Crafts from beads with your own hands are light. Bead crafts - Description How to make beautiful and unusual toys and decorations (135 photos)
Weaving from beads - a very entertaining, interesting and exciting occupation. Moreover, the result always comes out so beautiful, even novice needlewomen will admire their creations. The bead itself gives beauty to the product, if it is correctly selected. In the article we will analyze detail crafts from beads with your own hands, start-up schemes, flowers and beautiful compositions of them. And also, you will find here tips on the choice of material and the process of weaving.
Running forward, it is worth noting that crafts from beads are quite simple in performance, but require accuracy and concentration, as the work goes with a rather small material.
For beginners, we offer to master the technique of weaving colors. They can always come in handy separately. For example, to decorate any items and accessories: bags, photo frames, boxes, necklaces, brooks, and so on. And you can collect on them a bouquet or make amazing plants in pots, similar to real. Such crafts should decorate the interior or give friends as a souvenir.
These can be cute violets, and luxurious orchids, and roses, even the amazing hyacinth inflorescences. Having mastered several techniques and the essence of weaving, you can fantasize and create charming compositions from such an amazing material as beads.
Learnly approach the selection of material for the manufacture. Sometimes beginners advise to choose a simple, cheapest beads. But it seems to us incorrect. If you compare good, high-quality beads with the cheapest, then even inexperienced Lases will see the differences not in favor of a cheap material. Good Japanese or even Czech beads are smooth beads with smooth edges, all the same size and color.
The product from such beads will be neat even in inexperienced hands of a beginner master. Therefore, stop your choice on a good, decent material. It is best to buy Japanese beads, but he is quite expensive.
Prepare a bead of several shades for the colors themselves and leaves.
To create colors, a beads and needle will be required. These are special materials that are sold in stores for needlework, where the beads itself is. A thin wire is still useful, which keeps the shape, you will find it there.
In addition, it will be needed thin pipes. You can purchase two hotel tools or one in which all functions are connected.

Before working beads, you should pour out bags in the containers, from which it will be convenient to take beads. Capron covers for cans or any containers with low sidelights are suitable for this purpose.
Those who decided to master the mastery of weaving from beads and create with their own hands simple crafts, flowers, then the article presents the schemes and descriptions of the whole process, but before the start of the process, it is worth correctly prepared and choose the material.

First, select a good beads. To start mastering this type of needlework, many will consider to buy a cheap Chinese beads. But this is a delusion. Take at once good beads. They themselves ask for work and inspire the creative process. Any work made of good material will look decent.
So, what should be the beads: smooth shape, slightly flashed at the holes. Such beads will go to bed smoothly and beautifully in the product.
Now let's talk about the wire, this is a very important element of work from beads. It takes a row of beads and fastening them into the product. Wire take the middle thickness. Thin will not properly keep the intended form of details, and the thick will distract attention and violate the harmony of the created miracle.

All materials, for this type of creativity, are sold in specialized checkeys for needlework and can be in sewing accessories stores.
To work on creating crafts, you need to use a scheme. For each type of flower it is its own. After you woven several elements need to be collected together. So it turns out a beautiful and solid craft.
We start creative process
Before work, it is necessary to prepare everything. Do not neglect this preparatory stage. It is very important for the right organization of the creative process.

So, what to do and how to organize a place before work:
- Located on the working, smooth surface of a light, not slippery fabric.
- Select only that beads and those colors that will be required for this particular work, spread it on the piles, in color on a flat surface surface, so that the beads do not roll and do not slide.
- Prepare small cuts of the fishing line (if the production of colors from the fishing line) and wires are planned. They need to cut into sharp small scissors.
- Prepare a clear scheme that you need to work in advance, and mark all the colors for one or another item.
When all this is done, boldly proceed to creativity. The following are detailed descriptions of the schemes and the process of working on colors from beads, stepdown.

Schemes and description
Now consider step by step, creating crafts from beads with your own hands, schemes of colors for beginners and detailed photos of the work process on them.
We offer to make an amazing handicraft - a pot with roses. To do this, we will analyze in detail how to weave the flower of roses. And when you make several such buds and leaves, it will not be difficult for you to assemble them into a bush and consolidate in a decorative pot. Now about everything in detail.

Rose flower. Master class with photo
For work, we need to prepare beads of two colors. For bud, take pink or red, you can yellow, any at will. For stems and leaves - green.

Now follow the scheme in the photo and do everything neatly, slowly. Do not ride beads too tight on wire and do not make the gaps.
- First, it is necessary to form 3 loops with the striking beads of the color, which is selected for the bud. On each loop of 9 beerts.
- Now add a couple more beads and insert the edge of the wire into the central bead, drag it.
- Now let's miss the wire through the extreme loop and 7 beads, replenish the petal at the bottom.
- We had 5 petals, connect them and twist into the bouton the one inside.
- Now weave the leaflets from the green bead as shown in the photo. This is French weaving technique. Fresh leafles to the bottom of the bottom. Fix wire.

Here is our first bud is ready. Make several such buds and large green leaves for framing the composition. Collect all the sprigs of roses in one song and install it in a decorative small pot, securing inside on plaster or foam rubber.
Such a pot with roses can take a worthy place on the shelf in the room and decorate the interior.
Chamomile with description
And now we suggest making chamomiles from beads:
- Take a white and yellow beads, as well as wire.
- Do not cut off the wire from the Motochka, put the white beads on it. Beads need to dial so much so that it turns out the length of 40 cm with a raged beads.
- Now form the loops of daisy petals. The length of each loop is about 2 cm. Fold the edge of the wire with beads and twist the wire, forming a loop. So do 9 loops.
- Now turn a yellow middle. Take the yellow wire 10 cm and yellow beads. Put 10 pieces on the wire and form a loop, then to another end dial more than 5 beads and grind in the loop, tighten the wire.
- Now we collect a flower. Stick the wire with a yellow middle inside the white hinge and twist the wire at the bottom of the flower.
- For daisies you can make simple leaves and fasten them to the stalk
- Chamomile skelts can be cooled with green tape with ribbon or green tape.
- Make a few such daisies and put in a vase.

Scheme of romaxes
Violet: weaving the flower itself and green petals
And now, let's try to make a filkey flower. From the bead, it turns out magic beauty. To work, we will need to prepare a wire and beads of a lilac color for flower petals, yellow for a middle, green for leaves.
- First make a flower. For ease of work, type a lot of wire beads at once, without squeaking her end from the motor window, work already with that beads that on the wire.
- The first petal form this: we take 6 beads, make a loop, then, around the looping another loop around. This is one petal.
- Beads move quite tight to each other.
- Make several such petals for one violet (5-7 petals), simply forming and twisting the loops.
- For the middle, type 8 yellow bispers on the wire and make a loop. Similarly, make the second loop. Twist them with each other and stuck inside the purple flower. Downstairs twist the wire.
- The stalk can be cooled with a green teype with a ribbon or green tape.

Such floweries can be made somewhat for one composition. You can independently vary the size of the flower, increasing or decrease in the number of beads in the petals and the number of petals themselves. For seat loop, you can also use more or fewer beads.
Night Lilies - Earrings with Bead Flowers
Flowers from beads and beads are good not only for interior decoration, but also to create jewelry. We offer, following instructions and schemes, create their own earrings with beautiful colors from beads. For example, night lilies are described, but for the seagle you can use any flower, attaching it to the Schweza, as described below.

To work on these earrings with flowers, you will need:
- Size beads 11 and 15 different shades: purple, silver, both in a photo or any that you like.
- Rhinestones in the distributors for the design of the flower.
- Mononite and needles for beads.
- Accessories for Serg: Schwenza and connecting rings.
- Pipelines.
We proceed to the creative process:

- Web first medium petals of purple color. Make everything according to the scheme and photos that are given further.
- We are wearing all the 5 top petals, we connect them and go to the lower silver petals, we are wearing them also according to the scheme without changing the thread.
- We get a two-layer flower. In the middle of the same thread station.
- Attach the Swedza for the connecting ring to the edge of one of the petals of each flower.

Earrings with beads are ready. The exact same flower can be attached to the glue to the base for brooches or hairpins or decorate them the thread of pearl beads.

Mimosa branch

Another flower version for those who have little experience in working with beads is mimosa branch. The following is described in detail how to make a fluffy and spring branch of mimosa with yellow inflorescences and green leaves. For work, take:
- Green beads No. 15, yellow beads No. 8 and 10. Green beads can be translucent, and yellow - matte.
- Wire of copper and green shade 0.2 mm.
- Green silk thread.
We start work:
- First we make green leaves. We ride the wire bispers as shown in the drawings below. We make a sprig separately and collect them in a sheet.
- After collecting inflorescences, as the photo further.
- We connect the sprigs together with flowers and leaves.
- All twisted wires decorate the thread of green, winding them down the spirals.
Twigs can be made separately for a bouquet or collect several ready-made veins of mimosa in a spring tree.
Working with beads is quite complicated due to the size of the beads, but interesting, since we see the result quickly, and he always makes his eyes.
The main thing in this process is not to rush, do everything neatly and tightly press the beads to each other.
Make green petals to violet and collect in a bouquet, which can be installed in the pot. In this bouquet there may be a few large and several small flowerflowers. Composition place around the leaves. So violets will be like real.


To better and clearly understand the process of weaving crafts or flowers from beads with your own hands, see the video for beginners, where the schemes and work are described in detail.
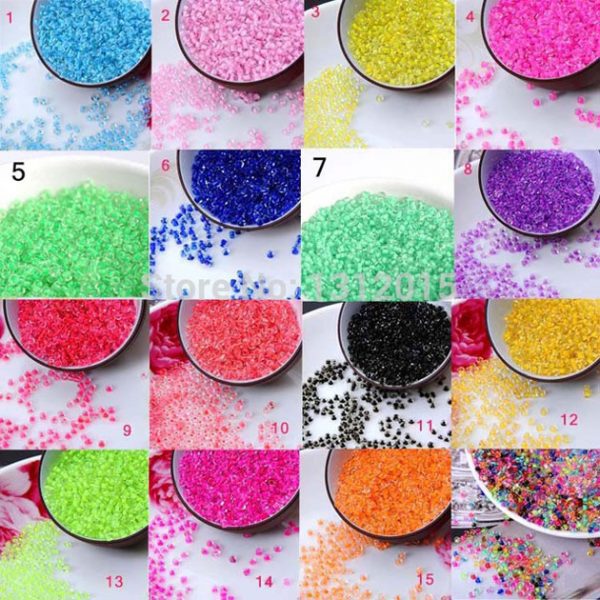
Small and multicolored, matte or transparent beads - excellent material for crafts. For children, it is useful in that he is intensifying interest in creativity, develops a fine motor skill. Experienced masters from small pieces of glass create masterpieces of art.
It is enough to look at the photo crafts from beads to admire the skill and artistic fantasy of the needlewoman.

What happens beads
Inexpensive and affordable material for crafts - beads - you can find in any needlework store. Calibrated, perfectly smooth beads is expensive and used for embroidery on silk or gabardine, as well as canal.

Bright paintings, decorated in baguette, are not inferior to embroidery with a cross or stroke, and gloss of glossy beads only enhances the aesthetic attractiveness of the panel. Beads from Japan or the Czech Republic are considered the best.


Beads differs in shape, fashion color. Depending on these characteristics, distinguishes:
- ideally round or slightly flapned beads;
- cylindrical, faceted;
- trihedral;
- drop-shaped (otherwise drop);
- cabbage;
- glass.

Aesthetic attractiveness and scope of application depend on coloring. You can find beads on sale:
- transparent;
- color - including two-, tricolor;
- transparent, painted inside;
- painted outside;
- pearl;
- metallic - silver, gilded or color.

From a variety will depend on the appearance of simple and complex crafts from beads.

What can be made of beads
Beads and fiberglass are most often used to create decorations: bracelets, necklaces, earrings can be performed in various techniques.


The ideas of crafts from beads for beginners can be found on the sites of the needlewoman or in print editions: Usually, in the most detailed way, step-by-step each stage.

You need to start with the simplest products, even if it will be simply striking on the line or a thin gum beads of different color or size.

Then you can move to more complex techniques:
- mesh weaving;
- french weaving;
- brick stitch;
- mosaic weaving;
- monastic, etc.


Beginner needlewomen are better to use ready-made instructions with schemes for making crafts - harnesses or lariats. They kide a crochet with woven in the drawing of Beerin.

Lariat has a three-dimensional look, and the use of beads of different colors opens a large scope for creativity. Lariat effectively complement any outfit: both everyday, slightly "diluing" a strict office suit and evening. It is only important to choose a color and beautifully tie a decoration.

Brooch from bead
Interesting crafts from beads are bright, multicolored brooches. Make them easy with your own hands. Prepare the basis, large sewn rhinestones and beads:
- on felt or piece of leather, take the contours of the future brooches;
- in the center of the trick, the bright cabochon (rivoli);
- start the crystal, using a thin beaded needle and a special kapron thread. To do this, make a ring from beads, glowing 2 rows and insert the rivoli;
- singing the braided crystal to the base and continue to sew the beads of a row for nearby, but not tightening the basis;
- after performing all the rows to the desired size of the brooches, glowing the openwork edge.

Easy, but the original brooch is ready. In the same way, you can make a brooch-owl, a brooch-cat using rhinestones for the eyes.


Beaded Decorations for Interior
Volumetric crafts from beads look original in the interior. From beads can be done:
- flowers and trees;
- volumetric panels.

Spectacular bonsai bead or lilac branch will cause delight among guests, especially if they are performed by you yourself. Split flower or branch is easy.


We offer a simple master class on bead crafts. Let's try to soar Sakura branch. To do this, you will need a thin wire and beads of gentle pink.

Step by step description:
- we are wearing the twigs of the future tree: We ride 5 beads on wire, twist them in the ring;
- by making several rings, we lose them in the twig;
- the twigs will need a lot, so be patient - you need to connect 3 twigs each by 3;
- of these, we will goss out large branches: for the top of the tree - 2 together, for the middle branches of Sakura - 3, the lower branches of the crown - 5 branches;
- we form a crown: we take a thick wire as the basis and climb the upper twigs to it, covering the trunk with a painted scotch.

When the barrel is ready, you need to prepare a small container and plaster. We put the trunk in the pot and fill with plaster. You need to wait for it to freely freeze.


We proceed the trunk: for this we take 1 tablespoon of alabastra, 1,5 tablespoons of water and plow glue. The sinking trunk need to paint the acrylic paint brown. The base can be painted with green paint, and you can use artificial grass or sisal.

Similarly, you can perform other trees, imitating the crown of birch, lilac branches, wisteria, etc. They spectacular fit into the interior of your home.


No special secrets in how to make a beautiful craft of beads with your own hands, no: fantasy, beads and some free time. And also - the desire to create.

Mastering the technique of weaving is better, manufacturing simple things - key chains, brook, moving gradually to more complex weaving techniques.

Photo crafts from beads


Beaded crafts for beginners - These are the simplest ideas that will help to master the first beadworks - whether flowers or trees, and maybe even bracelets or homemade earrings. To work beads, it may be necessary to need a wire, a thin thread, if you decide to master, or a fishing line for beaded jewelry. You can even apply our knowledge knitting knowledge to beads, because with the help of this tool you can perform harnesses and lariats that will become the main accessories in your wardrobe.
To make the first Crafts from beads, start-up schemes You can come in handy, especially if you decide to start mastering beadwork from bracelets or earrings. But for a romantic tree with wire and wire beads are not needed, it is enough to use the photo by the lesson and our advice to cope with this decorative product even a novice master. And other ideas you can find and expand your ideas about beading.
For this tree, we need a special wire of a special wire of green or silver color, we all use about 60 m, but it is better to always take with a margin. Beads need three colors - 30 g of pink and blue and 40 g of green, also a few old stocks need to be transparent and golden.
We will do the "Love Tree" in the shape of a heart, so it will take an aluminum thick wire for the frame, it bends well. And to complete the crafts, prepare plaster, PVA, greasy tape, brown acrylic paint for trunk and varnish to secure the result of decorating the trunk.

Beaded crafts for beginners
We will start to perform crafts from beads with their own hands for beginners With green leaves, for this you need to ride a wire, without squeaking it from the coil, the required amount of green beads - 40 g. You can leave for several hours on it, so you can bring to the process of small assistants who will be able to ride beads to the base.
When the green chain on the coil is ready, you can proceed to leaves: we move to the edge of 12 beads, make a loop, twisting at the base of three turns. Next, we make a loop with the following 12 beads. On each branch, we must make seven loopes. Then the wire must be cut off, leaving a small empty cut. In the same way, create the next twig with the leaves.

Between the leaves, it is necessary to leave small gaps, preferably the same - 0.5-1 cm. Total need to make 50 such blanks, and then start their assembly. We take one branch for the middle central loop, it is the fourth in a row, holding it for it, we fold the wire with the leaves in half. Now twist it in the intervals between the leaves. So you need to collect all the other blanks.

Now it is necessary to cut off the wire for each flower - 25 cm. On the segment to wear a transparent bell, move it to the center, to put three more beads to one edge and skip the second end of the wire in the opposite direction, stripping. Then begin to form petals: one edge 9 beads and twist the loop. Now the same looping with 9 beery and on the second end of the wire. We are still doing one loop on each segment, and twist the ends.
In order to make big flowers, you can use crafts from beads with beginner schemesAfter all, in them every petal woves separately in a circle, and then all six petals are connected in one bit. Big colors need to do six pieces of each color, each includes six petals.

For one petal, it is necessary to cut off 30 cm wire, and immediately make the loops, so that one tip remains 2 cm long. The loop must be twisted to get a leg of the petal. Now it is necessary to throw 5 beads to a small end, and on a long - 7 pieces. After that, the long end should be beatened around the small, and wrap around the base once. Next, you need to again throw 7 beads and bend it. You started to form the petal for which we use French circular weaving. Then 12 beads are put on, one turn is again made, and again - 12 beads, turn the tip several times and cut off the remaining wire, carefully hiding superfluous on the outside.
For a large flower, the heart can also be required, which can be made of three "stamens" from the golden bead. The stamens are twisted among themselves, and then begin to apply the petals: first two and wind up with the base of the wire, then two more, re-wind, and the last two. All subsequent petals must be in a chess order so that the flower is realistic. If running crafts from beads for novice children, then parents must suggest, give the right tips and help, so that the kids have mastered the new technique faster.

Bead crafts: Schemes for beginners
Technique, which, of course, requires certain skills, but at the same time it is quite simple, so that children are learn to learn from the younger school. However, for preschoolers, beads - the material is dangerous, and if the child was seriously interested in this creativity, then the mother must tell about the safety technique, because the beads can not be taken in his mouth or shove in the nostrils.
Beading for the very beginning should be fairly simple, as to weave beautiful big things or paintings, you need to practice for a long time. The process itself is not difficult, but there is a mass of nuances in it, which should be taken into account to obtain a qualitative result. In addition, the Internet presents various beading schemes for the youngest children.
If you are interested in the question - since how many years the child can be engaged in beadwork - then the unambiguous answer to give it difficult - it all depends on the individual features of development and nature. It is theoretically believed that this age is 7 years old - the child can already sit in one place for a long time, it can be interested in something else beyond the machines and dolls. But if your child is having fun, you can try to study from 5 years - at this age it will look more than done, but it is already able to create small toys, figures and key rings to him. It is not necessary to train the beadwork only girls - for the boy this occupation is also useful, because a small motorcy needs to develop all children, regardless of gender. For boys, it will be interesting to create airplanes and cars, figures of bearish and spiders, sailboats and helicopters. Schemes for such works can be found on the network and print free.
Beading for the very beginning should be pretty simple
In order for the beginner's craft to understand the specifics of this craft, and was able to understand how the material is properly placed, it is recommended to start from the simplest way, or rather with a mosaic handle.
So, the work is performed step by step:
- The easiest job provides for the use of beads of only one color, but mosaic weaving will look much colorful if you use several colors, for example, red and blue. It is enough just to alternate the color of beads.
- The start of weaving begins with a set of material on the thread. 20 beery must be scored for one row. From each edge of the thread should remain a distance of at least 20 cm.
- The material is passed through the free side of the thread. The field it is tightly tightened.
- It turns out a circle. This circle will be the basis for cylindrical weaving.
- Subsequent rows are wearing similarly, but it is important to ensure that the color of the material coincides with the color of the previous row.
- On the second row, weaving can be booined on the handle or pencil and continue to work like this.
At the end of the weaving of the last row, it is necessary to make a thread knot so that the material does not fall out of the row and the work did not break. To prevent this, it is recommended to make several threaded nodes.
Gallery: Beading (25 photos)


Bead chamomile (video)
Beading for the smallest: where to start
This is a very painstaking craft, so small children are rarely engaged in them. Why? Yes, because by virtue of young age, they are not inherent in the presence and attention to the details. But this does not mean that these qualities can not be brought up in a child.
To kill the baby's love for beadwork - to grow out of it attentive and enhanced person with a sense of excellent.

This is a very painstaking craft.
Start any work that lies in beadwork, it is worth the preparation of the necessary materials. What materials are needed?
In order to do this, you should prepare:
- Beads. Czech beads is considered the highest quality. In addition, it can be easily found at any needlework store. It is recommended to think in advance over what you want to embroider to know what color beads need to buy.
- A thread. If the picture is embroidered, then you can take any thread, but not knitting, since the material does not pass through it. It is suitable sewing thread or moulin. It is important that it is white, since the thread of another color will clearly be visible in the work.
- Needle. Special needles for beading are sold in needlework stores. It is necessary that it must be purchased.
- Wire.
Light way weaving from beads Snowflakes
- At the first stage, 6 small beads are recruited on the wire. The material should be located in the middle of the wire.
- Then the wire is tightened by forming a circle from beads. The resulting circle will be located in the center of the snowflake.
- At one end of the wire there will be the following weaving. The second of its edge remains not touched. So, 6 small white beads should be riveted on a wire, and then a big bead is rolled. The second row of white beads symmetrically lies on a wire.
- The wire is delayed and the first fragment of snowflakes is ready.
- Action at number 3 should be repeated three times. That is, the snowflakes will have 4 white circles on each side.
- Now time to take up the rays of the product. On that part of the wire, which is temporarily not used, long bispers of the oblong shape should be riveted. Three oblong bispers go to 1 beam.
- There should be 4 such rays such as circles from a white bead.

Snowflake woves pretty just
Such a snowflake can be attached to the clothes or use as a New Year tree.
Easter egg, beads braided
- To begin with, it is necessary to evan the canvas of beads. Its parameters: 7 beery in width 29 in length. This is a standard canvas for medium-sized eggs. It is rushing from the material of two colors: green and yellow. Multicolored beerts should be alternate among themselves.
- Then with the help of 8 other beads should be connected to the side of the canvas. It turns out a circular belt. It will be necessary to cling to the egg. If the cloth turned out too narrow, then you need to penetrate a few more rows.
- For convenience, you can use the billet for the egg. Its as well as other materials can be found in the needlework store. The billet will be in a bead canvas, but without the top and bottom.
- Makushevka's weaving is happening: the fishing line is extended from the middle of a row of the canvas and the material is consistently rushing.

It turns out beautiful, even if you do not use patterns
A simple method of weaving beaded forget-me-not
The craft is very beautiful! It is necessary to prepare blue, green and red material.

You can complicate the craft
So, the work plan is:
- The first thing is wearing the same flowers. To weave one of them, we need a wire length about 20 cm. Five beerts must be on the middle of the wire.
- Then another wire is taken and rolled on one of the beads. Must get a small loop.
- After that, other loops are made similarly. Forget-me-not 5 petals, therefore, the hoppers with beads should be 5.
- In the center of each flower, a middle of the red beads is made. Another segment of the wire is loaded inside the product, 3 red bispers are rolled up on it. Flower ready.
- The more floweries will be woven, the more beautiful it will work.
- Petal forget-me-notes is made of green beads. 20 beheads are put on the wire, and then it bends that the stem is tight. With the help of a small segment of wires to the stalk, all blue flowers are attached.
The composition is supplied with a small basket. In the basket put a woven forget-me-not.
The most logical New Year decoration from the bead will be snowflake. Snowflake circuits from beads An incredible set: from the simplest for beginners, to incredibly complex, consisting of several tiers. As a connecting element, you can use a fishing line, wire, threads, as well as pins and the most common glue.
# 1 snowflake from beads on an ambulance hand: make a Christmas decoration with your own hands
For those who have absolutely no time to prepare, the perfect version will be snowflake from wire and beads. To create such a masterpiece, you will need: wire, glue or thread (for fastening wire), beads or beads. Cut down a few identical pieces of wire (3 or more), secure them in the middle (glue or thread), take on the free ends of the beads. Snowflake ready!
# 2 Fast snowflake made of pins and beads: New Year's handicraft with your own hands
For such snowflakes, it is best to have not only beads in the arsenal, but also other beads of different sizes. You will need: pins, line, beads of different sizes, scissors and glue. Below see the step-by-step photo instruction.

# 3 master class from beads: do snowflake for new year with your own hands
So, complicate our product. This snowflake has its own making scheme that needs to be observed. You will need: line, scissors, beads and beads. For detailed snowflake schemes below.

# 4 snowflake from beads: masterclass with step-by-step photo
For beginner masters, this scheme of the New Year's snowflake will become excellent. You will need from the tools: a fishing line, scissors, a needle, beads. Beads are better to take two colors, so the handicap will look more spectacular.

# 5 snowflake from beads for new year do it yourself: scheme
For the manufacture of such a craft you need a bead of several types: so the snowflake will look incredibly realistic. The detailed scheme with the size of the beads see below.

# 6 Crafts from beads for beginners: Snowflake scheme for new year
For the manufacture of such a snowflake you will need beads of different sizes and colors, as well as a fishing line. A detailed beading scheme is described below, the diagram also shows the sizes of beads that should be used in the manufacture of this New Year's craft.

# 7 New Year's handicraft from beads: Snowflake scheme with their own hands
And one more unusual scheme of the New Year's snowflakes, which you can embody your own hands. The detailed scheme is described below with the size of the beads necessary for craft.

# 8 Snowflake Space Bead: Make New Year's crafts from beads
Another pretty simple, but at the same time charming scheme of the snowflakes of their beads. You will need a fishing line and beads of different sizes and colors. A detailed manufacturing scheme is indicated in the photo below.

# 9 Weaving Beading: Snowflake Scheme
This is such a charming crawler can make any needlewoman. Is that newcomers will have to be complicated, but nothing is impossible. Below is a detailed scheme that will help you master the technique of beadwork.

New Year's Angels Beaded
Another symbol of the New Year and Christmas is considered an angel. Cute angels can be made of beads, and then decorate the Christmas tree or house with these wonderful crumbs. Close and expensive to you people of angel from beads can be made as a gift to protect and helped.
# 1 Simple Bead Angel and Wire: Masterclass with step-by-step photo
Very simple angel, with the manufacture of which even beginners will be cope. You will need about 10 minutes of time and a cute angel from Beads for the New Year is ready! Step-by-step photo master class see below.

# 2 New Year's Angel of Bead: Make crafts for the new year with your own hands
Another variation of crafts from beads on the theme of angels. The scheme is pretty simple, you will need: wire, scissors, beads and beads of different sizes, chain or ribbon. Below see the step-by-step photo instruction for making crafts.

# 3 Angel of Bead: Make New Year's crafts do it yourself
A more complex version of the Christmas Angel of Beads. You will be remembered and experience in creating masterpieces from small glass beads. See a step-by-step master class with a photo below.
# 4 cute angel from beads and beads with your own hands: scheme
Here is another case of an angel of beads and wire. It is very similar to the option at number 1, however there are small differences that make the craft more realistic. Look the scheme in the photo below.

Christmas tree from bead
The most important attribute of the New Year holiday, without which it is simply impossible to imagine, is the New Year tree. If for some reason you do not have the opportunity to get a big green beauty, replace it with a miniature Christmas tree of beads. Here you will find a master classes for the manufacture of a Christmas tree of beads as for beginners, such for beading professionals.
# 1 Easy Christmas Eve Bead and Wire: New Year's crafts from beads for beginners
Even a child will cope with such a New Year's craft. By the way, beads are well developing a fine motor skill, which is useful not only to children, but also adults! Step-by-step instructions are shown below.

# 2 New Year's Christmas tree of beads: Make crafts together with children
Another option is a simple New Year's craft, which can be done with the children. The Christmas tree will be bright and cheerful if you use beads of different colors and sizes. Step-by-step master class see below.

# 3 make a Christmas tree for the new year with their hands from beads and glue
Such an exercise can be a very original decoration or even a gift. You will need glue, dense paper and scissors. Draw on paper silhouette of a future Christmas tree. Then neatly glue the circuit of the beads. Wait for drying and cut the finished product. The work is painstaking, but if everything is done correctly, there will be indescribable beauty!

# 4 Tree from Bead: Masterclass for the manufacture of a Christmas tree
An excellent element of the decor will be a miniature Christmas tree of beads. To create it, you will need two types of wire, a lot of green beads and red beads slightly larger diameter. Step by step masterclass look in the photo below.

# 5 Beading: Masterclass for the manufacture of Christmas tree for the new year
From the bead you can make such a cute Christmas tree suspension, which, by the way, you can hang like a toy on the New Year tree. You will need wire, green beads, white and orange beads. Step by step masterclass with photos see below.

# 6 Make a New Year Christmas tree of beads with your own hands: Scheme
A small Christmas tree can be made in this way: you need a toothpick or another thin wand, beads and a fishing line. According to the scheme, weave several cruciform bases with a round hole in the center. Basins must be of different sizes. Next, ride them on a wand, starting with the biggest. The top can be decorated with other color beads.

# 7 Tree of beads: masterclass + photo
Complete the task. In this masterclass you will learn how to make a Christmas tree of beads with wire. For the crafts you will need a wire and beads of two colors (green and white). Make each twig individually, and then twist them together and get a fluffy Christmas tree. Detailed photo instruction is shown below.

# 8 Scheme of the Christmas tree of beads do it yourself: Make New Year's crafts
Another church of the Christmas tree of beads and wire. Additionally, you can use multicolored beads of different sizes that will look like christmas balls. The scheme is described in detail in the photo below.

# 9 mini Christmas tree of beads and beads do it yourself
Miniature Christmas tree of beads and beads. Suitable for more experienced masters. The detailed scheme is shown in the picture below.

# 10 tree of beads: master class with step-by-step photos and scheme
Another version of the Christmas tree of beads and wire. At first glance, some masterclasses for the manufacture of Christmas trees in our article are similar. And indeed it is. They are similar, but the techniques are different. Experienced wizards will immediately notice the difference, and beginners we recommend clearly follow the instructions and carefully study the MK.
# 11 Christmas tree beads: Masterclass with photo
This version of the green beauty is slightly simpler than the previous one, but in general the production scheme is similar. You will need a fishing line, green and white beads and a step-by-step instruction of beadwork.

# 12 Tree of beads: step-by-step masterclass
For the most experienced needlewomen, we offer a masterclass for the manufacture of a Christmas tree of beads. A very painstaking work is waiting for the craftswoman when creating such a masterpiece. Each twig is made separately, and then screwed to the main stem. Step-by-step photo Instructions look below.

See also:
Other New Year's crafts from beads
For the new year, other crafts can be made from the beads, which you have enough imagination. Well, what are the New Year holidays without gifts, Santa Claus, cones, candies, wreaths, stars? All this and much more can be made of beads with our step-by-step masterclasses.
# 1 New Year's bell beads: Masterclass with photo
An excellent Christmas decoration will be a beam beam. To create it, you will need wire, beads and beads, scissors, English pin, chain or ribbon. Step-by-step MK with photos See below.

# 2 mint leshed beads: we are engaged in beading for the new year
You can also decorate the Christmas tree or the interior can be thematic mint candies from beads, which we know well from Hollywood films. Weaving scheme and step-by-step master class are shown in the photo.

# 3 New Year's gift from beads: do crafts with your own hands
Very symbolic as a decoration will look a gift. You will need wire, beads and beads of different sizes. Master class with step-by-step photo See further.

# 4 Santa Claus Beads: Scheme and Master Class
Well, what holiday without a kind old man who will spread gifts? Here we will do the Bourgeois colleague of our Santa Claus. The scheme is simple, suitable for beginners. You need a bead of red black and white colors.

# 5 master class on beadwork: make a New Year's bump from beads with your own hands
Well, what kind of christmas tree without cones? Now we will tell you how to make a bump of beads with your own hands. To do this, you need a foam oval blank, brown or golden beads, a fishing line. Newcomers Such a craft will be difficult: it will have to spend a lot of time and effort. But experienced craftsmen, a new year bump from beads will have to taste. Step by step masterclass see below.
# 6 masterclass: weaving beading christmas wreath
Typically, christmas wreaths are decorated with an entrance door, sometimes it is still hanging on the wall, to create a festive atmosphere. But you can make a small wreath of beads and use it as an element of the New Year decor. MK beadworks see below.

# 7 Christmas wreath of beads with their own hands: MK with photo
Variations on a christmas wreath from beads can be a great set. A little bit of configuring experience you can independently generate ideas of schemes, but for now, take the note our crafts and schemes.

# 8 wreath of beads for the new year: master class on beadwork
Well, the most complex version of the wreath of beads. We will have to try, but the result will exceed all expectations. With such a craft, it is not ashamed to go to visit, taking a wreath as a New Year souvenir.

You may be interested:
# 9 star from Bead: Masterclass of New Year's crafts do it yourself
You can make such a cute bright star with your own hands, using our step-by-step master class. You will need wire and beads of different colors and sizes.

Bead jewelery
By the new year it is necessary to prepare thoroughly: you need to decorate not only the Christmas tree or house, but also your loved one. From the beads you can make your own hands to make incredible thematic decorations and illuminate the good mood of everyone around. By the way, you can make the same jewelry for girlfriends, sisters or for mom and daughter. In general, turn on fantasy and forward - to create!
# 1 New Year's pendant snowflake: make decorations with your own hands, MK
Actually during the New Year holidays, and in general, with the beginning of winter, wearing thematic winter decorations of handmade. Here is such a pendant snowfish from beads you can make your own hands following the instructions in our master class.

# 2 New Year's pendant christmas wreath: Master class on making
A pendant in the form of a Christmas wreath will look important on the eve of the Christmas holidays. You will need beads of two colors and a fishing line. You can hang the pendant on the lace or chain.

# 3 New Year's snowflake earrings from beads with their own hands: step-by-step master class with photo
New Year's holidays are not far off, and therefore it is time to think about the holiday itself. It would be nice to appear at a gala evening in a unique handmade decoration. With this MK you can create wonderful thematic winter earrings with your own hands.

# 4 simple earrings from beads on the ambulance hand: Scheme + step-by-step photo
If there is no time, and the thematic decoration of Handmade really wants, you can make such simple earrings in the form of snowflakes. You will need: wire (6 identical pieces), beads or beads. For one earring, take three pieces of wire, twist from in the middle so that one whole six-pointed design is. At the ends, take the beads and secure. Add the hook and earrings ready!

# 5 earrings from beads for the new year do it yourself: step by step instruction with photos
Here are such cute earrings in the form of fir sprigs you can make yourself using our detailed photo instructions.

# 6 earring Christmas deer from beads with their own hands: MK with photo
Cheerful earrings in the form of deer can be made of beads with their own hands. The scheme is very simple, even beginners will cope. But it looks like this product is very funny, and most importantly - thematic!

# 7 earrings in the shape of a Christmas wreath do it yourself: weaving scheme
Bead decorations can be diluted with additional decorative elements, for example, tape, as in this master class. As a result, it turns out the original product for which you can not say that the manufacture has taken a little more than 10 minutes!

# 8 bead decoration: do flat earrings with your own hands
For the manufacture of earrings in the form of a gift you will need three types of beads and wire. From square flat beads weep the base. A glassware and small beads will be needed for a bow. Step-by-step master class see below.

# 9 jewelry from beads with their own hands: MK on weaving earrings
And here's another variation on the theme of earrings from beads in the form of a Christmas wreath. You will need beads of two colors (green for the base, red for decor), fishing line and our scheme.

# 10 Bead earrings: leaf of mistletoe with their own hands, MK + photo
Earrings can be made in the form of leaf of mistletoe. The scheme is simple to disgrace, so that beginner masters can safely take care. Step by step masterclass look in the photo below.

The thematic Christmas decoration will be a brooch of beads. In this master class you will learn how to embroider a bead brooch in the form of bulk. You will need beads of four colors, eye pebbles and breasts, rhinestones for decorating.

# 12 embroidery beads: make a new year mask do it yourself
Beaded can be divided by a Christmas mask. To do this, you will need a blank of an openwork mask. And then find it on its taste beads of different colors.

Crowns of bead
Little princesses for the new year you can make gorgeous crowns of beads. Little glass beads look like real gems on the New Year holiday. Little snowflake or princess will look unique. In addition, the crown of beads can be done together, and the child is busy, and Mom is pleased!
# 1 masterclass how to make a crown of beads: the crown of a snow queen
The real boron of the Snezhino Queen can be made with their own hands from beads and beads. The work is painstaking and will require you a lot of time and effort. However, the result is worth: a step-by-step masterclass with a photo see below.
# 2 crown snowflakes from beads: MK + photo
Little snowflake can make a bezel with a snowflake, which will look like a real crown. For a detailed scheme and step-by-step masterclass, see below.

# 3 How to make a crown of beads and beads: MK Crown Princess
Detailed diagram of the crown of princess from beads and beads. Improve yourself and a small princess of handmade product.

Help us become better: if you notice the error, select the fragment and click Ctrl + Enter..