Do-it-yourself table with benches for giving. How to make a table from boards with your own hands - drawings and photos
A garden table is an integral part of any country interior. On the modern market, this product is presented in a wide range - these are products made of metal, plastic, natural stone and, of course, the classic version, tables for a garden made of wood. In this article we will talk about positive qualities common options and give an accessible instruction on how to assemble a table with your own hands.
The tree is always relevant
Most garden furniture always made of wood. Almost everyone can make a table for the garden with their own hands, at least superficially owning a hacksaw and a plane. The whole process comes down to connecting a small number of curved planks and giving the furniture a presentation.
A few words about the choice of material
If you want your product to serve you faithfully for many years, then it is better to make a garden table from strong hardwood. By far the most the best option is oak, but the price here, even at cost, will come out considerable. Therefore, as a rule, more affordable wood of larch, aspen, birch, linden or acacia is used.

Tip: conifers can be used for manufacturing, but they should be well prepared and covered with protective compounds beforehand. Otherwise, the abundance of resin can negatively affect the quality of the coating and your clothes.
For the countertop, the quality and type of wood is especially important, therefore experts recommend not to save money and buy a good grooved board, the increase in costs will be minimal, but the appearance will please you pleasantly. It is advisable to collect a wooden garden table from a well-dried forest, so that later the details do not lead.
In addition, the tabletop and some individual parts can be made of thick waterproof plywood or YUSB board. Particleboard (chipboard) is less suitable, since this material is afraid of high humidity and will not last long in the garden.

Self assembly
Assembly instructions can be very diverse, everyone chooses what he likes best.
In the photo and video in this article, several interesting and accessible technologies are presented, but we will tell you about the simplest, in our opinion, installation option.
- As mentioned earlier, it is better to assemble the tabletop from a grooved board, so it will be completely monolithic... In this case, the joints should be glued with ordinary furniture glue for wood. In this case, we will talk about a solid product designed for a family of 6 - 8 people.
- Comfortable construction height for a standard dining table is 700 - 750 mm... We will make the dimensions of the top plate 930x1450 mm. For a table top, a board thickness of 20 mm is sufficient, but a table top with a thickness of 40 mm will look more solid and solid.
- The boards are joined on a flat, horizontal surface and knocked down with nails or self-tapping screws, two or three perpendicularly spaced bars of 50x50 mm... The bars are fixed at a distance of 300 mm from the edge.

Advice: since the wood is quite dense and thick, it is better to lubricate the self-tapping screws with soap before screwing in. Then they will enter the array much easier.
- Next, we move on to the arrangement of the legs. As legs, boards with a section of 50x150 mm and a length of 650 mm will be used. They will dock with the ends, therefore, in order to reduce the length of the fixing bolts or self-tapping screws, 1 sample is made in the middle on each leg about 70 mm deep and about 150-200 mm long.
- The legs are joined by their ends, and the selected grooves should be on the same level from the outside. A stiffening rib is inserted between two pairs of legs, the function of which is performed by a board 50x150 mm, about 1 m long.
- From above, the legs are attached to the strips that fix the tabletop boards... In the lower part, to increase the support area, two boards are knocked to the legs, all of the same section 50x150 mm. Long, slightly less than the width of the table top.

Important: the entire structure, with the exception of the tabletop, can be made collapsible; for this, furniture bolts with a diameter of 6 mm are used. Or collect everything on long self-tapping screws, but then the table will not be dismantled.
Do not forget that wooden garden tables will be used outdoors, so all wood must be covered with protective compounds. Often one coat of stain is used to bring out the beauty of the texture and two coats of waterproof varnish.

Important: all wood, even before assembly, needs to be planed and cleaned grinder or using sandpaper. Bevels should be removed from sharp corners, so as not to drive a splinter later.
Alternative constructions
A light coffee table is quite possible to assemble from wooden pallets. For this you need 2 pallets. The top row of boards should be ripped off, complemented by the missing ones and knocked down end-to-end, more tightly.
Thus, you get a monolithic tabletop. To increase the height, 4 bars from the same pallets are inserted between the pallets. It is advisable to install furniture wheels from below.


Plastic garden tables are used everywhere, their price is quite affordable. They are durable, have a neat appearance and can usually be disassembled quickly. But plastic rarely fits into a natural interior. country cottage... Artificial materials, for the most part, have already become boring in the city, in addition, such products cannot boast of durability.

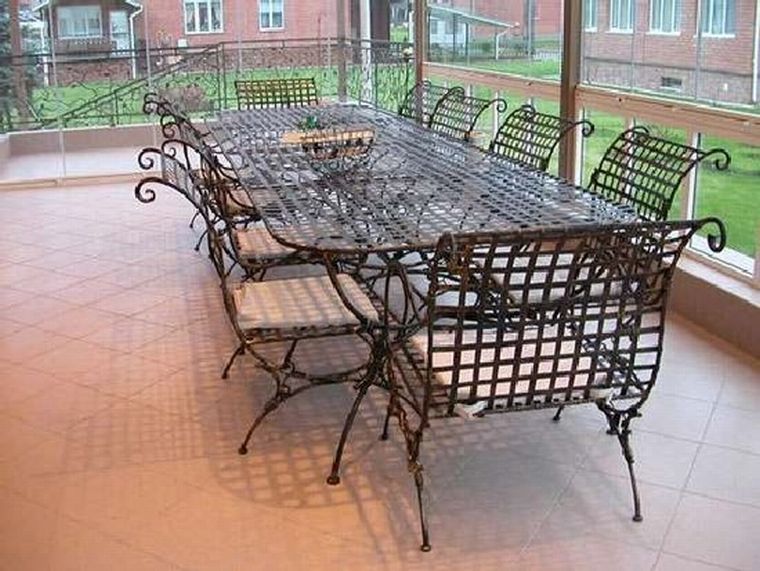
Garden wrought-iron tables are quite another matter; they are often true masterpieces of furniture art. Of course, only a narrow circle of real specialists can make such beauty with their own hands, therefore, the price of such products, frankly, bites.
It is quite problematic to make tables for a garden made of stone with your own hands. Alternatively, you can fold brick cabinets and install a countertop purchased in advance on top. A large piece of slate can also be used as a tabletop, but such an installation will require remarkable physical effort.

Table making option.
Output

It is often not so important that you have a wooden, stone or metal garden table installed. Any design can be successfully entered into landscape design cottages, the main thing is to do it with love, because you are doing for yourself.


It is such a building on personal plot or in the garden where the whole family can relax and invite friends.
But the arrangement is not only about giving an aesthetic appearance the building itself.
It is also important to organize the interior space.
The role of the gazebo in the design of the cottage
The gazebo has a special role in the design of the cottage. In addition to its functional purpose, it should be in harmony not only with the surrounding buildings, but also with the landscape of the site.
It is good if all the facades of the buildings on the personal plot, including the gazebo, are finished with the same material. Gazebos look interesting, the roof of which is an exact copy of the roof of the house.
But even such a room is unthinkable without internal filling, the main element of which is the table.
You can make a good table with your own hands
You do not need to buy a ready-made table for the gazebo, because you can do it yourself.
This option is preferred. As a result, you will get a piece of furniture that you not only need, but also ideally fits in size and shape.
This does not require a lot of experience in construction works and special tools. Simple skills and a small set of tools are enough.
For making a table, wood is the best suited. Its main advantage is its long service life, visual appeal and naturalness.
Such a table will become a worthy element of the overall design of the cottage.
Project and drawing creation
At this stage, you need to create a detailed drawing of the future table.
Self-tapping screws and fasteners made of stainless steel can be used as fasteners. Be sure to use a wood impregnation that will protect the table from rot and mildew.
Development of a 3d drawing of a garden table in AutoCad.
Step by step instructions
You can make a garden table with your own hands by following this master class.
It is necessary to prepare all tools and materials for work in advance. On the preparatory stage process a wooden surface and select boards by thickness.
Then four boards measuring 15x70 cm are laid in a row and connected with thin wooden planks. And the end parts are closed on both sides with boards measuring 15x60 cm, which are fixed with special metal plates.
Thus, a flat wooden surface is obtained.

Rectangular top strapping box
To prepare the upper harness, make a box. To do this, you can use boards measuring 10x91 and 10x46 cm. First, you need to make a rectangular base from long boards.
After that, stiffeners are installed on its surface, fixing them with self-tapping screws. It is important to install them at an equal distance.

Supporting structure box
Cooking the lower frame
It consists of 2 parts, made in the form of the letter "P". They are attached to each other using a long wooden plank... U-shaped elements are represented by two legs connected to each other by a bar.
Each support leg is made of four 4x4 cm bars.After both parts are made, they are fastened to each other with a strip, the length of which is 10x99 cm.

To make it more comfortable, turn the countertop over and lay it on the ground. Do the same with the frame.
As fasteners, metal corners and self-tapping screws are suitable, which provide reliable connection structural elements.

We connect the tabletop with the frame
We process surfaces
Everything wooden surfaces must be carefully treated with a special protective compound.
He will give reliable protection from moisture and insects.

Impregnation with varnish
Wood table
Wood is the most environmentally friendly and pliable material.
A wooden garden table can be round, square, or rectangular. Irregularly shaped models are also popular.
If you plan to do it yourself, the tabletop can consist of narrow boards or slats.
A table made of wooden saw cuts also looks good, which can be done in several ways:
- connect the cuts to each other with tongue-and-groove connections or staples, forming a flat surface;
- fix the cuts on some kind of base.
The finished surface is sanded and varnished. The gaps between the boards can be coated with epoxy.
Sand the finished product and cover it with a protective compound.
To give the surface the desired shade, you can use a stain or a special impregnation with pigment. Such a piece of furniture can be placed not only in the gazebo, but also in the open space in the garden.
For more information on how to make a table for a gazebo made of wood, see the video:
As a basis - pallets
Designers actively use wooden pallets to create furniture. This technique allows you to create an original stylistic solution.
Existing ideas can be used to implement the following solutions:
- stand models;
- on casters;
- with a lid;
- with glass top.
You don't have to buy a ready-made table. You can also make it yourself using pallets.

Such tables in themselves are not difficult to manufacture. To do this, you first need to find or buy a pallet. You can find it in one of the major home improvement stores. Then you need to saw off a part that is suitable in size and screw the wheels to it.
You can put an MDF panel or glass on top. They can also be bought at one of the hardware stores. The finished table must be treated with impregnation.
If you want to change its color, use a stain of the appropriate shade. This completes the manufacture of a table from a pallet.
Such a piece of furniture will organically look not only in the gazebo, but also in the open air on the personal plot. And the design, complemented by wheels, is mobile and inexpensive.
From scrap materials
Many designers use any materials at hand to make a table. Such a piece of furniture allows not only to decorate the internal space of a house or apartment, but also will look organically on a personal plot, in a gazebo or garden.

Ordinary stumps decorated with mosaics look original. Larger stumps can be used in a good quality original table... Smaller stumps are suitable for use as unusual stools.
Any tile left over after repair is suitable for decoration. It is split into small pieces, which are attached to the surface with cement mortar or tile glue.
Originality lies in your creativity. Such designs often turn into a real work of art.

Mosaic table top
An old table that has fallen into disrepair can also be decorated with mosaics. This will refresh the countertop. To do this, first remove old paint from the legs, grind them and cover with one or two coats of new paint.
Then the countertop is sanded and the mosaic is glued to it. From above, you can apply grout, which will protect the surface from the adverse effects of the external environment.
A wooden bobbin for winding a cable can also be used as a table. To do this, it is enough to process and paint it in a suitable shade. But it can be additionally decorated.
The resulting piece of furniture will become more convenient if you attach wheels to its lower part. In this case, you can easily move it around the site.
Also, many have inherited tables. They are usually not used as they require serious work. With the right approach, they can be used as garden furniture or placed in a gazebo.
If you inherited forged table, you can simply refurbish or replace the old countertop.
Forged furniture for a gazebo
For those who have weaving skills and sufficient perseverance, garden wicker furniture from a vine is suitable. Such furniture can be done independently.
But if you like wickerwork and don't want to make them, go to a large store. Here you can buy tables made of wicker or rattan, as well as artificial fibers.
If there is a lot of metal left in your area, and you know how to work with a welding machine, you can make a beautiful table for a garden or a gazebo.
If you have the necessary skills, you will get an openwork and original product that will be one of a kind.
But before starting to use it, do not forget to treat all metal surfaces with a corrosion agent.
If you plan to paint the table, you can cover its surfaces with a special primer and apply a finishing coat of paint. Materials such as wood or glass are most successful as a countertop.
A more interesting approach could be used. Decorate a simple countertop with mosaics or pebbles of the same height. Then cover the surface with glass to match the size of the resulting countertop.

Whatever table you choose for the gazebo or your garden, the main thing is that it is in harmony with the surrounding landscape and the interior of the gazebo. A hand-made thing will delight you for a long time with its uniqueness and originality.
The dacha is a pleasant place not only for work, but also for relaxation. In stores, you can find many offers for summer cottages, but a more economical option is to make country tables and chairs yourself.
Country table with your own hands
Making furniture requires a serious approach, certain tools and skill. But you can make a simple and very economical option from wooden pallets.

Necessary materials:
- Sandpaper
- Self-tapping screws
- Pallets
- Wood primer
- Varnishes and paints for wood


The pallets must be sanded (coarse sandpaper can be used for this). Then process with fine-grained sandpaper, in order to facilitate the work, the paper can be fixed to the block. Next, you need to cover the pallets with a primer, paint and varnish if necessary.

If the finished furniture will be outdoors, the workpieces must be varnished. So it will last longer and will last for several seasons. Before you start connecting pallets, you need to decide on the type and size, we select the photo of the table for the summer residence on the Internet and make it according to it.


Two or three pallets can be stacked on top of each other and fastened with self-tapping screws. If the table will be used at home, you can attach wheels to it for easy movement.

You can also attach ready-made metal legs to the pallets and thus make a complete dinner table... You can also make budget chairs, benches and veranda sofas from pallets. This material is the most affordable, you can buy new pallets, or get previously used ones for free.

Folding country table
Required materials and tools:
- Hacksaw
- Screwdriver
- Roulette
- A hammer
- Drill
- Pencil
- Wooden lath 5 m long
- Wood plate for countertop (board, plywood or OSB)
- Screws and nuts

When using plywood, it turns out to be a completely inexpensive option. If you have tools for woodworking at hand, it is better to use them, so the process will go faster.


To begin with, we cut the blanks according to the following dimensions:
- 4 pieces 70 cm each
- 4 pieces 45 cm each
- The table top measures 45 cm by 65 cm.

In order to properly assemble the folding mechanism, you need to find on the Internet drawings of country folding tables, or step by step photos.


On 70 cm parts, measure 40 cm from the edge and mark with a pencil, then drill the holes. We connect the two legs with each other with a screw, on the other side we tighten the nut, we also do with the second pair.

We divide the tabletop into two equal parts of 32.5 cm and cut it. On parts of 45 cm (for the folding mechanism), we retreat 1 cm from the end of the rail and drill holes. The parts for the folding mechanism must be rounded off so that they do not cling to each other.


According to the diagram in the photographs, we collect all the details together and get a folding table. Next, the table must be primed, painted and varnished. When using these sizes, a very compact table is obtained, it will be convenient to take it with you to nature and carry it in a car.

Additional Information
The design of the folding table can be adapted to your size and you can make drawings yourself. To make the table look better, the table top can be smoothly rounded.

Wood primer helps protect wood from insects, so don't neglect using it.

When painting tables and chairs, new brushes must be used, during the process, care must be taken that the paint does not bubble. Usually they are painted in two stages, you can proceed to the finishing stage after the first layer of paint has dried.


Outdoor tables must be varnished so that dampness and mechanical stress do not affect the wood. This should be done in a well-ventilated area; it is better not to take the product outside until it is completely dry.


If the structure is large and it is not possible to bring it into the room, you can varnish it on a covered veranda, where moisture cannot harm.

Varnishes differ in the degree of protection, some protect only from moisture, others will help to avoid minor scratches, they can also be with the addition of paint.

When making tables from wood, it is necessary to observe safety precautions, use cotton gloves for work, be careful when working with tools. If the work takes place on the street, you need to make sure that moisture does not get on extension cords and sockets.


Diy photo of a country table


We will send the material to you by e-mail
Not everyone likes to buy finished products for home use. The soul of some people requires creative and practical self-realization. The editors of the online magazine, the site invites those who wish to learn how to make a table out of wood with their own hands, what is required for this, and whether there are pitfalls in such work.
Beautiful wood product for the kitchen or living room, made with love
Professional carpenters are unlikely to need our step by step recommendations, but for novice amateurs, advice will come in handy. To begin with, consider what products you can make with your own hands from wood.


Of course, the more skills a person has, the more difficult the model he can make. But in order to build a table with your own hands from wood, there are ready-made drawings and photos to help beginners.
How to choose material for self-manufacturing of a wooden table for home and summer cottages
What to make a dining table with your own hands? Best of all - wood. The most pliable for the newly-minted master will be a pine tree. Poplar products will look more solemn. For the street, you can take mahogany.
If you want an option for home and easier, then you should consider laminated chipboard with an optimal thickness of 25-35 mm. On the countertop you can take wooden planks, birch plywood with a thickness of 35 mm. Legs can be made of metal or wooden beam(about 50 mm thick).
In order not to be mistaken with the amount of material, they make a preliminary drawing of the future structure with exactly the specified dimensions.
Advice! Suitable product heights vary between 750-800 mm.
Related article:
DIY furniture made of wood: for a garden, a nursery, a kitchen, a bath, a garden, a gazebo; how to restore pieces of furniture, useful tips and advice from experts - read our publication.
What tools are needed to make a wooden table with your own hands
It doesn't matter what shape the future table will be: working with wood requires a certain set of tools. You can't do without a jigsaw, and it will be much easier to work with an electric model. To fix all structural elements, either a drill with a multistage drill for holes or confirmations is used. To grind the product to perfection, you need either a special drill bit.

For greater fastening strength, wood glue is included in the tools.
How to make a wooden table with your own hands - step by step instructions
We have selected four types of structures that you can make on your own, even with a minimum of carpentry skills. We invite you to learn about the stages of making a round and rectangular table, coffee table and models for garden gazebo.
Making a wooden round table
The easiest way to make a round table top and tie ring is from or in sizes 1500 × 1500 mm and 1280 × 1280 mm. You will also need two laminated chipboard strips (1110 × 120 × 25 mm). We will make the legs from four wooden blocks measuring 120 × 50 × 750 mm.

How to make a countertop
How to draw a circle perfectly straight? On a sheet of plywood in the center, place your own thumb with a string and a pencil attached to it. The length of the rope from the base to the top should match the radius of the future countertop. Holding your finger in one place, draw a circle around the full length of the rope with a pencil. It remains to cut it out with a jigsaw.
The circle underframe is cut out in the same way.


Making legs
A round table made of wood or chipboard will look charming if you do everything consistently. You won't have to bother with the legs if there is no excessive originality in the plans. The bars are divided into 4 parts according to the desired size of the table height minus the thickness of the table top. First, one leg is cut off, and the other three are already aligned along it.
All processing with a grinder is carried out immediately.
Advice! You can't rush to sanding, since the first varnish will reveal all the flaws.
Assembly of the structure and processing of the finished product
The assembly is carried out in stages. First, the strips are aligned groove into groove. Then the crosspiece of the slats is connected with the legs with confirmations, as in the figure below:

If you want to make the structure stronger, before connecting the legs to the table top, their upper base is coated with glue.
Advice! Nails are not used in such work: a self-tapping screw or confirmat can be unscrewed without problems, and the connections will be much stronger.
Making a rectangular wooden kitchen table
The rectangular design is classic and very useful in everyday life: it is convenient to cook on such a table and you can comfortably dine at it.

How to make a countertop
The table top made of wood for the table is made either from a whole sheet of plywood, or from individual edged boards processed to perfect smoothness.

Having fastened the boards with screws and glue, they begin to make the frame.
Making wooden legs for the table and frame
At the heart of the quadrangular models is the wireframe. It serves to securely fix the legs, ensuring the stability of the entire structure. Turn the tabletop over, measure 3-4 cm deep on each side and transfer the measurements to the boards. As a result, you will need two boards of shorter length and two more.

The frame is made of four elements: according to an approximate ratio, these are two boards of X cm and two of 2X cm. They are connected to each other with an overlap alternately, building a rectangle. In order not to break the angle of 90 °, any board is used while working with a screwdriver: they press the structure with it while tightening the screws.
As soon as the frame box is ready, they begin to make the legs. You can take ready-made balusters for the table, buy metal supports, or cut them out of bars according to the desired length according to the drawing.

Both the frame and the legs must be carefully polished!
Product installation and final finishing
The frame is screwed to the tabletop with glue or self-tapping screws. Then the product is turned over and the legs are attached.

Important! Better to make the screw holes well in advance. This eliminates the possibility of splitting the tree.
Why not use nails and a hammer? Not everyone knows the skills of working with a hammer - here it is dangerous not only to knock on the finger. Excessive zeal can easily damage wood by splitting it. Confirmates and self-tapping screws hold the tree much stronger.
As soon as the leg is fixed, the angle is immediately checked: there should be no deviation from 90 °. The operation is repeated with other legs. It is possible to attach the legs directly through the countertop, but this will affect the aesthetic component of the product.


Related article:
: Photo best ideas... What can be made of pallets for an apartment, office and summer cottage; rules for the selection and handling of pallets; master classes on making a table, sofa, bench, armchair and shelving - read our publication.
DIY wood coffee table
Not only a beautiful element of the interior, but also a useful one. No need to look for where to put a book, gadget, glasses, TV remote control in a prominent place. Such necessary constructions are made from different materials: metal, glass, plastic, laminated chipboard, wood. But let's leave the other materials alone and concentrate on working with wood.


The choice of a wooden tabletop for the table depends on the expectations of the owner of the product. Someone wants something massive, while others prefer light options. Let's dwell on a simple solution.
We buy five boards 30 × 150 mm and process them to perfect smoothness. We immediately saw off the desired length on the countertop: you should get 6 identical canvases. We take four bars on the legs, 6 sheets of shorter length on the lower tabletop, 4 narrow slats for the frame.
| Illustration | Description of action |
|---|---|
 | For brushing wood, use a grinder with a brass brush head. The procedure will expose the structure of the wood, giving the product a special flavor. |
 | We go back and forth along each board from the side that will be the front. |
 | We process the tree with fire. The flame is gradually moved from place to place: the board will acquire a beautiful darkish tint. The procedure will permanently destroy unnecessary soft wood fibers. We actively wipe the entire surface with a felt boot or a piece of felt. |


We begin the process of assembling a small table with our own hands from wood.
- The lower and upper countertops are laid on the work surface with the wrong side facing you. Boards are stacked tightly to each other, gluing them together. As soon as the boards grab, the slats are attached to the top tabletop. They will serve as a frame and fastening element. They can be glued or screwed on with self-tapping screws. A self-tapping screw is screwed in the center of the rail into each of the boards.
- The legs are screwed to both the table top and the slats. You can use the furniture corners.
Video: the process of making a coffee table made of wood
DIY wood table with benches in the gazebo
It's time to set aside time and build a wooden garden table.


It is best to take boards standard sizes... Studs (suitable with a length of 16 cm), washers (24 pieces) are purchased at a hardware store. Long nails (8 cm) will do for a garden gazebo.

To paint a product or simply to varnish it is already a matter of taste.
