A beautiful table for a garden gazebo with your own hands: a master class. How to make a table for a summer residence: ideas, materials, drawings with dimensions, step-by-step instructions, photos and videos Do-it-yourself wooden table for a summer residence
if you have small garden on the site, which means there must necessarily be a comfortable place to relax, and the epicenter of this place should be a table. A large table for a friendly company of friends or a modest table for secluded gatherings over a cup of coffee - it doesn't matter. If you are interested in this topic, you must have already visited more than one garden furniture site and visited all the surrounding furniture stores, but did not find anything suitable. Often solid tables with stylish design are prohibitively expensive, and you just don't want to buy. That is why we offer the best option for hardworking owners - to make garden table do it yourself.
You may be surprised, but furniture can be made from a variety of materials at hand, which, it would seem, have long been waiting for their last trip to the landfill. We suggest starting the article with a list creative ideas to create a garden table with your own hands from boards, pipes and other "unnecessary" materials, of which there are plenty in any country house.
So, for example, a great and comfortable table can be obtained from a pallet for bricks. You can buy it or look for it at a nearby construction site. The furniture turns out to be very stylish and is suitable not only for the garden, but also for home interior in eco, loft and country style.
Helpful advice: Since we will talk about making a garden table out of wood with our own hands, it should be understood that if such material is not protected from moisture, then it will not last long outdoors. Therefore, before assembling any wood structure, carefully treat each element with an antiseptic stain, and then cover with 2-3 layers of weather-resistant varnish (tinted or not) or paint. In this case, the stain can act not only as an antiseptic, but also as a toner, coloring wood in darker tones (you can create an imitation of wood of rare and expensive species).
By the way, pallets can be used the most different ways, collecting literally anything from them, as from a constructor:

And if you come across an unnecessary wooden coil at a construction site, then in order to get a stylish round table for the garden, it will be enough just to varnish it and put it on the end:


And the last example of how you can create comfortable garden tables and benches from building pallets with your own hands, without putting much effort:

Manufacturing of furniture from pallets in recent times has become quite popular, so getting suitable materials It is not always possible for free or cheaply, and after all, every owner wants to save ... With the next version of the garden table, such a problem is not observed, because old used tires can be easily found in the nearest tire workshop! The table turns out to be low, but stable and very comfortable. To increase the aesthetics, the tire can be carefully wrapped with twine and varnished, and the plywood tabletop can be decorated with mosaics or artistic painting.


The option in the image below will appeal to adherents of eco-style. To make such a table, you only need a thick clay solution and wooden table top... The base can be formed into any shape, including storage compartments. If there are no deposits of clay nearby, you can mold such a table from a thick concrete mortar, and then paint in any color.

A great place to relax with a table and comfy seats can come from the most common metal barrels. There will be room under the seats for useful things, and soft pillows can be taken into the house at night or in bad weather so that it does not get wet.

Very unusual and beautiful garden tables are obtained from large old tree stumps. If there is such a stump on your site that you are still not going to uproot, maybe you shouldn't do this? Check if there are insects inside the colony (if there is already an anthill there, then the stump is most likely rotten and fragile), thoroughly saturate the wood with an antiseptic, varnish and attach a countertop on top. Wood is best used for countertops, but thick glass or metal can also be used. Also, this role will do an excellent job. old countertop from a broken table or interior door... If the stump is large enough, you can do without a countertop altogether, simply by carefully leveling its surface and covering it with stain and varnish.

Wooden garden table
Wood is the most popular material for making furniture. It is environmentally friendly, strong enough and durable, easy to work with. Due to its low weight, it is convenient to carry the wooden table into place and, if necessary, quickly remove it under the canopy. And to make transportation even more convenient, the design can be folded. In this part of the article, you will learn how to make a folding garden table with your own hands.

Manufacturing instruction:
- The folding table will be 55 cm high, 85 cm long and 50 cm wide.To make a solid frame that will hold the table top and legs, you will need 2x6 cm wooden slats.The frame length is 62 cm, and the width is 35 cm All its corners must be brought to the end and drilled with self-tapping screws, since the frame will be tightly attached to the tabletop.

- For the manufacture of legs, you will need similar strips 2x6 cm, 50 cm long. For greater aesthetics and safety, they should be rounded off at both ends. In order for the table to unfold clearly and conveniently, the legs must be attached in a specific sequence. Tackle the first pair of legs first. Step 5 cm from the outer edge of the support frame, mark and draw a vertical line. Then measure 4 cm up the line from the countertop and make a second mark. At the intersection of the lines, make a hole with a diameter of 8 mm - here the legs will be connected to the frame with 8 mm bolts. Alternatively, you can use an aluminum tube of the appropriate diameter, as in this case. Pass the tube through the hole, cut off the protruding ends and flare on both sides. Attach the second leg to the frame in the same way.

- The next step is to fix the bottom of the legs together to give stability. This can be done with wooden slats or with a piece of chipboard. In this case, 38x8.5 cm chipboard was used. Mark the center of the width of a piece of chipboard, departing from the edges by 7 cm, then measure 2 cm in each direction from the center, cut off the excess and round the corners. This is necessary in order to slightly "drown" the fixing spacer into the legs and the supporting frame - so the second pair of legs will be able to cover the first one and not protrude when the table is folded. To drown the spacer, attach it to the legs and frame, circle it along the contour and make cuts in the indicated places with a depth in the thickness of the chipboard. Then use the chisel to select the appropriate areas to make the indentations.

- To assemble the second pair of legs, you need to slightly adjust the frame, or rather add small overlays to increase the distance between the legs. If the distance between the legs of the second pair is the same as that of the first pair, the table will not be able to fold. Make the overlays of wood 2.5 cm thick and 8x6 cm in size.

- Close to the edges of each lining, drill 2 holes and screw them to the supporting frame with self-tapping screws. Now you can install a second pair of legs and make a spacer for them. Note that the spacer will be longer in this case (44 cm) as the distance between the legs has been increased.

- Further, for each pair of legs, it is necessary to install a limiter so that the table cannot open too much and is as stable as possible. To make the limiter, take wooden plank 3x2 cm, the length of which is equal to the distance between the legs. Place a plank over the legs, 5 cm away from the frame so that the legs are slightly apart.
- The folding table is almost ready, and all that remains is to attach the tabletop to the frame. This can be done using steel corners or simply screw the countertop with self-tapping screws, as in this case.


- The easiest way to make a do-it-yourself tabletop for a garden table is from chipboard. Sand all corners with sandpaper, putty on wood, coat the fasteners. Then the table can be covered with paint or pasted over with wood imitation paper. To glue the paper to the surface with high quality, smear it and the parts of the table to be pasted with PVA glue, attach the paper and immediately go over these places with a hot iron. It remains only to cut off the excess at the edges.


- To protect the paper from getting wet and dirty, cover it with a weather-resistant varnish. In this case, the first coat of varnish was tinted. When dry, sandpaper the surfaces with fine sandpaper to roughen and increase adhesion for a good hold on the second coat. It can be made with a transparent composition. Wipe down treated parts with a damp cloth to remove dust before application.
- Finally, when the second coat of lacquer is dry, tape the countertop with furniture plastic tape of the appropriate color.

Now the table can be taken out into the garden and used as intended. There are a lot of folding designs, and at the end of the article you will find drawings of the transformer garden table. Even a novice carpenter can make such furniture with his own hands if he has the simplest tools.
Metal garden tables
Working with metal is much more difficult than working with wood, as it requires special equipment, not to mention professionalism. Besides, hardware they weigh several times more and are not as mobile as light wooden tables. However, the service life of such furniture is much longer, and the resistance to external negative impacts stronger. If you protect the metal from corrosion, it will stand in the open air for many years.

In most cases, shaped pipes are used for the manufacture of furniture. It is versatile and very convenient construction material, which has the correct geometric shape, making it easy to work with. To make a garden table with your own hands from shaped pipe, you must have a special pipe bender and welding equipment. Below are examples of similar products and drawings that you can use to make your own table.

Helpful Hint: In the case of wooden tables, all elements should be treated with stain or other antiseptics. Metal also needs protection, so every detail must be covered with an anti-corrosion compound or special paint. If metal furniture is constantly outdoors, the anti-corrosion coating should be renewed once a year (in spring).
As a rule, metal parts serve only to create a strong and durable frame, while a tabletop and various decorative inserts can be made of wood, plastic, stone or glass. Various combinations make it possible to realize comfortable seating areas. The most elementary wood and metal construction can look spectacular if you decorate it appropriately and correctly fit into the landscape. To do this, you can use mosaics, colored glass, or decorative glass pebbles.

The tabletop lined with ordinary sea pebbles also looks very beautiful. And if you use the same pebbles to decorate elements of garden paths or a porch, you can link the exterior with the landscape into a harmonious composition.

The main advantage of garden furniture on metal frame is weather resistance - you do not need to worry that in case of bad weather the table will be damaged and it will have to be restored. It can be covered with plastic wrap for the winter, and every spring you can simply renew the paintwork to prevent rust. Making a garden table with your own hands from metal, wood or scrap materials is within the power of any hardworking owner, and if you apply a little imagination to this, you can get a real work of art.
DIY garden table: photo


For every summer cottage evokes associations of soybeans. For example, for some it is work, for others - outdoor recreation. Anyway on fresh air after working in the garden, any food will taste better. And so that whatever you have to eat, as they say, on your knee, you can equip a special place, the center of which will naturally be the table. And such a piece of furniture, made by hand, will not only express the care and skill of the master, but will also serve as his pride.
How to make a table for a summer residence with your own hands - instructions
To make a table in the country, you do not need special skills or tools, because its main function is to stand. Therefore, even a beginner will be able to make such furniture. When choosing a material for a country table, it is worth considering the nature of the operation: the furniture will be outside in any weather, so it is important to choose a durable material.
How to make a wooden table for a summer residence
It is necessary to carefully choose wood for the table, because each type of wood is good exactly in the area in which it is used. For example, to use conifers, you will have to impregnate them with a special solution, protect them from fire, but even all these actions will not help get rid of resin stains on the tablecloth. On the other hand, hardwoods are excellent for these purposes.
Wooden table
The table top should consist of boards, at least three to five centimeters wide. For greater stability, they need to be nailed to the frame. It is customary to make the legs straight or cross them. To avoid the danger of getting a splinter during lunch, you need to carefully process all surfaces. In addition, the finished table must be protected with special compounds. You can cover the table with varnish, for greater strength. As a rule, the varnish is applied in three layers, heating it before that in a water bath.
Logs can also be used to make a table from wood, they are also perfect for creating benches. It is also possible to use narrow slats in combination with a metal frame.
In fact, making a table made of wood comes down to two technologies: the cuts are connected to each other and form a dining plane; the cuts are fixed on a solid base.
How to make a stone table for a summer residence
The stone table impresses with its inaccessibility and strength. He will definitely withstand all the tests of nature and will lay down the family and the dacha for many years.
You can reduce the cost of the structure by laying out the bases yourself and buying only the countertop. For the bases, you can use quarry, flagstone, cobblestone, brick. These materials fit perfectly into the interior of the garden and the dining group will look very original.
How to make a metal table for a summer residence
If the house has a welding machine and a person who knows how to operate it, you can make furniture out of metal. These dining groups are original and interesting. To extend the service life of such furniture, the metal must be protected from rust and exposure to aggressive environment... The easiest way to do this is using a special primer that serves as the base for the paint.
A table for a summer residence made of a different material
For an inventive person with imagination, there are no boundaries. For country furniture you can use any material at hand, from old tires to wooden pallets.
Original table ideas for a summer residence
From pallets
The loft style, which has been gaining popularity lately, disposes to the use of atypical materials for the interior. For example pallets. It is comfortable, eco-friendly, and most importantly, cheap material is used to build benches, tables, sofas, even beds. For furniture, it is better to take new pallets, you can choose the size of the euro or Russian. In addition, the size of the pallets can be adjusted by yourself. To arrange a table, you will need from one to three pallets, depending on the design. You can put glass or plywood on the cover. Before use, the pallet must be carefully checked for unnecessary nails, then sanded. When the product is ready, it needs to be painted or varnished.
 Outdoor table and pallet benches
  Outdoor table and cable reels
  Street table and chairs from old tires


Many of the people, coming with their families to their summer cottage, first of all want to get together at a large table to relax and dine. Eating at the dacha, be it breakfast, lunch or dinner, is usually held outdoors. That is why there must be a special place on your garden plot, which plays the role of a kind of dining room. So that there is no need to take furniture out of your house every time, you can simply make do-it-yourself table for summer cottages from scrap materials. Naturally, it is necessary to take care not only of the construction of the table, but also of the chairs. Making a table for a summer residence is not such a difficult matter, for example, for an experienced summer resident, who is not the first time building structures on his site, it will take no more than one or two hours. Those who are engaged in construction for the first time will have to make some effort.
Pros of DIY furniture making
Select suitable furniture for a summer residence is not so difficult, because manufacturers offer a fairly wide range of products for every taste and wallet. Nevertheless self-production country furniture is becoming more and more popular, which is not at all surprising. Thanks to such a solution to the issue of arranging a summer residence, you can not only save a significant part of the budget, but also get a lot of new impressions in the process of work, giving vent to your creative powers. The result of the work will be a thing that will not only perfectly fit the interior, but will also become the highlight of the whole house, attracting the eyes of guests.

Required tools
To build a table for a summer residence, you will need the following tools:
- hacksaw or circular saw;
- drill and a set of drills from 1 to 10 millimeters;
- hammer;
- spanner key (12 and 14);
- corner;
- tape measure.
Building materials required in construction:
- boards in the amount of 11 pieces (the length of the boards is 4 meters, the width is 100 millimeters, the thickness is 50 millimeters);
- boards in the amount of 8 pieces (the length of the boards is 6 meters, the width is 100 millimeters, the thickness is 50 millimeters);
- galvanized furniture bolts for fastening in the amount of 20 pieces;
- galvanized nails in the amount of 100-150 pieces (3.5 to 90).

Drawing
Before the start construction works it is necessary to pay special attention to drawing up a drawing of the future table. One similar example will be briefly analyzed below:
- table legs, in the amount of 4 pieces. The length of the legs is 830 mm;
- seat support elements in the amount of 2 pieces. The length of the elements is 1600 mm;
- countertop support elements in the amount of 2 pieces. The length of the elements is 80 millimeters;
- boards in the amount of 14 pieces. Length 2 meters. These elements are required for the table and seats;
- amplifier board. The length of the board is 800 millimeters;
- transverse boards in the amount of 2 pieces. Required for seat reinforcement;
- elements of the amplifier of the table structure. The length of the elements is 960 millimeters.
Attention ! It is necessary to strictly follow the dimensions listed below only if the work on the table is made of dried and planed wood.
Manufacturing technology
Sawing out elements of the future structure
To do this, you need a hacksaw or circular saw. Sawing parts is as follows: using a hacksaw or circular saw, make required amount parts for a table made of boards measuring 4 meters and 6. Based on the above drawing, it is necessary to cut boards 2 meters long, which will be used for flooring the table and seating.

Attention ! In order to avoid mistakes when cutting out elements for the sidewalls, it is best to cut them according to a template that must be made in advance from strong cardboard.
Assembly
After all structural elements have been cut, it is necessary to start assembling them:
- first you need to install the side parts (sidewalls). In order to mount the parts evenly, it is recommended to use a measuring angle;
Attention ! The assembly of the table should be done on a perfectly flat surface. This will help prevent skewing of parts.
- after the installation of the sidewalls is completed, you can proceed with the installation of the table legs. To do this, we place the legs at the required angle and lay them on the transverse elements, grabbing the parts with nails. Then you need to use a pencil or marker to mark the surface in those places where the bolts will be installed. After marking with a drill, it is necessary to drill holes and fasten all parts with bolts;
- then you need to start connecting the side parts and the tabletop. This assembly step is best done with an assistant. An assistant holds the first side panel before it is secured. You hold the second sidewall yourself. On the upper part of the sidewalls it is necessary to hoist one of the boards intended for flooring the table and seats. We fix the board with nails. We repeat the same assembly moment: we place the board on the other side of the table and nail it down;
- then we proceed to the installation of the tabletop. Before installation, it is necessary to make a blank of small wedges, with which you can leave the same gaps between the elements. Then start bonding the countertop planks together. After the installation of the boards is completed, the wedges can be removed;
- the last stage in the assembly of the table is the installation of amplifiers. Turn the structure upside down and install transverse amplifiers. According to the drawing, according to which the assembly was carried out, the amplifiers are installed in the middle of the table top and bench, after which they are nailed. In order for the structure to be safe for health, the cuts must be sanded. Then it is necessary to install amplifiers that have a curly cutout and repeat the transverse part of the tabletop. Nail them to the countertop and sides.

Treatment
After the assembly of the table is completed, it is necessary to process it using special means... It is recommended to carry out processing before the start of the assembly process, so that it will be possible to more thoroughly coat all elements and protect them.
Make it more attractive appearance a country table can be used with a color scheme or varnish. The varnish will become an additional means of protecting furniture and increase its service life.
Tables for giving from scrap materials
In addition, you can make a table for a summer residence with your own hands, using simple materials at hand.
For example, what can you do with a regular tree stump? It can be easily made from it original table, which will become a decoration of your garden plot. Stumps can be decorated with mosaics, tiles, or other decorative items. It all depends on the creative imagination. You can also make seating stools (also from hemp), after decorating them with a mosaic.
If you find in the country old table, then do not rush to throw him out, because he can be given a second life. Remove from it old paint, decorate the tabletop with mosaics, and paint the legs again. Such a table will serve for many years to come and will delight the eye.

Tennis table for summer cottages
So that at the dacha you can occupy yourself with some active sports, you can build a tennis table. It is quite simple to make it, you just need to buy the necessary materials and prepare the tools.
Necessary materials:
- 2 sheets of plywood 20 mm thick;
- planed boards in the amount of 2 pieces (3 millimeters thick and 3 meters long);
- for the racks, you will need construction trestles with supports in the upper part.
The dimensions of the table should be 76 centimeters high, 152 centimeters wide, 274 centimeters long.

Then you need to choose a place to place the table 7 by 5 meters.
Installation process:
- construction racks must be installed horizontally at the same level;
- after installing the construction goats, it is necessary to lay two boards along the edges of the supports 3 millimeters thick (the boards are laid along the length of the tennis table). Boards are screwed with self-tapping screws;
- then plywood sheets are laid, which are subsequently fixed with rails.


After that, the tabletop must be sanded and covered with several layers of antiseptic.
We continue to equip the summer cottage. Today we'll talk about how and what to fill the dining area or recreation area. It is difficult to imagine a cozy gazebo or shade canopy without a table and comfortable benches or chairs.
Today, garden furniture manufacturers offer a huge variety of tables: large and small, wooden, wrought iron, wicker or plastic.
Of course, you can buy a finished product, but many people prefer to make garden furniture do it yourself.
How and from what material to make a table, how to decorate a tabletop will be discussed in this article.
Outdoor table for a summer residence made of wood
Undoubtedly, wood is the most flexible and sustainable material. A wooden table can be made round, square, rectangular or irregular, it all depends on the size of the gazebo or the number of seats. You can use a regular stump as a tabletop leg.

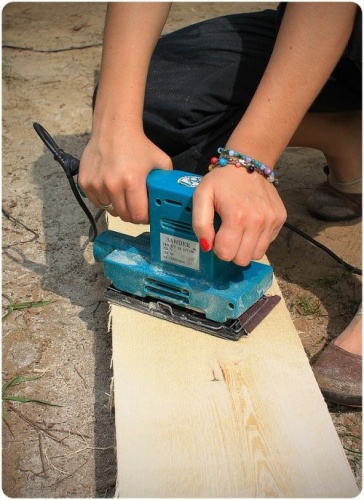
The shape and appearance of the table largely depends on the style of your country house and exterior. The log cabin can be supplemented with furniture made from logs and planks. The main tool for processing parts is Sander, since the surfaces of the table tops and benches should be smooth, without chipping.


The table top can be made from slats or narrow boards by stringing them on metal rods, or by connecting them using short slats.

A table made of wooden cuts looks interesting, especially if there is one on the site.


There are several ways to make such a table:
- connect the cuts with each other with staples or tongue-and-groove joints, forming a flat surface;
- fix the cuts on some base (in this case, the parts must be of the same thickness to form a flat surface). The product must be sanded and varnished. If desired, the gaps between the cuts are filled with epoxy resin, after which has dried, the surface is sanded again and covered with a protective compound.
A garden table made of wood with benches, made in a single structure, looks great both in the gazebo and in the open area.


It is not difficult to make it. Use the diagram below to make your own drawing and calculate materials.

When drawing up a drawing, consider some generally accepted standards:
- bench seat height from ground level - 400-500 mm;
- seat width - 300-400 mm;
- table top height from floor level - 700-750 mm;
- tabletop width - 580-900 mm.
The length of the table and benches is individual. The figure shows an example of making a table with benches located on two long sides of the table top. Similarly, you can make a structure with benches on four sides.
And here is a small option round table with stationary stool benches for four seats. It is easy to move it to the right place at the moment: to an open area, under a canopy or into a house.

If you wish, you can purchase or make your own folding garden furniture, which can be easily installed in any part of the garden or in the house.

Such furniture will last longer, since it will not be constantly exposed to atmospheric precipitation. The weight of such products is small, they can be easily and quickly transferred to a permanent storage place in a house or shed, where they will not take up much space.
In order for the product to serve for a long time, all wooden elements must be treated with an antiseptic and coated with varnish, wax or paint. Use wood stain or special pigment impregnation to give the wood the desired color.


Garden table made of scrap material
Earlier we have already talked about the furniture made. A stylish pallet table is cheap and looks organic on personal plot... The design, complemented by furniture wheels, is also mobile.

Ordinary stumps decorated with mosaics look very original and can serve as a small table or stools in a seating area. For mosaic decor, various tiles left over from repairs, chopped into small fragments and laid on tile glue or cement mortar, are suitable.

The originality of this composition lies in the creative approach of the owners. The most common stumps turn into a work of art.

An old, worn-out table can also be decorated with mosaics and thereby renew the tabletop. Old paint must be removed from the legs, sanded and painted again. Such a garden table will serve the owners for a long time and will gather the family around it for lunch and tea.

A wooden reel for winding a cable can also serve as a table, it is enough to process it and decorate it a little, or just paint it in the desired color. The table will be easy to move if the wheels are attached at the bottom.


Many have inherited things, as they say: it's a pity to throw it away, and nowhere to put it. Try to be smart and use them when setting up suburban area... As table legs, you can use the base of the old sewing machine, metal headboards and more. By the way, you can simply buy a countertop and install it on top of a metal structure.

Those with weaving skills can make vine garden furniture with their own hands. If you are not capable of such feats, but are very fond of wicker products, then you should go to the store. Manufacturers offer tables and chairs made of wicker, rattan or artificial fibers for every taste and budget.

Metal garden furniture
If you are "friends" with metal, have a welding machine, then you can make garden furniture from this material. Such furniture, as a rule, is delicate and original. In order for the product to serve for a long time, the metal must be protected from the effects of corrosion before its operation. One of the most simple ways protection of metal surfaces is a primer that is applied to the product before finishing painting.

Forged furniture for a summer residence is an excellent solution for respectable home owners. Such can only be made by blacksmith forging masters with the appropriate equipment and the presence of a forge.

Forged products go well with many materials: wood, glass, marble. If you wish, you can purchase a forged blank for the table, and fill it yourself.
Stone table
Recently, small architectural forms made of stone have been gaining popularity. Including on sale you can find tables and benches made of marble or granite. Such products are expensive.

But this is not the only solution. You can independently make a stone base of a table and benches, for example, from quarry, limestone, bricks or blocks, fitting them into the overall look of the garden, combining them with other stone buildings.
As you can see, there are quite a few options for arranging a recreation area on a personal plot: from cheap, practically worthless, to expensive. A table made with love will surely gather wonderful people around it, and joint gatherings will deliver pleasant moments.
The arrangement of a summer residence is a constant process. Either you build something, then you improve it. Moreover, furniture is constantly required and tables are most in demand in the country. And put in the garden, and near the house, and also in. We will tell you how to make a table for a summer residence with your own hands in this article using the example of ready-made projects.
Homemade table from pallet boards
Disassembled pallets served as the material for this table. Naturally, new boards can be used. There is only one condition - they must be dry. You can buy dry ones (it costs more) or buy ordinary ones, put them somewhere in ventilated piles and keep it that way for at least 4 months, or better - six months. In general, any furniture, including, is made of dry wood.
We assemble the table for the street - put it in the gazebo, therefore we will not glue the boards of the countertop, but we will fasten them from below, using slats. It's very simple country table and very cheap.
Having disassembled the pallets, we get boards with an individual color and pattern. Having conjured a little, having shifted them several dozen times in different manners, we achieve the required result. It turns out quite a nice tabletop.
We take the side parts of the pallet. We use them for the table frame. We grind them first with coarse sandpaper, then we bring them to the required smoothness (grain 120 and 220).

We take the strips that have remained unused, with their help we fasten the tabletop. We place them in the place where the joints of the boards are. For fastening each board with a joint, we use two self-tapping screws, for a solid one - one.
From the processed sidewalls and two boards (also sanded) we assemble the table frame. We fasten its parts with self-tapping screws to the end (two for each joint). The frame can be glued or also "put" on self-tapping screws. Only their length is large. For each, we pre-drill holes with a drill, the diameter of which is slightly less than the diameter of the screws.

Turn the assembled tabletop over and grind it. The procedure is the same - first with coarse-grained sandpaper, then with fine grain.
Next is the installation of the legs. We select four boards of the same size, check their length, and adjust if necessary. Then - sanding again. It's easier than sanding already screwed legs. We screw the sanded boards to the frame. These will be the legs. For each one there are two self-tapping screws fixed in a diagonal (look at the photo). For greater stability, we install jumpers at the bottom. From the floor to the jumpers, you can leave about 10 cm. We connect everything with self-tapping screws so that the boards do not crack, we pre-drill the holes.


After removing the dust, we again varnish. In theory, the varnish should lie flat, but it depends on the wood, so another sanding / painting cycle may be needed. As a result, we get such a homemade country table.

If you don't like motley planks and old nail marks, you can use the same design to make them planks. This table can be rectangular, maybe square. All sizes are arbitrary - see available space.
Country table from the remains of boards
This table for giving with your own hands is assembled from the remains of boards of different breeds and sizes. Pine boards with a thickness of 25 mm and a width of 50 mm were used for the tabletop frame, the rest of 15 * 50 mm on the legs. We make the frame according to the dimensions you need. This table will stand on the veranda, and it has a small width. So we will make it not wide - 60 cm, and the length 140 cm. The height of the legs is 80 cm (everyone in the family is tall).

Immediately cut off two long boards of 140 cm each.To the width of the table top is 60 cm, we subtract twice the thickness of the board used - this is 5 cm. Short bars should be 60 cm - 5 cm = 55 cm.Fold the frame, keeping an eye on the right angles, and twist it with screws. We check if the bars were folded correctly - we measure the diagonals, they should be the same.
We cut off four boards of 80 cm each, fasten them from the inside to the assembled frame. You can have 4 self-tapping screws for each leg.

We attach the crossbars approximately in the middle of the height of the legs. This is the frame for the shelf. The shelf can be used for its intended purpose, and it also increases the rigidity of the structure. We fix it strictly at right angles, checking with a large square.

We put the frame on the floor, check if it is wobbling or not. If everything is done correctly, it should be rigid. Next, we take sandpaper or a sander and grind.
Let's start assembling the countertop. From finishing works planks of different types of wood remained, some were painted with wood stain. We alternate boards of different colors.

We fasten the boards of the tabletop with finishing nails, carefully finishing them off with a finishing tool. It can be fixed on the shelf with ordinary nails or self-tapping screws. Then we level with a grinder. The last stage is painting. Very unlucky with the choice of varnish. We bought it too dark, didn't like the look. We'll have to sand it again and paint it in a different color.

Wooden table with glued top
This design is different L-shaped legs... They are assembled from boards of the same thickness. In this case, 20 mm. In order for them to hold well, 5 self-tapping screws are needed. Pre-drill holes with a drill with a diameter of 1-2 mm less than the diameter of the screws. Then with a drill larger diameter we drill recesses for the caps. The diameter can be matched to furniture plugs of a suitable color or made from a wooden rod. Another option is to use wood putty, to which add wood dust that remains after sanding. After drying and sanding, the marks will be difficult to find.

When assembling the legs, make sure that the angle is exactly 90 °. You can choose a bar as a pattern. First, we coat the joint of the two parts of the leg with wood glue, then we install the screws in the following sequence: first the two extreme ones, then the middle one, and only then the other two. After the glue has dried, the legs are sanded, varnished and dried.

It's time to make the countertop. We collect it from boards of the same thickness. We type in the size you need. Fragments of different widths can be used. It is only important that everything looks organic, and the sidewalls of the boards are even and docked without gaps.
We coat the sides of the boards selected for the tabletop with glue, lay them on a flat surface (some kind of table) and tighten them with clamps. In this case, they cost one, but preferably at least three. We tighten it so that there are no cracks in the resulting shield. We leave for a day. Having removed the clamps, we get an almost finished tabletop. It still needs to be ripped off - to align the edges, and then sanded. You can trim with a jigsaw or a conventional hand saw. Using a grinder is difficult to get a straight line, but you can try. After sanding, we get a beautiful tabletop.

Using the same technique, you can make an oval or round tabletop. It will only be necessary to draw the appropriate line and end the glued boards along it.
To make the table look more attractive, let's make a frame. We take a thin strip, process it with sandpaper and fasten it around the perimeter of the tabletop. You can also use finishing nails. Only the planks are also pre-coated with wood glue, and then with nails.

After the glue dries, we process the joint again with sandpaper.

Now you can attach the table legs. We assemble a table frame from four boards (there is no photo, but you can do it as in the previous paragraph). We attach it to the back of the tabletop with glue, then install furniture confirmations through the tabletop. A preliminary hole is drilled for confirms with an expansion under the head. The holes for the fasteners are masked in the same way as on the legs.
We attach the legs to the fixed frame. We put them inside the frame. You can attach it with ordinary self-tapping screws. That's it, we made a table for a summer residence with our own hands.

How to make a garden table from wood with benches
For this table, boards of 38 * 89 mm were used (dismantled themselves), but you can take standard sizes... The difference in millimeters will not greatly affect the results. In the photo below you can see what should turn out.

To connect the parts, studs 16 cm long with washers and nuts (24 pieces) were used. All other connections are made with nails 80 mm long.

The parts are installed in place, a through hole is drilled with a drill. A hairpin is installed in it, washers are put on on both sides and nuts are tightened. Everything is pulling up wrench... Why is this option convenient? For the winter, it can be disassembled and taken to a shed or garage.
Making seats

According to the drawing, we cut the boards of the required size. Everything is needed in double quantity - for two seats. We grind the boards, pay special attention to the ends.
The short sections, which we use to fasten the three seat boards along the edges, are cut off at an angle of 45 °. First, we assemble the structure that is attached to the bottom of the seat. We take a board about 160 cm long, at the end to it we attach two short boards sawn at an angle. You need to attach it so that this board is in the middle.

Then we attach the legs to the resulting structure (you can use nails). Then we add the boards cut at an angle and tighten everything with studs and bolts.
We attach the seat boards to the resulting structure. Since this is a table for the street, you do not need to knock them close. Leave a gap of at least 5 mm between two adjacent ones. We nail it to the supports (which have been cut down), two for each board.

We fasten the finished seats with four boards 160 cm long. We fasten each leg with studs (if you walk, you can put two studs by placing them in a diagonal or one above the other).

Putting together a table
The table is assembled in a different way. Please note that for the countertop, the transverse boards are sawn at the edges at 52 °. We attach them at such a distance that the legs enter. Each board has 2 nails. You can finish, with small hats, or you can hammer in deep, and then mask the holes with putty.

Now we need to assemble the cross-legs. We take two boards, cross them so that the distance between their ends is 64.5 cm. We outline the place of intersection with a pencil. At this point, you will need to take out the wood half the thickness of the board.

We make the same notch on the second board. If you add them, they turn out to be in the same plane. We connect with four nails.

We make the second leg for the table in the same way. We are not assembling the table yet.
Installing the table
Now you need to fix the legs to the structure on which the benches are installed. We put them at an equal distance from the benches, fasten them with hairpins.


Now we install the tabletop. We also fasten it with pins. The last stage is painting. Here everyone does as he pleases.
Variations on a theme
According to this drawing, you can make separate benches and a table for a summer residence, a garden. The design is reliable and simple to perform.


Diy table for giving: drawings

