Ceiling decoration with foam tiles. Pros and cons of foam ceiling tiles - preparation for finishing: marking, installation
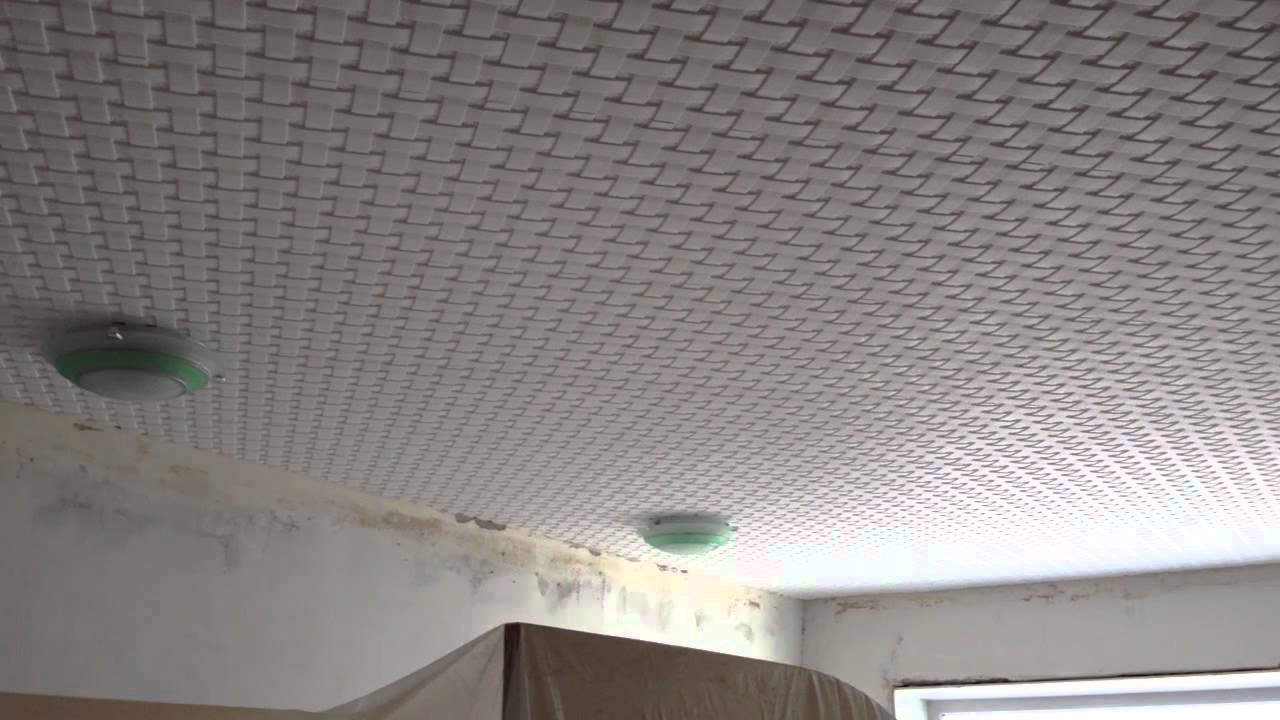
The tile, which serves as a material for finishing ceilings, has one significant drawback - the presence of noticeable seams, which cannot be removed or at least masked well. But she has an alternative, and it stands out favorably with a number of advantages. It's seamless ceiling tiles, which has successfully occupied its niche among materials for finishing apartments, houses, offices and other premises.
Types of seamless tiles
This material is a slab made of expanded polystyrene (belonging to the foam class), with a thickness of 3.5 to 15 millimeters. The shape of the tiles can be different (not only square), and the surface has a pattern, which, when laid, folds into patterns. Also, seamless polystyrene foam tiles can reproduce the texture of wood carving, stucco or artistic plaster. The edges are made in such a way that when laying at the joints, the seams are almost invisible (they can be viewed only at a very small distance).

There are the following technologies for the manufacture of such tiles.
- Pressing- the mass of expanded polystyrene on a stamping press turns into a plate of a certain shape and pattern. Material thickness - 5 millimeters, area (for most brands) - 0.25 square meters for one tile. Tiles made using this technology have the lowest cost.

- Injection treatment- expanded polystyrene is sintered in a mold under the influence of high temperatures. The result is thick (8 to 15 millimeters) and durable sheets. The tiles made using this technology have a large selection of patterns and textures.

- Extrusion- polystyrene granules are mixed with blowing agents at high temperature and pressure. The resulting mass is formed into strips, which are covered with a special film and cut into separate plates. Thanks to the film, this finishing material can imitate the texture and color of metal, wood, plaster or stone. Extruded seamless tiles are very thin (3 to 5 mm) and durable, but also more expensive than other types.
Ceiling tile prices
ceiling tiles

In terms of shape, seamless ceiling tiles can be divided into two categories.
- Straight edged... Square tiles with a pattern applied to them according to the above technologies. The dimensions of each individual piece and its edges are made very precisely to ensure that the tiles fit snugly against each other with the smallest possible gap that will not be visible from the outside.
- With complex edges... In this category, there are various "designer" brands of ceiling tiles with wavy edges. When combined, they form an aesthetically pleasing pattern that makes the room unique.

Advantages and disadvantages of tiles
Why is seamless foam tile so popular? You can answer this question by giving full list its merits.
Important! When cleaning seamless tile finishes, do not use household chemicals containing various solvents - they can easily damage the foam.

But any material has its drawbacks in addition to its advantages.
- Brittleness - when working with expanded polystyrene panels, you should be extremely careful.
- Lack of vapor permeability - seamless tile does not allow air to pass through. For city apartments with concrete floors, this is not critical, but for country cottages with wooden floors and thermal insulation is a big problem- if the air exchange is disturbed, excess moisture may accumulate above the ceiling.
- Under the influence of high temperatures, polystyrene tiles can partially peel off from the ceiling. To prevent this, you should take a responsible approach to the choice and purchase of glue.
- The decoration does not burn in the event of a fire, but it emits a lot of smoke and a certain amount of substances harmful to humans.

Tile selection rules
The first step to a beautiful and durable ceiling is choosing a quality finish. This fully applies to seamless ceiling tiles. There are several hallmarks of a well-made and quality material.
First, pay attention to the back of the ceiling tiles. It should be perfectly flat, without any depressions or bulges. Their presence indicates a violation of the manufacturing technology of the material, which means that the tile may have other defects that cannot be noticed immediately.

Second, carefully inspect all the edges of the ceiling tile. There should be no chips or other damage, otherwise they will be visible at the joints of the panels with each other.
Advice! Be sure to try joining two or more tiles together, especially if they have wavy edges. Make sure there are no visible seams between them.
Thirdly, check the patterns and, in general, the entire outer side of the seamless tile - there should be no hollows, blotches or other defects. When connecting several panels, an even pattern should be obtained without displacement.
Fourth, take one of the tiles and gently lift it up by holding one of the corners. Good material should not break or bend strongly in this case.
Prices for seamless ceiling tiles
seamless ceiling tiles

Having checked several plates from the packages you purchase by the above criteria, you will be able to fully make sure of the high quality of the material.
Table. Popular brands of seamless ceiling tiles.
| Name | A type | Dimensions, mm | Manufacturer |
|---|---|---|---|
| Extruded | 500 to 500 | VTM Holding |
| Extruded | 500 to 500 | MartinPlast |
| Pressed | 500 to 500 | Korikov |
| Injection | 500 to 500 | Marbet Sp.zo.o |


Now let's move on to the next step - compiling a list of the necessary tools and buying glue, with the help of which the seamless tiles will be installed on the ceiling.
How to choose the right tile adhesive
The service life of the ceiling tile directly depends on the quality of the glue, how well it will adhere to the ceiling when the temperature or humidity inside the room changes. When choosing, the following nuances should be taken into account.

Advice! The glue of the Moment Montage, Bustilat and Titan brands is suitable for laying seamless ceiling tiles. Ordinary PVA glue is also suitable. In addition, there are many formulations available today that are designed specifically for foam ceiling tiles.

Required tools
To install seamless ceiling tiles, you will need the following fixtures.
- Level - to determine how smooth the rough ceiling is and to control the correct laying of the foam boards.
- Long ruler, square and tape measure - for various measurements.
- Large utility knife with replaceable blade - for cutting ceiling tiles. It is used in cases where it is not possible to lay the entire slab along the edges of the room.
- Spatula - if the glue is not packed in a tube, but in a bucket, then the tool is needed to apply the composition to the tile. Replaceable with brush or roller.
- Pencil or marker - for marking the location of the tiles. It will not be superfluous to take a few sheets of paper to make any notes or sketches.
- Stepladder or table.


Preparatory work
Before the immediate start of laying foam tiles, the surface of the ceiling must be prepared. The main thing in this business is to completely get rid of the remnants of the old finish. Cleaning methods differ depending on its type.

Advice! If the layer of plaster does not break off and does not collapse with light tapping with the handle of a trowel (or other tool) and does not have large differences in height, this finish layer can be left and the seamless ceiling tile can be glued directly onto it.
A step-by-step description of the preparatory work.
Gluing process
First, you should draw up a plan for how the tiles will be located in the room. Use a tape measure to measure the length and width of the room, but keep in mind that two opposite walls may differ slightly in size. Draw a preliminary sketch on a piece of paper to calculate the required number of tiles and their approximate location. The most commonly used installation schemes are shown in the figures below.


Now you need to transfer the markings to the ceiling. To do this, use a ruler, square, pencil, or marker. In this case, it is necessary to divide the room into four parts, diagonally or along the middle of opposite walls. This is done using stretched threads.

Advice! Regardless of the method of laying, some of the plates will have to be cut with a clerical knife. Keep a few copies in reserve, as seamless ceiling tiles often break.
After completing the ceiling marking, you can start laying the slabs. The process is as follows.
Ceiling Tile Adhesive Prices
ceiling glue for tiles

Step 1. Unpack the finishing material and leave in the room for several hours - the temperature of the ceiling and tiles should be the same so that the latter does not deform after installation.
Step 2. Apply glue to the back of the tile, in the center and around the edges. Spread the adhesive with a spatula if necessary.

Step 3. If the glue has a liquid consistency, wait a while (you can find it out by reading the instructions for the composition).
Step 4. Press the tiles against the marked area on the ceiling, apply some force (but not excessive force, otherwise the material may break). First, the first four foam panels are laid in the center of the room, one at a time on the previously marked parts of the room.


Step 5. Wait a while for the adhesive on the tile to adhere to the ceiling. Before that, adjust the position of the tile so that it lies flat.
Step 6. Repeat the above steps with the next tile, attach it to the ceiling and dock with the previous one. There should be no gaps between them. Remove excess glue immediately, since it will be difficult to do this when it dries.
Step 7. Install any remaining seamless tiles.
Ceiling panel prices
ceiling panels

Step 8. Lay the cut-off pieces of the tiles around the edges of the room.
Step 9. Treat the joints of the boards with acrylic sealant. Do not use silicone compounds - they turn yellow over time.
Seamless ceiling tiles are an inexpensive and visually appealing finishing material. With a responsible attitude to the selection of materials and installation technology, you will get a beautiful ceiling, the finish of which will last for many years.
Video - Seamless tiles on the ceiling in the nursery
There is a wide range of materials for the design of ceiling surfaces. It could be plastic vinyl wallpapers or even ordinary plaster.
One of the solutions takes place foam ceiling tiles... They are affordable in terms of price, but at the same time they are practical and very attractive.
Features of Styrofoam Ceiling Tile
The fastest and budget way to make the ceiling in the house beautiful is to buy a foam ceiling tile. This kind of material will help decorate any room.
It is suitable for offices, living spaces and even washrooms. If a question arises, how to paint a foam ceiling tile, then the answer is simple - any paint.
It is an environmentally friendly material. The main advantage of tiles is compliance technical characteristics and prices. Designers from all over the world have noted that such tiles are a good assistant in decorating an apartment. It behaves well in rooms with high humidity and temperature extremes.
Now a huge number of tile modifications are presented on the construction market. You can choose an ornament for every taste. A big plus is that it lends itself well to painting and visually smooths the ceiling. Foam Ceiling Tile Size depends on its type.


One of the advantages of ceiling tiles is that the pattern is uniform, but with big amount seams. Plates are installed very quickly. All these quality characteristics make this kind of material in demand.
If you don't like ceiling seams, you can use a different type of tile. They are called seamless. The price for them will be higher, but the result is worth it. Panels of this shape look good in large rooms and offices. All tiles of such a plan will only be in snow-white shades.
There are 3 ways to produce foam tiles:
- Pressing method;
- Injection method;
- Extruded.
The pressing method involves compression in the manufacture of foam using a press. Such slabs will have a thickness of about 0.7 centimeters. In the future, the products are compacted and a pattern is applied to them.

In order to obtain thicker products, there is an injection method. In this case, the slabs are molded at high temperatures... The resulting products will be the most expensive. The most small thickness have plates that are obtained by extrusion.
Types of foam tiles
The variety of ceiling tiles makes this material very popular. In shape, foam tiles are:
- Square;
- Rectangular.
As a rule, the slabs are made square. This is done for comfort in gluing them. But in recent times it is also possible to find rectangular slabs. They are more practical to use when decorating ceilings in large rooms. They will help reduce material consumption.
By the size of the slabs can be:
- Small;
- Big ones.

The most popular slab size is 50 * 50 centimeters, but there are also slabs - 30 * 30. Depending on the method of production, they are:
- Stamped;
- Injection;
- Extruded.
The first slabs will be the most readily available for the price. They will be grainy in type and usually white... Due to this type of production, the boards are not very strong and the seams are very visible. There are errors in the manufacture of slabs, therefore, gaps may appear when gluing the slabs.
When injected, the slabs are of high quality. The main characteristics of the products will be: regular shape, barely noticeable seams and a large number of plate designs.
In the manufacture of the injection method, the plates are off-white, so they are subsequently covered with a special film. This kind of material will be the most durable, but also quite expensive.
When finishing, the surface can turn out:
- Mirror;
- Laminated;
- Seamless.
The most popular of them is laminated. After gluing the boards, the material is covered with a film. This significantly increases the quality characteristics. separate material... Such Styrofoam ceiling tiles in the kitchen, will look more than attractive.

Advantages and Disadvantages of Styrofoam Ceiling Tiles
Like any building material, tiles have their pros and cons. The pluses include:
- High sound insulating properties;
- Low weight;
- Ease of installation;
- Low price;
- A variety of textures;
- Huge color palette;
- Hides defects.
Foam tiles have high thermal and sound insulation qualities, and are also lightweight. This makes it possible to carry out the installation without the help of third parties.
It is also distinguished by its own decorativeness and a large number of textures. Every buyer can buy foam ceiling tiles perfect shape. The ceiling, which is covered with such material, is not afraid of moisture and high temperatures.


You can glue such a tile yourself without the presence of a master. However, despite the large number of advantages, the material has a number of disadvantages:
- Fast flammability;
- Fragility.
Over time, such plates tend to turn yellow, especially in kitchens and bathrooms.

The disadvantages of foam tiles can be considered its fragility and softness.
Laying foam tiles
Installation of slabs includes a number of stages, namely:
- Calculation of the number of plates;
- Choice of glue;
- Surface preparation;
- Markup;
- Sticking.
First of all, before starting work, it is necessary to calculate the amount of material that will be needed. For this, it is enough to understand the length and width of the room.
By multiplying these characteristics, you get the area of the room. But to buy plates according to this calculation. It is necessary to take about 15% of the total calculation in reserve. The shape of the ceiling in many apartments is not ideal, so the calculation can be wrong!
Foam Ceiling Tile Adhesive you have to choose carefully. The service life of the plates depends on it. So, there are several types of advice when choosing an adhesive:
- It is necessary to choose glue with a thick consistency, it will not roll off the plates. Well suited for these purposes "Moment" or liquid nails. Plus, this kind of adhesives quickly adhere to the surface, which saves time. On average 1 square meter it will take about 6 milliliters. It turns out that for a medium-sized room you need about a tube of glue.
- The next favorite among consumers is Titan glue. It sets and dries quickly. He has only one drawback: after applying it to the tile, it must be applied to the gluing site and removed again. This is done in order to fill the gaps with air and the glue adheres well to the surface;
- If the choice fell on more budgetary adhesives, then these can be adhesives from Chinese manufacturers. They will be less viscous and will not bond the tile surfaces to the ceiling as quickly.

In order to glue the tiles, you need a tool. You need it a little, and it is quite accessible to any person. This is:
- Marking cord;
- Scissors;
- Roulette and pencil;
- Brush;
- Roller;
- Putty knife.
Before you start gluing the tiles, you need to prepare the ceiling. So, the old coating can not be removed, if it is smooth, if the surface is not even, then it must certainly be cleaned.
Important! If the ceiling is whitewashed, then the whitewash must be removed, the tiles will not stick to it! If there are cracks or holes, then they are putty. In order for the slabs and the ceiling to adhere, they are primed. The primer must dry for at least 3 hours.
Next, the ceiling is marked and the center is determined. Diagonals are drawn from the corners of the room and their intersection is found. This is done in order to determine the number of plates required. If the ceiling is uneven, then more slabs must be purchased to fill the gaps.

Walls can be glued parallel to the walls or diagonally. The adhesive is applied to the board and the installation takes place from the corner of the wall. Press the tile well and wait about 3 minutes.
If excess glue comes out, it can be easily removed with a sponge. All subsequent slabs are glued to the joint of the previous ones. The ceiling will dry for about a day. How to glue foam ceiling tiles of course, it remains to be disassembled in painting.
For painting foam ceiling tiles, the following paints are suitable:
- Water-based;
- Latex;
- Acrylic.
All these types of paints dry quickly and lay down evenly. If the tile has been lamination, then it is not worth even trying to paint it. The paint will run off and the result is unlikely to please.
If the surface of the tile is rough, then it is better to use a spray gun so that there are no smudges or gaps. The joints must be covered with sealant. Then apply and let dry.

It is advised to choose paint renowned manufacturers, and it must meet the following requirements:
- Resistant to moisture;
- Dense structure;
- High adhesion;
- Should not fade from direct sunlight.
As for the choice of color, it should harmoniously fit into the interior of the room.
Price and reviews of foam tiles
Foam Ceiling Tile Price varied and ranges from $ 1 per square meter. This applies to conventional products. If the tile is obtained by extrusion, then the price of the product will be about $ 12, but the service life is much longer.
Many consumers note that such material behaves very well in any room. And of course, a big plus when choosing is the price. From a wide range of finishing materials, foam tiles are inexpensive. From the negative: over time, it can turn yellow and burst.
The average service life of this material depends on the manufacturer and varies from 5 to 15 years. The room in which the tiles were glued is of great importance. If this room is in high humidity, then the material will lose its operational properties earlier than in a dry room.
When the task is to renovate the ceiling cheaply, with low labor costs and beautifully, foam ceiling tiles can be a good solution. They are not very demanding on the surface to be pasted over, lightweight, have the property of absorbing sound. Tile manufacturers will delight you with a wide assortment. You can play with the design, choose the most suitable for the room: type, color, pattern, thickness of ceiling tiles.
Types and characteristics of foam ceiling tiles
First, the types of foam tiles can vary in shape:
- square, with a side length of 50 cm - such a tile is found most often;
- rectangular, in the form of panels - it is used much less often, as a rule, for decoration in non-residential premises public use;
- diamond-shaped;
- hexagonal.

Secondly, according to the manufacturing method:
- pressed or stamped - these tiles are obtained by compacting foam boards with an industrial press. Their average thickness is 7-8 mm;
- injection - cast in molds using high-temperature modes. In this way, thicker foam tiles are obtained (up to 14 mm);
- extruded. In the production of tiles of this type, it can be used decorative film(2.5-3 mm).
Also, tiles can vary in color, texture (smooth, embossed). Can be laminated or plain.
Foam ceiling tiles are also characterized by their positive and negative properties.
The pluses include:
- heat and sound insulation
- moisture resistance
- resistance to fungi and mold
- not susceptible to decay
- low price.
The tile is capable of hiding small imperfections on the surface. To stick it does not require any special skills or special tools.
Of the shortcomings, it is worth mentioning, first of all, fire hazard.
Important: There are types of tiles that are difficult to ignite and do not burn. This information can be seen on the packaging. In any case, it must not be allowed to melt, because this will lead the tile to deformation and the release of toxic substances into the air, which are formed when exposed to high temperatures.
Styrofoam ceiling tiles do not like direct sunlight. When exposed to them for a long time, the foam turns yellow and loses its strength. A large number of joints can also be attributed to the disadvantages of tiles, since the feeling of the integrity of the ceiling surface is lost. The exception is seamless tiles.
Seamless Styrofoam Ceiling Slabs
Thanks to tiles of this type, you can get a flat monolithic ceiling. The joint seams are masked by the special shape of the edges of the tiles. Such a tile is made by pressing (stamping). The size is usually 50x50cm. White colour. The foam in these tiles is very soft, which makes it possible to tightly connect the tiles to each other and make the joint practically invisible. For seamless foam tiles, there is its own laying technology. It is recommended to use a quick dry adhesive.
Styrofoam ceiling tile dimensions

- Standard sizes for square tiles will be 50x50 cm, there is a small tile - 30x30 cm.
- Rectangular tiles are made 100x16.5 cm.
- The thickness of foam ceiling tiles, as noted above, can vary from 2.5 to 14 mm.
How to glue foam ceiling tiles
In order to glue the ceiling with foam tiles on your own, you should use the instructions for its installation, where all its stages will be revealed step by step.
Installation instructions for foam ceiling tiles
- Preparatory stage. It includes cleaning the ceiling from old coatings, leveling strong drops and priming the ceiling surface. You also need to prepare tools: a sharp knife (clerical), a ruler, tape measure, skip, pencil and clean rag. It is important to choose the right adhesive.
- Markup. It is necessary to find the center of the ceiling - at the intersection of its diagonals. Additionally, you should draw lines that will connect the middle of the walls opposite each other. They must intersect at right angles at the same point.
Advice. If the center does not coincide with the light source (chandelier), then it is better to move the center of our marking there and glue from it. A chandelier hanging somewhere on the side of the tile will catch your eye and make your ceiling cheaper.
Through the center, using a paint cord, you should beat off two perpendicular lines along which the first tiles will be aligned.
- The first tiles converge at the corners in the center of the marking, corners are cut off near the cord of the chandelier, which will then be covered with its glass. Next, the foam tiles are glued in a spiral around the center. It is important to observe that the rows run parallel to each other, without allowing the tiles to move. At the junction with the walls, the tiles are cut with a knife to size before applying glue to them, so that it is possible to try on and correct the cut. As a rule, a small gap is allowed near the wall, which is then hidden by the ceiling plinth.
- Seam sealing. If the installation of the tiles was carried out using a putty, then it immediately fills all the gaps, the excess is washed off with a clean rag. When using other types of glue for sealing joints, it will work well. silicone sealant, the excess of which is also removed with a damp cloth.
Please note: as a rule, tile glue is transparent and viscous, rather inconvenient in practice. It assumes that the surface is perfectly flat and requires some time to press each tile. It is much more convenient to use a quick installation in white or a finishing putty.
Important. If there is a pattern on the tile, make sure that it is correctly positioned and not disturbed.
Finishing the ceiling with foam tiles, as we have seen, is convenient, not complicated and sufficient a budget option... Additional decor in the form of a rosette for a chandelier and a ceiling plinth will give the ceiling a complete look.
A little trick. Staining can be used to prevent yellowing of the tiles and for additional masking of joint joints.
Painting of Styrofoam Ceiling Tiles
Not all types of ceiling tiles can be painted. For example, laminated tiles are hardly suitable for this purpose. It is worth dyeing acrylic paint or water-based.
The paint is easy to tint in any shade. When choosing a paint, it is important to take into account such indicators as matt (gloss), hiding power, consumption, the presence of antiseptic additives.

It is better to paint with a roller from the window, with movements perpendicular to the window line. In corners, joints, ceiling plinth and socket, as well as problematic and unpainted areas, go through with a brush. To prevent the skirting from dripping onto the wall, it is better to stick masking tape along all the skirting boards along the top of the wall during painting.
Foam Ceiling Tile Price
Depending on the type of foam ceiling tiles, prices may vary. From 10 rubles / piece for the simplest white non-laminated tile up to 150 rubles / piece (seamless tile)
Where to buy Styrofoam ceiling tiles?
You can buy ceiling tiles in large hypermarkets of building and finishing materials, in construction markets or in online stores.
In Moscow:
- KUBik, shop of goods for repair: Moscow, Ferghanskiy proezd, 10A p. 3;
- Online store kubikstroy.ru: Moscow, Novocherkassky Boulevard, 13.
- Leroy Merlin, a chain of hypermarkets for household goods and cottages: Moscow, st. Verkhnyaya Krasnoselskaya, ow. 3а, TTS "Troika";
In St. Petersburg:
- Leroy Merlin, a chain of hypermarkets for household goods and cottages: St. Petersburg, ul. Kollontai, 3;
- Construction hypermarket "MOYDOM" St. Petersburg, Kolpino: st. Oktyabrskaya, 8, TC "OKA".
- "Builder" network of stores of goods for repair: st. Aircraft designers, 7, 9;
Video
Thus, it can be noted that with the help of foam plastic ceiling tiles, it will be easy and simple to make cosmetic repairs, and most importantly - inexpensive. With a little effort, you can get a beautiful, warm, flat ceiling with good sound insulation.
If there is a desire to make repairs in the apartment, but there is no big money for materials, then you should pay attention to the foam ceiling tiles. A wide selection of textures and colors allows you to find the best option for every taste. Ease of installation will allow you to glue the tiles yourself.


Peculiarities
Everyone from childhood is familiar with foam, the full name of which is extruded polystyrene foam or styrofoam. It is in great demand in the construction industry. Today, a variety of building materials are made from polystyrene due to its unique structure. It consists of a huge number of small air cells.
Polyfoam is characterized by lightness of design, ease of processing, and also is distinguished by the ability to create any shape of the product. Another important feature of this building material lies in the fact that it perfectly retains heat. The versatility of foam is manifested in the fact that it is used in the creation of many building materials.


Basically, the foam tiles for the ceiling are square in shape. Standard sizes are 250x250, 300x300 and 500x500 mm. On sale you can find rectangular options, which are commonly called panels. This option is used for finishing ceilings in public areas that are not intended for living. The standard size is 1000x165 mm.
Modern manufacturers Styrofoam ceiling tiles offer this material in other forms, sometimes you can even find options with an irregular shape. This variety allows you to create amazing compositions on different topics.


Styrofoam is presented in white and is complemented by an ornament on the front side. Such tiles are usually used for finishing the ceiling for painting with a water-based composition. To ensure excellent paint absorbency, this material has a matte finish. This option costs very little, so it is very often used for subsequent painting.
The foam board is up to 14mm thick, but standard sizes range from 2.5mm to 8mm. The lightness of the material is one of its main advantages.
So, to cover a ceiling of 20 m², you will need about 4 kg of foam tiles.


When calculating the required number of tiles measuring 500x500 mm, the ceiling area should be rounded to a larger figure, which is divisible by five. Since in the last row the tiles will have to be cut. If diagonal laying is used, then another 15% should be added to the total number of tiles.


Advantages and disadvantages
Extruded polystyrene foam, like other materials, has advantages and disadvantages.
The main advantage of foam ceiling tiles is that they can be easily glued to any surface. The low weight of the material, as well as the convenience of cutting, contribute to quick and easy installation.
This material is characterized by excellent heat and sound insulation properties. It can even be used to equip children's rooms, since it is safe, because it does not contain harmful substances in its composition.


Many people prefer this finishing material, because it is inexpensive, and the glue for installation has an affordable cost. If you choose the right finishing material for the ceiling, then it will last for many years. When using tiles big size ceiling cladding can be produced very quickly. Since the foam tile has a small thickness, the height of the ceiling after its installation practically does not change.
Styrofoam tiles are paintable. White material can take on any shade. The tile can be painted up to seven times.
Ease of installation allows you to do everything yourself without special skills and abilities.


But besides the advantages, the foam tile also has some disadvantages, which you should familiarize yourself with before deciding to work with this material.
The main disadvantages of polystyrene is its fragility, so you need to be very careful with it. A significant disadvantage is vapor permeability. The ceiling can no longer absorb excess moisture. The seams between the tiles are difficult to mask. You shouldn't buy very cheap foam as it tends to yellow quickly.


Views
Modern manufacturers offer three types of foam plastic boards, which differ in properties and manufacturing method.
Stamped
It is made from polystyrene blocks using the stamping method. Its main characteristics are light weight, low density, as well as the presence of a relief print. Its thickness varies from 6 to 8 mm.
This tile is the cheapest, so its properties are significantly lower than that of other types of foam tiles. It does not have a protective coating, is afraid of exposure to water and is fragile. It is forbidden to wash such a ceiling, therefore, you can only use the dry version for cleaning, or wipe the surface using a damp sponge.
This type of tile cannot boast of a clear shape, therefore, gaps of different sizes may appear during installation.


Extruded
It is made from polystyrene mass due to the application of the pressing method. She is different high density... Its thickness is generally only 3 mm. It has a protective coating, so it can even be washed with water. Since the extruded tile has a smooth surface, it can imitate wood, marble, or other materials.
The main advantages are long service life, beautiful appearance and excellent durability. If we talk about the shortcomings, it is worth highlighting that the tile does not lend itself to staining, has an uneven surface from the inside out, and also noticeable connecting seams are formed during installation.


Injection
It is of the highest quality. It is produced using the method of baking polystyrene in molds. Its thickness is 14 mm. The peculiarity of this type is the increased strength and clarity of the geometry of the embossed print. The joints of the tiles during installation are of high quality, which guarantees the creation of a coherent surface.
The hot plate is fireproof as it does not burn. It can be washed with various detergents. If desired, it can be painted.
This option is suitable even for finishing a bathroom.


How to choose?
To make the ceiling look beautiful and even, you need to adhere to the advice of experts when choosing it:
- The tile must have straight edges, then its installation will not take much time, and there will be no large gaps between the tiles. If it has curved or deformed edges, then it should not be purchased at all.
- It is necessary to check the material for strength. It is enough to apply a little pressure on the edge of the tile. If it crumbles, then material of this low quality should not be purchased.
- It is necessary to pay attention to the uniformity of the structure and density of the foam. There should be no waves or dents on it.

- An important criterion is the quality of the print. The drawing must be clear and legible.
- Tiles should be checked for quality before purchasing. It is necessary to lift it by one edge and shake it slightly. If the edge is not broken off or deformed, then it can be used for finishing the ceiling.
- If you want to create a single canvas without joints, then you should use the seamless option. It has a straight edge with no piping. But here you need to competently approach the gluing process, each tile must be precisely fitted to the adjacent one.


- Don't buy foam tiles online, because the material in the picture and in reality is not always the same. It is better to look at the samples in order to understand how the material looks like, what it feels like.
- Many buyers leave positive reviews about the foam tile. Therefore, remember that even among inexpensive materials, you can find a decent option for repairing.


Surface preparation
First you need to pay attention to the condition of the ceiling surface, on which the foam tiles will be glued in the future.
It is necessary to carry out preparatory work:
- If there are level differences of more than one centimeter on the ceiling, then it is worth starting by leveling the ceiling.
- If wallpaper was glued on the surface, it is necessary to dismantle them, and also carefully treat the ceiling with a primer.
- To remove the whitewash from the surface, it must first be washed off and then primed.


- If the ceiling has been painted oil paint, then it must be thoroughly washed with soapy water, then remove all swollen paint.
- The ceiling painted with water-based paint must be moistened abundantly, then dried using a heater or a draft, and after 30 minutes the paint can be removed from the surface with a spatula.
For gluing tiles to the ceiling, you can use one of the methods: parallel, diagonal, with an offset (reminiscent of brickwork) and combined (carried out through the use of tiles of different colors).


In order for the elements to be arranged evenly and in a certain order, first you need to make markings on the ceiling:
- You need to stretch two perpendicular lines using a paint cord. It needs to be pulled like a string. Each line will divide the surface into two equal parts. The geometric center will be located at the point where they intersect.
- To make the styling in a parallel way, it is enough to create a marking of two lines. To be sure, you can also draw parallel lines at a distance equal to the width of the tile.


- For use diagonal way additional markup should be done. From the geometric center, you need to draw lines to the perpendicular lines of the first marking, while maintaining an angle of 45 degrees.
- The first tile should be glued in the center of the ceiling. There are times when work can be started from the most visible corner of the room.


Gluing technology
The process of gluing foam tiles to the ceiling is quite easy and simple:
- Glue must be applied to the tiles, namely, in the center and along the edges. If desired, glue can be applied to the entire surface.
- Press the tile firmly against the ceiling surface and wait about 30 seconds.
- You need to gently remove your hands. If the tile sticks to the ceiling, then you can move on to the next one.


- The last row of tiles most often has smaller size than her standard height, so you need to cut it off with a sharp knife to create the desired size.
- When the entire ceiling is glued, it is worth moving on to working with cracks. To eliminate them, you can use an acrylic sealant or putty. If the tiles are glued onto a putty, then the joints can be sealed immediately during the gluing process.
- After completing all the work, it is necessary to let the tiles dry completely, so the ceiling should not be touched throughout the day. After drying, if desired, you can start painting the tiles.


How can you wash?
Ceiling tiles can be cleaned of dust with a vacuum cleaner or a soft fluffy brush. But sometimes you should just wash it.
To clean the foam tiles, you can use the detergents that are at hand, but it is better to give preference to liquid products. It can be liquid detergent or dishwashing detergent.
The powder usually contains abrasive particles that will not damage the tile surface, but can leave streaks after washing.


You should be very careful with stamped tiles, because they have a low density, so they can only be washed as a last resort. Injection and extruded tiles are not afraid of contact with water, as well as mechanical stress during washing.
Styrofoam tiles are cleaned in the same way as stretch ceiling... You need to take a soft cloth or sponge, pre-moisten in soapy water, which consists of detergent and water. The solution must be distributed between the embossed depressions. You can use a damp sponge or flannel to wash off the lather.
Among the variety of methods for finishing ceilings, foam ceiling tiles are often used. Low price and simple installation of panels will allow you to quickly and inexpensively update the interior.
Views
Foam ceiling tiles are a unique finishing material. Segments are produced in different forms and sizes. Among the common are square panels with sides of 50 cm. Hexagonal pieces or diamond-shaped tiles, which look unusual and form patterns, are also popular.
 In the photo, the tile for the ceiling made in the form of rhombuses in the office
 Ceiling tiles are divided into:
- Stamped. Made of polystyrene foam blocks using the stamping method. These panels are lightweight, with a segment thickness of 8 mm. The advantages are relief structure and low price. Disadvantages - lack of protective film on the surface, fear of moisture;
- extruded is obtained by pressing raw materials from expanded polystyrene. Thickness - 3 mm. On top of the segments, a special protective layer is applied to protect the parts from mechanical stress, preventing the settling of dust particles. Panels imitate natural materials- wood or marble. Minus - the impossibility of staining;
- injection is made using the method of baking polystyrene in molds. The difference between such tiles from previous types is high strength. The thickness of the parts is 14 mm. The surface of the panels is embossed and patterned, while the seams between adjacent segments remain invisible after gluing.
Separately, mention should be made of seamless tiles, with the help of which smooth and monolithic ceiling surfaces are obtained. Thanks to the special shape of the edges, the joints between the parts are invisible.
Advantages
Foam ceiling tiles have the following advantages:
- light weight allows the use of segments for decorative design any surface or ceiling structure;
- sound and heat insulation properties, resistance to temperature extremes, high humidity;
- masks flaws and defects in the base ceiling;
- easy to install, you can glue the ceiling with expanded polystyrene tiles on your own in a short period of time;
- ease of care. It is not afraid of water, so wet cleaning is suitable for it;
- does not take the height from the room;
- replacement of a defective element without dismantling the finish from the entire surface of the ceiling;
- low price;
- assortment of colors, textures. Imitation natural materials, beautiful relief or just smooth surface segments find their place in various interiors. If desired, the ceiling decor can be painted in any color.
Minuses
In addition to the pros, foam ceilings also have disadvantages:
- unnaturalness, under the influence of elevated temperatures, they emit harmful substances;
- instability to fire. Strong heating will have a detrimental effect on decorative finishing, the material will melt and ignite. Therefore, it is undesirable to install such ceilings near heating devices, or to mount lighting devices with high-power incandescent lamps next to the tiles. For example, carob chandeliers with bulbs pointing up to the ceiling;
- afraid of mechanical stress. The surface of the segments is represented by a soft structure, it is easy to damage it;
- instability to UV rays. When exposed to direct natural light for a long time, white tiles turn yellow, and colored tiles lose their original shade;
- before finishing, the ceiling base will require careful preparation - leveling, puttying, applying a primer;
- low decorative properties. Regardless of the pattern on the surface of the parts, it will not work to create a luxurious interior with this type of finish;
- after installation, visible seams remain on the surface, which will require sealing with a sealant.

Calculating the number of foam tiles on the ceiling is not difficult. To do this, you need to calculate the area of the ceiling surface. The standard dimensions of the segments are 50x50 cm. For cladding 1 m² of the ceiling, 4 such parts are needed. Therefore, to determine the number of tiles, the ceiling surface area is multiplied by 4 segments.
For non-standard tile sizes or shapes, the calculation is carried out in the same way. First, determine how many pieces of tiles fit on 1 m² of the ceiling, and then multiply the resulting figure by the area.
3-5% is added to the resulting figure in reserve in case of waste or marriage. Also, the consumption of elements will be greater if the installation is carried out diagonally.