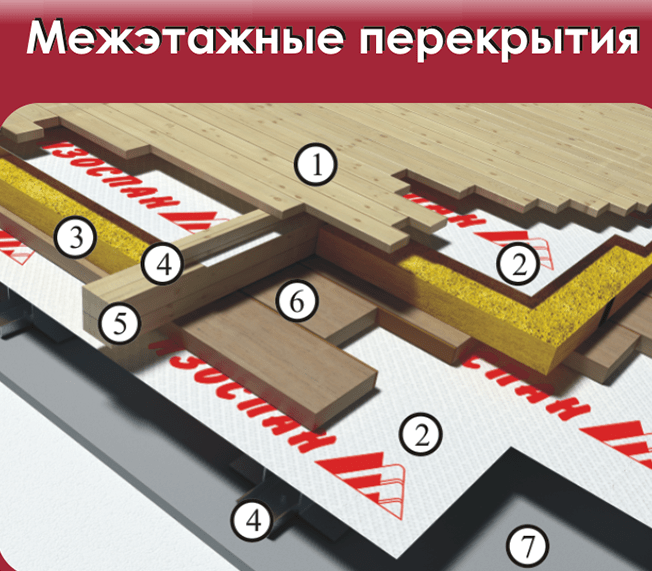
Izospan with mineral wool insulation of the ceiling. Attic and interfloor floors
Hydro-wind protection
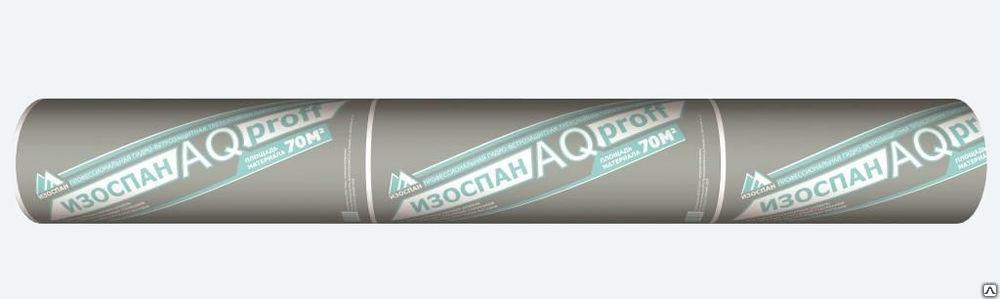
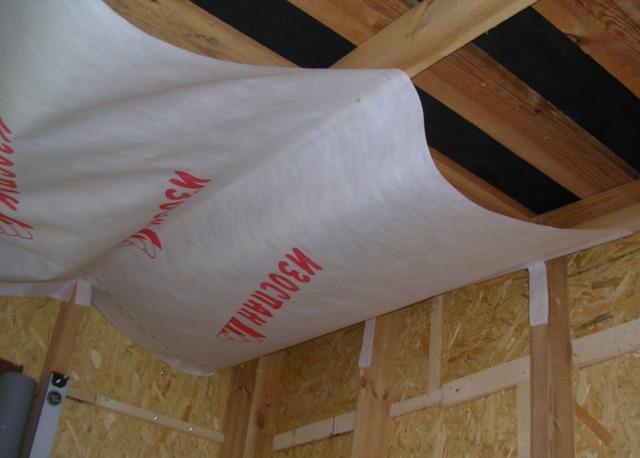
In the structures of attic floors to protect the insulation from weathering and from moisture from the under-roof space, and in the structures of interfloor floors, to prevent the penetration of insulation particles into the living space, it is recommended to use hydro-windproof membranes Izospan AQ proff, Izospan AQ 150 proff, Izospan AS 130, Izospan AS or Izospan AM that do not interfere with the release of residual moisture from the insulation and wooden structural elements.
Installation instructions for hydro-wind protection
Izospan AQ proff (Izospan AQ 150 proff, Izospan AS 130, Izospan AS, Izospan AM) stacked with the logo side up. The hydro-windproof membrane is mounted on top of the insulation, with an overlap (the width of horizontal and vertical overlaps is 15–20 cm). The material is fixed on the beams using a construction stapler or in another way. It is recommended to glue the joints of the hydro-windproof membrane to wood, concrete and other surfaces with a connecting tape Izospan ML proff or Izospan KL +... It is necessary to arrange a gap of 4–5 cm between the hydro-windproof membrane and the finished floor. For this, antiseptic wooden slats 4 × 5 cm are mounted on top of the hydro-windproof membrane.
Vapor barrier
In the structures of attic and interfloor floors, it is recommended to use Izospan RS, Izospan B or Izospan B fix.
Vapor barrier installation instructions
Fits in between finishing material ceiling and draft ceiling, smooth side - to the draft ceiling (rough side - down). The vapor barrier is installed with an overlap (the width of the horizontal and vertical overlaps is 15–20 cm). The material is attached to the sub-ceiling using a construction stapler or galvanized nails with a wide head.
To ensure the tightness of the vapor barrier layer:
1.overlaps of vapor barrier sheets Izospan RS Izospan KL + or Izospan ML proff... Vapor barrier canvases overlaps Izospan V must be glued with connecting tape Izospan KL +, Izospan KL, Izospan SL or Izospan ML proff... Vapor barrier horizontal overlaps Izospan B fix glued with adhesive tapes applied to the material web, vertical overlaps Izospan B fix glued with adhesive tapes Izospan KL + or Izospan ML proff.
2.the joints of the vapor barrier to wood, concrete and other surfaces must be glued with a connecting tape Izospan ML proff or Izospan KL +.
Finally Izospan RS (Izospan B, Izospan B fix) fastened to the rough ceiling with antiseptic wooden slats 4 × 5 cm (when finishing the room with clapboard, plywood, decorative panels, etc.) or galvanized profiles (when finishing with plasterboard). The interior decoration of the room is attached to the slatted frame or galvanized profiles with a gap of 4–5 cm between the vapor barrier and the decoration.
Instead of Izospana RS (Izospan B, Izospan B fix) as a vapor barrier in the structures of attic and interfloor floors can be used Izospan C or Izospan DM. Izospan DM fits similarly Izospanu RS, Izospan C fits similarly Izospanu B.
Also, in the structures of attic and interfloor floors, it can be used as a vapor barrier with an energy-saving effect Izospan RF, Izospan FS, Izospan FD and Izospan FX.
It is laid between the finishing material of the ceiling and the rough ceiling, metallized surface down. The reflective vapor barrier is installed with an overlap ( Izospan FX- end-to-end), the width of horizontal and vertical overlaps is 15–20 cm. The material is attached to the rough ceiling using a construction stapler or galvanized nails with a wide head. To ensure the tightness of the vapor barrier layer, the overlaps of the reflective vapor barrier sheets must be glued with a metallized connecting tape Izospan FL; the joints of the reflective vapor barrier to wood, concrete and other surfaces must be glued with a connecting tape Izospan ML proff or Izospan KL +... Finally Izospan RF (Izospan FS, Izospan FD, Izospan FX) fastened to the rough ceiling with antiseptic wooden slats 4 × 5 cm (when finishing the room with clapboard, plywood, decorative panels, etc.) or galvanized profiles (when finishing with plasterboard). The interior decoration of the room is attached to the slatted frame or galvanized profiles with a gap of 4–5 cm between the reflective vapor barrier and the finish. It is necessary to maintain a gap of 4-5 cm between the reflective surface Izospana RF (Izospana FS, Izospana FD, Izospana FX) and material interior decoration to provide conditions for thermal reflection.
Chemical means for processing wooden elements can lead to the destruction of IZOSPAN materials, therefore, the installation of IZOSPAN materials should be carried out only after the treated wooden structural elements have completely dried.
Appearance materials, the presence and location of the logos may differ from the original.
Vapor barrier of any building is an important step. modern construction... Effective protection of the premises from moisture and condensation can significantly increase the operational characteristics of the building, make it more reliable and durable. Correctly executed instructions for the use of the selected material can ensure the complete absence of condensation. This will have a positive effect on the temperature regime and will ensure a constant temperature in the house, reducing heating costs.
Isospan is one of the most demanded vapor barrier materials on the construction market. Its technical characteristics fully comply with existing requirements, allowing you to quickly, efficiently and inexpensively perform work in any building, regardless of its size and purpose. The use of Isospan for ceiling insulation is a popular solution, both for professionals and for those who want to do vapor barrier with their own hands. For a complete understanding of the basic rules of working with the material, we recommend that you familiarize yourself with its varieties and features of the laying technology.
What is isospan
This material is a diffuser-membrane film, the production of which is based on polymerization of polyethylene. Existing technologies make it possible to produce material with different technological characteristics. At the same time, the format, packaging and surface features allow laying Isospan on the ceiling with maximum efficiency and quality.
This material is especially in demand for work in rooms with high humidity, as well as buildings that are insulated with soft materials - mineral wool, foam foam or expanded polystyrene, with joints polyurethane foam... Among the main functions that this vapor barrier material will perform, it is necessary to highlight:
- protection of ceilings from the appearance of fungus and various bacteriological formations,
- insulation of insulation and protection from getting wet,
- containment of condensate and the possibility of its evaporation in a natural way.
In addition to the above properties, it is worth laying Isospan because of its high strength and elasticity, which greatly facilitates work processes. Such a vapor barrier is environmentally friendly and can be used in rooms with any air temperature.
Varieties and technological features of isospan
The modern construction market offers four types of vapor barrier of this type, suitable for protecting premises from condensation, steam and other manifestations of moisture. They are conventionally designated by markings A, B, C and D. The rest of the material rulers are designed for special operating conditions, for example, for a bath. They have a higher cost and are less commonly used in mass construction.
Produced in two types:
- roofing - used for wind and moisture protection. It is advisable to fix such material between the roof insulation and the flooring. It prevents under-roof condensation and frost formation.
- wall - used to insulate partitions and ceilings. It has a lower vapor permeability index, but at the same time it is lighter and perfectly repels moisture.
It is a two-layer protection of heat-insulating materials with high versatility. Fits with inside insulation of interfloor ceilings in attics and basements.
Two-layer vapor barrier material that is used to protect against steam, condensation and water on both sides. Differs in increased strength and can be effectively used for waterproofing concrete premises.
Excellent option for outdoor use. Made on the basis of woven fabric, this material will perfectly cope with any load, including large volumes of water and snow.
Which side to lay isospan correctly
The first question for beginners is choosing the right side of the material. The main purpose for which isospan is laid on the ceiling is to protect the insulation from moisture penetration. Therefore, for maximum efficiency in performing the required tasks, a smooth layer of material should always face the insulation. Along with this, outdoor and roofing work with this insulator has some differences. When choosing which side to put and isospan, remember that it is more important for the roof to ensure the unhindered steam outlet to the outside and protect the insulation and ceilings from precipitation. In this case, the smooth side of the material should be facing outward.
Isospan laying on the ceiling
Ceiling vapor barrier technology can include the installation of one or more layers of coating. In order to properly lay Isospan, it is necessary to take into account the following characteristics of the treated surface:
- functional purpose of the insulated surface
- material of manufacture,
- the expected load on the material in the form of moisture and steam.
Installation on concrete ceilings
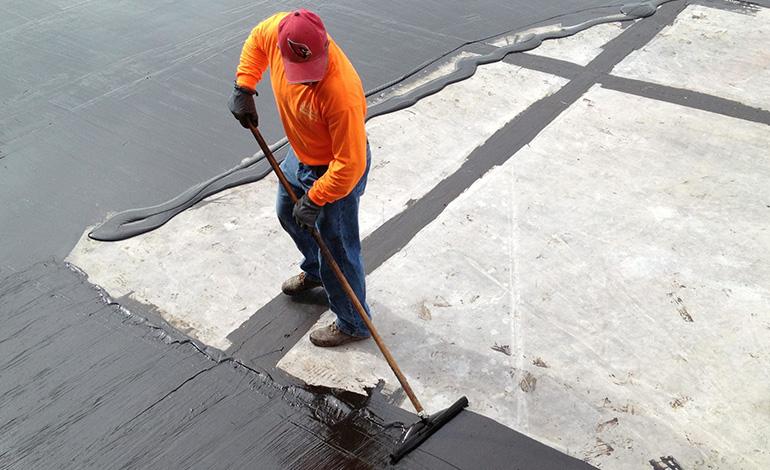
Considering the fact that most of the concrete floors are covered with bituminous mastics, the use of isospan here will not be effective. Nevertheless, when using soft insulation, vaporization should be present to extend their service life and improve technical characteristics.
Izospan with outside fastened to a previously prepared frame, while for installation on concrete surface, plastic dowels are used. A wooden or galvanized lathing can act as a frame, which serves as the basis for laying insulation, vapor barrier and facing material.
Installation on wooden ceilings
Insulation of surfaces in wooden house is one of the main tasks to improve its performance and quality characteristics. Izospan is used here regardless of the presence of insulation and is mandatory for use on both sides of the treated surface. The laying process itself is not particularly difficult and any available methods can be used to fix the material on the surface.
Conclusion
When working with this material, it is necessary to strictly adhere to the manufacturer's recommendations, observe the technology of work and choose the right type of material for installation in this or that case. If you correctly put Izospan on the ceiling, it will fully be able to provide the necessary characteristics and will fully reveal its own capabilities.
Laying Izospan on the ceiling - which side to lay
What is Izospan, what is it for, and which side of it should be properly laid on the ceiling. Varieties of material.
Which isospan to use for the ceiling? Today isospan is very popular. This is a new generation material that is used in construction to provide effective thermal insulation.
Dignity
The advantages of this material:
- allows you to protect insulation from water and wind
- allows you to significantly save money on insulating repair work
- used both in small construction and large construction projects
- resistance to low temperatures
- easy installation
- availability of all certificates, including the certificate of conformity of the GOSSTROY RF
Very often, Izospan is used for ceilings, for an attic or basement, where the issue of ceiling insulation is quite acute due to huge heat losses.
Isospan species
Izospan for the ceiling is divided into 4 groups: A, B, C, D. They include many varieties, each of which has its own characteristics.
All of these varieties are designed to isolate structural elements from moisture, wind or steam. They are used to protect all structural elements: roofs and facades, walls and floors, floors.
The use of this type makes it possible to protect the internal parts and thermal insulation from moisture. It is mounted on the outside of the insulating elements.
The main feature of this type is vapor permeability. The structure of the coating differs depending on its purpose.
Which side to put Izospan in on the ceiling? It is mounted with the smooth side to the inside of the thermal insulation. The side that will be in the room has fine fibers, which are designed to retain moisture.
This type is used to protect interior walls, roofs, ceilings, floors, interfloor and attic floors.
The most basic positive characteristics include:
- high strength, because films of this variety are very durable and reusable,
- excellent reliability, since during the operation of this building material the heaters are dry in all situations,
- individual versatility, because it can be used for a wide profile of structures,
- but the most important advantage is the fact that Isospan B is an environmentally friendly product, because it does not contain any toxic substances,
- the material is practical, fireproof and easy to install, due to which this material can be actively used not only by professionals, but also by those people who are far enough from construction.
This type is similar to the previous variety, but it is more reliable. Its disadvantage is that it has a higher price. It is based on an ultra-dense polypropylene sheet, capable of effectively protecting against moisture, steam, condensate.
This type is used for frame walls, for the protection of "cold" type roofs and ceilings in damp rooms.
This species is referred to as universal variety, which is able to protect surfaces from both internal and external influences. Most often it is used in the construction of pitched and flat non-insulated roofs, foundations, floors and basement floors.
So which isospan to use for the ceiling? This is Isospan B. It is excellent for ceilings, as well as for the protection of roofs, floors, interfloor and attic ceilings.
Which isospan to use for the ceiling
Isospan species. Isospan variety that is suitable for the ceiling.

Building structures and thermal insulation materials provide comfortable accommodation in room. Being constantly under the negative influence of external and internal climatic factors, they themselves need protection to extend their service life. One of the circumstances that deteriorate the properties of the insulation is getting wet due to the penetration of water vapor.
Izospan's line of vapor and waterproofing materials is designed to provide reliable protection load-bearing structures and moisture insulation. In order for the effect of the material to be effective, it is necessary to carry out the installation correctly.
Why use a vapor barrier?
The indoor air is saturated with moist steam, which tends to leave the house through the walls and ceiling. In the cold season, it turns into condensate, which settles in the insulation and on the surface of the building structures. High humidity significantly reduces the insulating properties of heaters and causes the appearance of mold and mildew on the surface of floors and walls.
The installation of a vapor barrier layer, which retains moisture and does not prevent its evaporation, will eliminate the listed problems. Among the numerous products designed to protect the building from negative impacts, materials of the Russian brand Izospan are deservedly popular. The films and membranes of the company are made from polymeric materials and receive special properties... The dimensions of the canvases are selected in such a way as to facilitate installation as much as possible, and their high strength ensures a long service life.
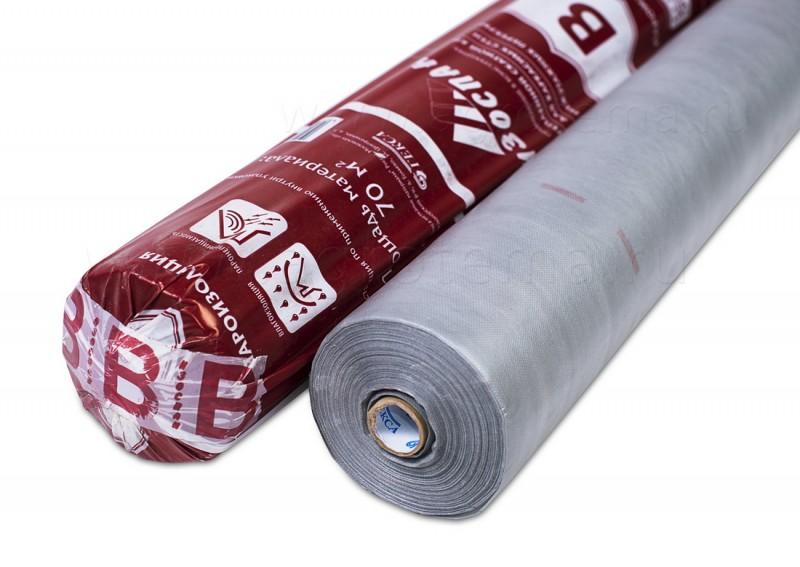
Izospan B - characteristics and features
Regardless of the purpose of the building being erected, it is necessary to install protection against steam and moisture. Izospan B film has been specially developed for this purpose. It is a propylene sheet, one side of which is smooth, and the other is covered with perforations that form a roughness. After unrolling the material, the question arises, which side of the insulation should it be mounted on? To properly fix the vapor barrier film, you need to figure out how it works.
The main purpose of the film is to protect the insulation from getting wet, and the room from the penetration of small particles, heat insulating material... This is especially necessary when placed as insulation mineral wool which is very sensitive to moisture and has an unpleasant tendency to spread fine fibers.
The smooth surface of the web forms a sealed vapor barrier, and the rough coating serves as a place for collecting condensate, which subsequently evaporates. The film has the following technical characteristics:
- resistance to direct exposure to ultraviolet radiation for 3-4 months,
- pair resistance - 7,
- density - 72 g / m2,
- breaking load - 130 (longitudinal), 107 N / 5cm (transverse),
- composition - 100% polypropylene,
- water resistance - 1000 mm water pillar,
- operating temperature - from -60º to + 80º C.
The membrane is durable and elastic, it reliably protects metal constructions from corrosion, and insulation and wooden elements from fungus and mold. The product is produced in rolls with a width of 1.4 and 1.6 m, an area of 35, 70 m2.
The Izospan B vapor barrier film is installed from the inside of the room. It is used for insulated roofs, floors, attic floors, walls. The manufacturer's instructions and information about the material give an idea of which side to turn the canvas to the insulation during the fastening process. The smooth surface always adjoins the thermal insulation, while the fibrous surface remains outside and retains moisture from the steam, preventing it from penetrating into the structure.
The vapor barrier is laid with an overlap of the canvases of 15-20 cm, installation is carried out from the bottom up. The joints require reliable sealing; for gluing, a special adhesive tape produced by the company and marked FL is used.
Izospan SL tape is also suitable. Areas of abutment to the structure, lathing, engineering holes and niches are sealed with a self-adhesive sealing tape, which is simultaneously pressed against the protective sheet and the contacting surface.
Installation of a film for insulation pitched roof occurs according to the following scheme:
- the roll is cut into strips of the desired size,
- the first strip is attached from below parallel to the floor, with the smooth part to the insulation,
- the next tape is mounted, overlapping the fixed film by 15 cm,
- fixation of the canvases is carried out with a construction stapler or galvanized nails to the rafters of the building,
- joints are sealed with special tape SL,
- a crate is stuffed over the vapor barrier, creating a gap of 40-50 mm,
- finishing material is attached to the wooden slats.
Fastening Izospan B when insulating the floor (floor) occurs in several stages:
- canvases are laid with a rough side to rough floor(to the ceiling)
- the places of abutment to the walls and the joints of the tapes are glued with the SL tape,
- the insulation is laid on smooth surface films,
- the top is covered with waterproof Izospan C,
- the installation of the floor covering is in progress.
When fixing the vapor barrier on the inner walls and partitions, the canvas is laid directly on the insulation and attached to wooden planks... A crate is necessarily stuffed on top of the film, creating a ventilation gap of at least 30 mm. With subsequent plasterboard finishing, installation is carried out on a galvanized profile.
The use of Izospan B, which protects the insulation and the surface of the walls from moisture, extends the life of the thermal insulation and the entire structure of the building.
Izospan V: how to mount and which side to the insulation
What is vapor barrier used for? Technical characteristics of Izospan B material, its pros and cons. Installation rules for this vapor barrier.

How to stack isospan
In the process of performing roofing work, it is necessary to protect the ceiling from condensation by applying a vapor barrier. The most demanded material in the construction market is isospan, since it has not only quality characteristics, but also its price is quite acceptable. It should be noted that the insulating material is used not only in roofing works, but also for vapor barrier on the ceiling, floor and walls. In order to understand how to lay isospan, you need to familiarize yourself with the types of material and take into account the rules for working with it.
Isospan species
Now in more detail about the variety of types of material.
Provides supporting structure and insulation protection from under-roof condensation, wind. This material is used as waterproofing on roofs and insulated walls of any type. In this case, the installation is performed on the outside of the insulation material.
Izospan A (with flame retardants)
Its use eliminates the risk of ignition of the structure during welding and when using blowtorches.
Izospan AM
The membrane is a vapor-permeable universal material used to protect the insulating layer of the roof from wind and steam. Can be installed directly on top of the thermal insulation layer.
Izospan AS
The vapor-permeable membrane consisting of three-layer polypropylene is also hydro-windproof. It is used as an insulating material for walls, roofs, facades, attics.
For the manufacture of the material, reinforced polypropylene is used, which contributes to its good strength and high resistance to mechanical damage. One side of this material is smooth and the other is rough.
It is made of super-dense polypropylene cloth. Externally and structure similar to type B. Completely protects against various kinds of moisture. More expensive, as it has a large margin of safety. It is used for "cold" roofs, interfloor structures, floors.
Versatile high-tech polypropylene material. Has a high degree of strength.
Laying material on the floor
By performing a vapor barrier in the house, you can avoid the accumulation of condensation in the underground, preventing the appearance of fungi and mold on wooden floor... To understand how to do the job correctly, you must follow the step-by-step instructions.
Preparing the subfloor
Before installing the vapor barrier, wooden blocks and other details, it is important to treat with a special antiseptic material that will protect the floor from rotting and insect infestation. If the vapor barrier is made on a floor that has already served a lot, all materials are removed and debris is removed. Wooden parts are also treated with hot linseed oil or primer and put into place.
Vapor barrier installation process
The initial laying of the material serves as a vapor and waterproofing layer that prevents moisture and vapor from entering the ground. The roll should be spread on a horizontal surface and laid on the floor. The strips of material must be overlapped by 15 cm. The film is fastened to each other using mounting tape; double-sided tape is also suitable. This connection prevents gaps through which moisture can enter. Fastening to the logs is performed with a stapler or nails.
Installation of insulation
Between the lags, insulation can be attached to the vapor barrier layer. Moreover, its thickness should be at least 50 mm. Mineral wool, polystyrene foam or expanded polystyrene mats are the best options. During the installation process, it is important that no gaps form, and the material fits perfectly to the joists.
Laying the second vapor barrier layer
The second layer serves as a barrier for steam that comes out of the room, preventing it from getting to the insulating layer. The material must be laid so that a gap is formed between the vapor barrier layer and the finished floor.
Floor installation (finishing)
Floor boards are laid on the logs. Subsequently, they are covered by the finish floor covering... It can be laminate or parquet.
Installation nuances
- When laying double-sided material, it is important to face the smooth side of the insulation, with the rough side out. Thus, the rough surface perfectly retains steam, preventing it from penetrating inside.
- When using polypropylene film, which has a one-sided laminated coating, the smooth side is also turned onto the insulation.
- Foil material should be laid with the aluminum surface facing out.
The exception is Izospan B, which is mounted with a rough surface inward.
Fastening the material to the ceiling
- The surface of the ceiling is thoroughly cleaned and primed. If the walls are thin, and the temperature in the winter season reaches thirty degrees, it is advisable to lay the material both outside and inside.
- Heat-insulating material is laid on the ceiling, having previously pulled it.
- The vapor barrier is attached to the walls with a construction stapler or double-sided tape. In this case, it is important to overlap the fastening along the perimeter of the ceiling. Between the beams of the ceiling, the film is fixed with nails with a wide head. The distance between the fasteners is 30 cm. The joints can be fixed with tape.
- If there is no need for additional thermal insulation insulation, the vapor barrier can be fixed with thin wooden slats. They are screwed in half a meter to each other. Otherwise, the fixing is carried out after the heat-insulating layer has been laid.
Installation of isospan on the walls
The vapor-permeable membrane Izospan A, AQ, AM, AS is capable of protecting the structure from wind and cold and the escape of steam. It is not difficult to install Izospan on the walls.
- On the outer side of the insulation, over the beams and racks, sometimes Izospan is fastened along the rough sheathing with a stapler or nails.
- Installation starts from the bottom line, moving to the top with horizontal stripes. In this case, it is important to do the work with an overlap of at least 10 cm at the joints of the panels.
- If the room is finished with clapboard, the material can be fastened using antiseptic wooden slats 4 × 5 mm.
- When decorating a room with plasterboard, it is important to give preference to a galvanized profile.
- The material is laid on a layer of insulation, wrapping the smooth side to it.
- Internal work can be done on a rack frame or galvanized profiles. At the same time, it is important to maintain gaps of 4 cm. The material can be sealed with a connecting tape, which is attached to the joints.
- In places where Izospan adjoins wooden or other surfaces, it is worth gluing with a special tape.
Having familiarized yourself with the main nuances of installing the material, you can do this work on your own. It is important to arm yourself with the right materials and be patient.
See how the Izospan vapor barrier is installed in non-insulated pitched roofs:
How to stack isospan
Learn how to lay Izospan. The article describes the types of isospan and its scope.
Izospan today is considered one of the most popular high quality vapor barrier materials presented in the domestic market for goods and services. As practice shows, consumers distinguish among the advantages a high level of strength, ease and simplicity of installation work. The production of Izospan V, instructions for use for the ceiling will be discussed below, is a large company Geks, located in the Tver region.
Which isospan should be used for the ceiling
Today on sale you can find a large number of varieties of isospan, used for thermal insulation of the ceiling. Among the existing types, the following are worth noting:
- "Izospan A" - a film used as a protective material for heaters of all types, from atmospheric moisture to strong gusts of wind;
- "Izospan AM" - is a diffusion membrane, consisting of 3 layers, this type of material, as a rule, is mounted on top of the insulation;

- "Izospan A.S" - if we compare the performance indicators, then it is worth noting that this material, intended for finishing the ceiling surface, is identical with respect to the previous type, distinctive feature this isospan is a lower level of vapor permeability;

- "Izospan AQ proff" - the main advantage of this type of material for ceilings is a high level of tensile strength;
- "Izospan C" - this type of membrane, as a rule, is used mainly for arranging premises from the inside, in some cases it is possible to use Izospan outside, but this is extremely rare;

- "Izospan D" - is a multifunctional film, which is covered in the production process with a special anti-condensation coating;
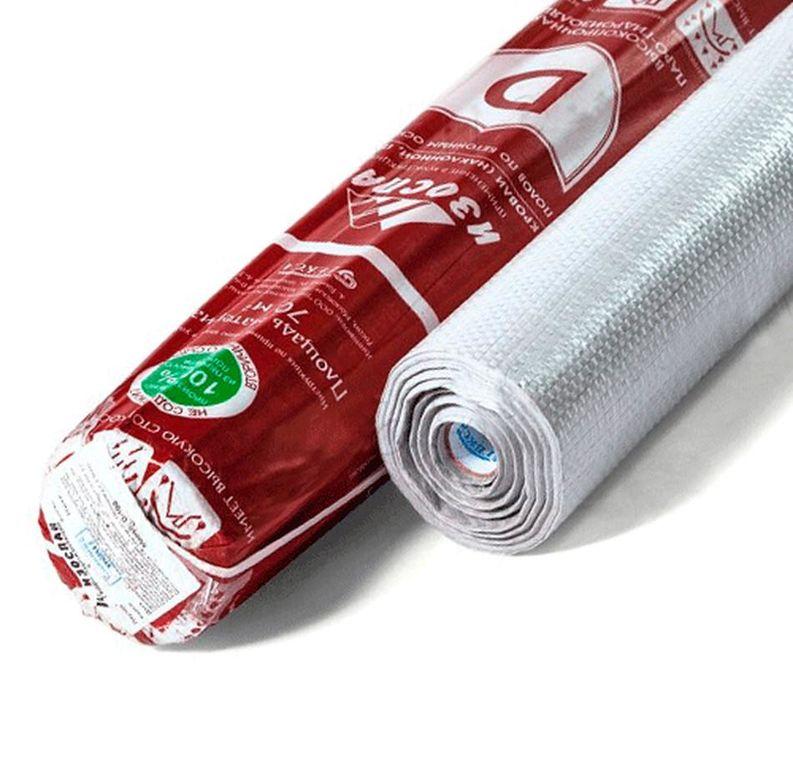
- "Isospan B" - according to the attached instructions, this material is used as a protection for insulation, this type is suitable for both external and internal installation work.
As practice shows, "Izospan V" is the most popular building material on sale on Russian market and is used much more often.
Among the main advantages of this material, intended for ceilings, the following points can be highlighted:
- high level of strength - the film for ceilings does not tear during installation work, has a long operational life;
- reliability - thanks to this material, the insulation mounted on the ceiling remains dry at any time of the year, regardless of temperature conditions;
- versatility of the material - insulation can be used for any ceilings, regardless of the type of surface and design features;
- environmentally friendly material - the used film "Izospan V" for ceilings does not emit in environment harmful substances;
- quite easy to carry out assembly work for fastening isospan;
- high level of fire safety of isospan.
Due to its unusual structure and structure, the material contributes to a fairly rapid weathering of the accumulated condensate.
Attention! The use of "Izospan B" prevents the appearance of fungus and mold on the surface of the ceiling.
How to properly lay Izospan on the ceiling
The laying process must be carried out taking into account the following rules:
- It is not recommended to fix the vapor barrier material to the surface with nails. In this case, it is best to use staples. The launch on the walls should be 20 cm.
- As a rule, isospan is deployed to the opposite side, after which it is cut off with a small margin.
- Isospan is fastened both along the perimeter and along the intermediate rails. Since one strip is not enough for the ceiling, they are fastened together with adhesive tape.
- To ensure ventilation, it is necessary to leave small gaps between Izospan V and the ceiling surface during installation.
After the installation of Izospan is completed, you can proceed with the installation of the main finishing material.
How to put Izospan on a concrete ceiling
Concrete ceilings need waterproofing as a result of hygroscopicity - water seepage is carried out by capillary method. In order to properly lay Izospan on the ceiling, it is necessary to simultaneously mount a heater on the ceiling surface.
It is preliminarily recommended to remove all existing debris from the surface of the ceiling, to eliminate existing cracks and potholes. Only then can one proceed to deep penetration waterproofing or with a bitumen base. Thanks to this material, it is possible to prevent the accumulation of liquid on the insulation.
After the first layer of waterproofing is completely dry, proceed to installation of a soft insulation on the ceiling surface, in this case, you can use mineral or stone wool. Fastening of sheets must be carried out using the frame method. In order to cover the seams, it is recommended to place all the elements in a checkerboard pattern.

From timber make a crate, while the length of the step should be equal to the size of the insulation. Through cotton wool in concrete ceiling make holes, use umbrellas for fixing. After the frame is completely ready, proceed to the installation of "Izospan B". It is recommended to lay the material, making an overlap of up to 15-20 cm, after which the joints are glued with tape.

The installed lathing can later be used as a basis for fastening the lining, made of wood or plastic. In the event that a frameless installation method was chosen, then the insulation must be glued to the ceiling surface, and "Izospan V" must be attached to the insulation with plastic umbrellas.

Izospan for a ceiling in a wooden house
Since Izospan for the ceiling on the market for goods and services is sold in the form of rolls, it is necessary to roll out the vapor barrier, cut it into pieces of the required length, and then proceed to installation. It is recommended to overlap the material, the sheets should overlap each other by at least 15 cm, and a maximum of 20 cm. It is important to ensure that the ceiling surface is covered with a continuous vapor barrier layer. If necessary, thin wood strips can be installed on the connecting seams.
It is not recommended to stretch the vapor barrier material during installation work. "Izospan V" after completing all the work should hang slightly from the ceiling surface. This rule is due to the fact that a highly stretched material during fluctuations in temperature conditions can quite easily succumb to deformation and, as a result, will burst after a while. When laying the plastic wrap, it is important to ensure that the rough side is always on the outside.
Advice! To get the best effect, you can lay the film in 2 layers, while the layers should be in contact with each other with the smooth side.
Izospan for interfloor and attic floors
If it is planned to insulate the interfloor and attic floors, then it must be borne in mind that during the installation work, ventilation gaps must be provided. First of all, a layer of waterproofing is laid between the logs, after which the insulation plates are mounted. When attaching the Izospan V vapor barrier, it is recommended to use wooden blocks. After all the work is done, boards or any other finishing material are installed.
In the process of using this brand of isospan for vapor barrier of residential structures, it is recommended to adhere to the following tips:
- In the event that the material is planned to be laid on walls or a floor made of wood, it is recommended to pre-treat the wood with special antiseptic compounds. As a rule, the process of drying moisture between the tree and the isospan film will be as fast as possible, but it is best to play it safe so as not to face dire consequences in the future.
- In addition, wooden parts of structures must be pre-processed special means against the appearance of insects. It is important to understand that it is unlikely that it will be possible to do this kind of work after installing Isospan, so you should think about it in advance.
- Izospan B, used for walls and ceilings, has a high level of strength. It should be borne in mind that with careless handling there is a high probability that the film will be damaged. If there are places of damage on isospan, then they should be immediately eliminated using a special tape with a sticky base or glue for these purposes.
Due to the reasonable cost of isospan, everyone can afford this material during construction work.
Important! If some part of the living space is not insulated in this way, then it is worth taking into account the fact that in the future it will not be possible to qualitatively insulate and finish the surface of the floor and walls.
Conclusion
Izospan V - instructions for use for the ceiling in different residential buildings were considered in as much detail as possible. Building material is the most popular for waterproofing works. As you can see, this heat-insulating material can be laid on concrete base ceilings, used for arranging wooden living quarters, interfloor and attic floors. Before starting the installation work on installing Isospan on the ceiling, it is recommended that you first study all the nuances of installation, and then follow the step-by-step algorithm. This is the only way to count on a quality result.
To prevent the penetration of household vapors into the thermal insulation layer, it is necessary to create a vapor barrier. The water contained in the warm air that rises upwards contributes to the decay of the materials of the roofing cake, which leads to a decrease in their performance. Therefore, a reliable barrier must be located in the path of warm air.
In most cases, attic roofs are insulated along the upper floor. In this case, the vapor barrier should be installed not on the slopes, but on the ceiling.
Purpose of ceiling vapor barrier
If the arrangement of the living space is not planned in the attic, then the need to reduce heat loss through the plane of the slopes disappears. This situation requires insulation of the ceiling. Insulation can be laid directly on reinforced concrete slabs, in the gaps between the ceiling joists or in the section of panel slabs. In each case, you need to know how to fix the insulation on the ceiling correctly.
In any of the above options, a vapor barrier material is required under the insulation. With its help, it is possible to prevent the penetration of moist warm air into the layers of the roofing cake, which is an integral part of human life. In addition, a vapor barrier film on the ceiling protects the wooden elements of the roof from the formation of mold and mildew, extending their service life.

Before the advent of modern thermal insulation and vapor barrier materials, oily clay was used as a protective layer, which was laid in a continuous layer on the ceiling. A layer of soil was poured over the clay, which played the role of insulation. This type of protection gave the highest results, neither cold, nor heat, nor moisture penetrated into the room. In turn, the wooden elements of the building have been flawlessly used for a long time.
Despite the high efficiency, new techniques and a wide range of insulation materials have gradually replaced the old technology, although the new products do not have such an effectiveness. In addition, modern insulating materials are made on the basis of synthetics, which, when in direct contact with wooden structures, give undesirable results. For this reason, the installation of all insulating materials, including fixing the vapor barrier to the ceiling, should be carried out in strict accordance with the recommendations of specialists.
Laying vapor barrier depending on the direction of movement of warm air
For correct styling of the vapor barrier material, the direction of the moist warm air must be taken into account. From the school physics course, everyone knows that steam is always directed to the side with a lower pressure. For example, the air pressure in the room is always higher than in the attic, therefore, the steam will tend to the side attic space... A similar situation occurs in the attic, where the pressure is higher than in the atmosphere. Here the air with suspended water particles will rise to the roof slopes. In other words, steam always rushes from the living space to the attic, and from there, through all the layers of the roofing cake, it tries to get out.
When passing through the roofing system, a certain amount of vapor remains in the materials of the roofing system, causing negative impact into its individual elements. To prevent this process, it is necessary to use a vapor barrier when insulating the ceiling. If the attic is not insulated, then a barrier in the path of steam is installed on the inside of the living space in front of the insulation, becoming its direct protection.

Laying a vapor barrier on the upper floor is carried out taking into account the purpose of the attic space:
- If the attic is not supposed to be operated, then the vapor barrier is installed only along the ceiling. Insulation in this case does not need waterproofing and wind protection. However, do not forget about the waterproofing of the slopes in order to prevent the penetration of precipitation.
- If a summer vacation is planned in the attic, storage of things and blanks, then the insulation should be closed with a vapor barrier film on both sides. The slopes are also equipped with protection from atmospheric moisture.

It should be noted that not only a vapor barrier layer is used to protect structural elements from moisture. For this purpose, ventilation is arranged, air vents are mounted, aerators and a ventilated ridge are installed. Ceiling vapor barrier in a private house is one side of a complex event; it can perform its function flawlessly with the correct arrangement of the roof.
Reasons for arranging the pie
One of the arguments in favor of the device of the cake is the vapor permeability of building materials, that is, their ability to pass warm air with the smallest particles of vapor. If this property is not taken into account, then moisture will accumulate in the heat-insulating layer, which makes up the main part of the multilayer system, which has a destructive effect on all structural elements.
Correctly selected vapor barrier material can completely eliminate steam penetration or reduce it as much as possible. It all depends on the steam capacity, which should have a minimum value.
When using materials that still allow moist warm air to pass through, you should choose the right thermal insulation and waterproofing. In such situation throughput these materials must be significantly higher in order to actively conduct humid air, preventing moisture stagnation in the layers of the roofing cake.

In such a situation, laying the vapor barrier on the ceiling should be carried out according to the following scheme:
- A vapor barrier material with a minimum throughput is laid directly on the ceiling.
- This is followed by thermal insulation, which has a higher flow capacity.
For the correct selection of the components of the pie, it is necessary to study in detail the technical characteristics of all materials used.
Some features of the device pie on the ceiling
In general, when constructing an insulated ceiling cake, the same ceiling vapor barrier scheme is used, regardless of the type of materials used for insulation. However, their capacity can make some changes, so it is important to know how to properly install the vapor barrier on the ceiling.
In particular, we are talking about the following:
- The use of extruded polystyrene foam in rooms with low humidity levels allows the vapor barrier to be passed through. This is explained by the fact that this type of insulation practically does not allow moist warm air to pass through, therefore, it does not need additional protection.
- In rooms with a high level of humidity, a vapor barrier layer must be present regardless of the type of thermal insulation material and its characteristics.
- Laying mineral wool of any hardness and foam is always accompanied by the use of a vapor barrier material.

In the process of solving the question of how to put Isospan on the ceiling, it is necessary to ensure that the edges of the insulating material are located at a higher level than the upper edge of the insulation. In other words, the insulation is placed in a kind of bowl made of vapor barrier material. In the case of a panel board, a vapor barrier material is placed in each box under the insulation. When installing thermal insulation in the space between the ceiling joists, they should be wrapped in a vapor barrier material.
If a polyethylene film or glassine is used for vapor barrier, then you should take care of the ventilation space between the insulation and the vapor barrier, the gap should be about 2-3 cm.For this purpose, slats are nailed to the ceiling, which can later be used as a basis for mounting lining, decorative panels or drywall.
The method of using the vapor barrier material must be thought out at the stage of drawing up the project. At the same time, it is important to choose the right way of laying and options for fixing the material. With the advent of new technological insulation materials on the market, it became possible to correct mistakes made during the installation of the vapor barrier layer. The main thing is to know the characteristics of the insulation used, how to lay Isospan on the ceiling, and also technological features selected material.
The choice of materials for creating a vapor barrier layer
The main property of a vapor barrier material that you should pay attention to when choosing is the ability to pass a minimum of steam. This criterion is calculated by the amount of steam that passes through 1 m 2 per day. Some materials have an index of 3-5 g / m2, but most are characterized by a vapor permeability of less than one. In order to know which vapor barrier to choose for the ceiling in your case, you need to study the possible options.
The first vapor barrier material was glassine, its vapor permeability was 80 g / m 2. However, modern insulation in some cases has an indicator of about 0.02 g / m 2. The appearance of the materials used as surface insulation from steam and atmospheric moisture is practically the same. Therefore, it is very important when choosing to carefully study the information that is indicated by the manufacturer. Otherwise, you can purchase not a vapor barrier, but a waterproofing material, the use of which will lead to damage and the mandatory replacement of the thermal insulation layer.

- A vapor barrier polymer membrane refers to roll materials, one side of which is completely smooth, the other is rough. The roughened side must point downwards during stacking so that a minimum amount of fumes can penetrate the cake. The presence of roughness prevents the accumulation of condensation on the surface.
- Film polypropylene and polyethylene materials can be reinforced and unreinforced. This type of insulation requires the mandatory creation of a ventilation gap between the vapor barrier and insulation. Ceiling vapor barrier foil is used where construction budgets are limited and can be installed on both sides.
- The foil-coated membrane for the ceiling is recommended for use to create a barrier to the path of moist warm air, as well as to reflect heat rays and return them to the room. In both cases, the installation is carried out with foil towards the steam and the flow of warm air.
In most cases, vapor barrier materials have accompanying documentation, which, along with technical and operational characteristics, describes which side to fasten the vapor barrier to the ceiling, and the fastening technology itself. To avoid unpleasant moments during operation, when choosing a material, you should pay attention to the possibility of direct contact between the vapor barrier and insulation.
Formation of rolls of vapor barrier polymer film is performed in accordance with how the material will be rolled to create a vapor barrier layer. There is a recommended overlap mark along the long edge of the strip so that the insulation carpet on building structures is solid.

The direction of the strips of insulating material does not play a special role, the roll can be rolled out along or across the ceiling. The main condition is the creation of an overlap and strong fastening of the strips into a solid canvas using adhesive tape.
Particular attention must be paid to the exit points of chimneys and various communication risers. When deciding how to fix the vapor barrier to the ceiling, it is important to ensure the complete tightness of the vapor barrier layer. To do this, the material is cut, and the edges are glued to the structural elements with adhesive tape and additionally fixed with a rail.
It is recommended to choose the gluing materials and vapor barrier from the same manufacturer. Otherwise, complete tightness cannot be guaranteed at the bonding points. Due to the peculiarities that each manufacturer endows its products with, material deformation and even its destruction can occur.
Among a large number manufacturers of roll roofing materials the TechnoNikol company should be highlighted. It produces building materials for use in the CIS countries, including polymer vapor barrier membranes, polyethylene and polypropylene films.
Vapor barrier membranes are available in several innovative self-adhesive options, as well as materials that are installed using bitumen mastic or by fusion with a gas burner.
The products of the Izospan manufacturing company are no less popular. Its range of materials ranges from standard vapor barrier films to foil insulation with a layer of insulation and a self-adhesive coating on the back.
Almost all types of insulation must be protected from moisture penetration and evaporation. To equip a barrier from steam is not worth "at random", since the role of vapor barrier is no less than waterproofing. It is important to know the intricacies of a vapor barrier device for a ceiling in wooden floors, since materials with a high sensitivity to moisture levels are used during their construction.
Peculiarities
Water vapor is generated in any room, especially a residential one. This is an inevitable process, since food is prepared, laundry is carried out, and rooms are wet cleaned. Therefore, a vapor barrier for the ceiling and roof is a must.

With regard to buildings made of aerated concrete, then, according to some experts, the vapor barrier inside increases the moisture level of the blocks, respectively, worsens their heat-shielding properties.
Steam rises close to the ceiling, or rather to the beams, thanks to which its safety and stability is ensured. It is unrealistic to go through the beams, the insulation cladding becomes an obstacle on the way of vapors and they settle in it, first destroying it, and then causing rotting of all wooden elements. As a result, due to decay, the entire finish goes down the drain.


If you understand the terminology in detail, then a vapor barrier for a ceiling in a wooden floor is a set of actions aimed at preventing floor decay, reducing the possibility of mold fungus, as well as helping to increase the safety level of your home.
When implementing a vapor barrier for a ceiling, a number of features must be taken into account:
- the ceiling includes several layers, which means that all the main work is carried out on the rough ceiling;
- if necessary, you can protect wooden floors additionally, and fill up all the cracks with special compounds;
- it is possible to install a vapor barrier only after the surface is completely dry.

Materials (edit)
In order to protect the ceiling, the device should be dealt with in a comprehensive manner.
Various materials with similar characteristics are used to furnish the insulating layer. To choose such a material correctly, we will understand its classification.
A universal material is a vapor barrier film. Since it is reinforced with fabric or mesh, it has a high level of strength. There are 2 types of such vapor barrier available: perforated and non-perforated. Moreover, this does not play a big role for operational characteristics.


The foil film has a metallic surface, which allows not only to protect from steam, but also to save heat. Such material should be laid correctly with the metal side down. This significantly reduces heat loss.

Polypropylene films are also in demand on the market. They have a special layer to absorb moisture. It consists of viscose and cellulose fibers. When condensation settles on the surface, moisture is absorbed by this layer. The penetration into the heat-insulating layer is impossible.
Then, due to ventilation between the vapor barrier and the insulation, evaporation occurs. It is recommended to use this kind of film in rooms with a consistently high level of humidity.
On the other hand, the film also has significant drawbacks:
- creating a greenhouse effect;
- short period of operation;
- the accumulation of condensation in different places.

Glassine can also be included in the number of vapor barrier materials. Its basis is cardboard impregnated with bitumen mastic. It has poor bandwidth. After installation, it is imperative to ventilate the room. This material is in demand mainly due to its low cost.

The popularity of breathable membranes is growing more and more. It is a non-woven double fabric that protects structures from condensation and steam. They have high vapor permeability characteristics. Such insulation is made from a material with a special structure. In this case, the steam capacity is affected by temperature regime and the humidity level in the room.
Membranes can be conditionally divided into several types:
- WITH aluminum foil... Does not release heat from the room. Great for a bathroom or bath.
- With variable steam capacity. Allows you not to worry about fluctuations in the level of humidity in the room, works and adapts to various processes.
- With limited steam capacity. It is more often used in a house where the owners do not live permanently.


Practice allows us to assert that a vapor barrier membrane is much more effective and reliable than a conventional film. In addition, it is easier to work with (stack). To create a reliable vapor barrier, just one layer is enough.
Alternative option protection can be called a special varnish or mastic. Also, roofing material and roofing felt can be noted as vapor insulators.


Also, vapor barrier materials can be classified according to the following principle:
- Standard. The principle of operation of such materials lies in the fact that they do not allow steam to penetrate into the insulation. The main location of such vapor barriers is inside the structure of the house.
- Reflective insulators. This includes membrane-type materials that are protected from the effects of water vapor and can still reflect heat.
- With moisture control. This option becomes relevant in a summer house, when the room is not used in winter or is used infrequently.
- Variable permeability materials. This option is suitable when restoring floors between floors.


Which one to choose?
Both global and material manufacturers from the Russian Federation offer their customers a wide range of types of vapor barrier. Each of them, performing its main function, allows you to solve an additional range of problems.
Before opting for a specific type, it is worth examining all the characteristics of the material. It will also be useful to take into account the amount of the budget for the work.
When choosing, there are several points to consider:
- The function of the room in which the material will be used. If this is a bath, just a plastic wrap will be enough.
- If you plan to install a layer in the attic of a private house, then you can give preference to more expensive materials.
- Climatic features of the area. In cold areas, a foil insulator should not be used, since overheating of the roof of the building will clearly not threaten. In warm climates, it is better to choose a material with a high air permeability.


In addition to the listed points, the vapor barrier material must meet the following criteria:
- ease of installation (important if you decide to carry out the installation yourself, without hiring hired specialists);
- a high level of strength (even with strong mechanical stress, the material should not be damaged);
- the level of elasticity (it is especially important when the film is stretched and fixed: the material should wrap around the screws, and not tear).

In wooden housing construction, construction industry experts recommend using the following types of vapor barrier materials:
- penofol A - the material is easy to install, it has a self-adhesive layer;
- penofol B - with a foil coating;
- penofol C - with a self-adhesive layer;
- isospan V - with a two-layer structure and the possibility of condensate evaporation;
- alukraft - consists of three layers, ideal for rooms with high humidity.


Mounting
Vapor barrier must be made from inside the room along with the installation of insulation.
If in the region where the building is located, winter temperature air lower than -30, it is easier to mount the vapor barrier layer both above and below. This is a kind of protection of floors from steam and at the same time a way to keep warm.


Now let's take a closer look at the installation process itself.
Folk way
In ancient times, the peoples of the north who inhabited the territory of Finland to protect the ceiling in the bath, used a "breathing" membrane - birch bark.
At the present time, first of all, it is better to lay the vapor barrier material together with the heat insulation material in the crate. Therefore, first of all, it must be mounted. Then the ceiling frame is fixed using self-tapping screws and plastic dowels. After installing the lathing, a heat-insulating layer is created, after which the vapor barrier of the ceiling is directly performed. Please note that each piece of wood must be treated with an antiseptic solution and fire retardant.

The styling procedure includes several stages:
- The vapor barrier material does not need to be nailed, but attached with staples to the edge of the lathing. It is imperative to make an allowance for the walls within 15 - 20 cm.
- It is better to unfold the film to the opposite side and cut with the same allowance.
- The material should be fastened not only along the perimeter, but also on intermediate rails. One strip is not enough to completely cover the ceiling, so the film should be overlapped with 15 - 20 cm strips. It is recommended to fasten the edges with tape or special tape.
- To ensure adequate ventilation, leave a gap between the vapor barrier and the ceiling when installing the vapor barrier.

The last point can be safely ranked among the most important rules for installing a high quality vapor barrier. For the same purpose, a counter-lattice must be installed throughout the frame. It is almost identical to the configuration of the first layer. The thickness of the slats is about 40 cm. The fastening is carried out using self-tapping screws.

It is worth considering in more detail the vapor barrier for baths and saunas. In these rooms, the humidity is always high, and the air is solid vapor. If the walls of the steam room are not protected, then sooner or later they will undergo fungal diseases or rot.

To protect the wooden structures of the bath, it is not recommended to use a vapor barrier made of polyethylene, since this material is not able to withstand a high temperature load.
To attach the vapor barrier, you need the following set of tools:
- the material itself (taking into account their capabilities and needs);
- stapler / construction stapler (to nail the staples);
- hacksaw;
- scissors for cutting metal;
- Scotch;
- self-tapping screws;
- screwdriver;
- nails with a wide head;
- hammer.


We have indicated the tools that will come in handy during different ways installation. And your task is to choose what is needed for a specific situation.
Manufacturers
And now it is worth analyzing several companies that are leaders in the vapor barrier materials market.

The specialists put the company in second place Technonikol... In the production of materials used Newest technologies and the quality has been at a high level for many years.

Company Ecolife manufactures materials for protection against moisture, as well as against the formation of under-roof condensation both in residential and industrial premises. The only downside is that this material is categorically not suitable for use as a temporary roof.

Polish company Fakro found recognition among the domestic consumer. Its products are resistant to low temperatures, which allows for installation work all year round.


"Ondutis" produces inexpensive material with special moisture-resistant tapes for joining fabrics.

Company "Hexa" produces material under the brand name Izospan... Offers customers films and membranes in rolls of different sizes. It is used in capital construction.

Tyvek- a high performance nonwoven membrane manufactured in Luxembourg. Protects not only from steam, but also from strong winds.

DELTA- vapor barrier manufactured in Germany. Protects building construction and insulation from wind and steam.

Laying a vapor barrier cannot be called an extremely difficult process, but in order to do the job efficiently, read a number of specialist recommendations:
- before installing the vapor barrier, remove dirt and a layer of dust from all surfaces, seal all gaps with sealant;
- lay the film without pulling it excessively, it should lie slightly sagging;
- if the canvas is fixed with a stapler, then it is better to put cardboard or other dense material under the staples;
- one-piece material should be laid in the corners to cover the corner;
- to completely eliminate cracks, as well as increase the level of sealing, lay the canvas, grabbing the walls;
- take care of the material, do not pierce it with nails;
- make a ventilation gap between the film and the ceiling finish;
- lay the vapor barrier not close to the insulation.

Be careful: after the vapor barrier material is laid, check if the joints and installations of junction boxes, electrical cables and pipelines are tight.

And the main advice: if the manufacturer has prepared the instructions, study them in detail before laying. All materials have their own characteristics, to do everything right, do not ignore them.
It also happens that the ceiling has already been hemmed, but they forgot to put the vapor barrier, or did not know about her at all. Of course, you shouldn't panic. But to find out what kind of material was used for the filing, you need. If it's drywall, you're in luck - it absorbs moisture pretty well.

If chipboard was used, there is no reason for worry either. It is a dense material where glue is used as a bonding element. In principle, regular paint is also good protection.