How to build a summer gazebo with your own hands. Country gazebos - what are the alternatives to the tree? Calculation of materials for brick gazebo
Sowing with guests, dinner with family on fresh air, rest after working in the garden and garden - summer arbor Economy class in any of these situations will be very useful to you. It is not always advisable to make it large-scale and roomy, in most cases enough small and budget buildingwhich will delight you and your guests.

Classic Sizes Summer Arbor
The optimal size of a small summer gazebo is 3 by 3 meters. This is enough for both the family circle and for relaxing a small group of people.
Today's problems sound like this:
- How to build budget summer arbor do it yourself?
- What materials can be made of summer design with the lowest costs?
- How much will this construction cost?
This publication will be considered phased process Construction of photos and video small arbor from a bar with sizes 3 by 3 meters. This option is one of the cheapest and most practical for construction, but if for some reason he will not suit you - at the end of the publication I will bring links to similar articles on construction.
Before proceeding with active actions, I propose to study the final result of the work and its technical characteristics.
Most budgetary arows are built on the same principle, the consumption for materials is also about the same, but still I would like to make an emphasis - it is important to understand what we are going to build.
Technical characteristics of the finished arbor
Photo is presented to the right of the characteristics. When you click on the photo, it will open in a larger size.

The final result of construction
- Material: Bar 100 per 100 mm;
- Dimensions: 3 3 meters;
- Foundation: column (from bricks);
- Roof: single;
- Roof: erectifier (Ondulin), but you can use a more fiscal option - professional flooring;
- Plumber of walls: oriented chipboard (OSP);
- Floor: board 40 per 100 mm "Sorokovka";
- Painting: Antiseptic Sezhes ultra in 3 layers.
Materials for construction are used the simplest and cheap. Nevertheless, they are quite enough for reliable and strong buildings, which will eat far from one year and will endure not one hundred rains.
Foundation
For such a structure was chosen foundation columnal. Represents nine of himself brick pillarswhich are the basis for the entire gazebo. The process of building the foundation is as follows:
- 9 pits are equipped with a depth of 70 cm;
- The first 30 cm is covered with sand (ideally put a little rubble on the bottom) and tamper;
- The remaining 40 cm is covered with construction garbage and poured concrete;
- Two bricks are stacked on top of concrete (ideally burned ceramic red);
- A bitumen layer is applied on top of the bricks and the head of the rubberoid is stacked.

Finished pillars of foundation
This foundation is extremely reliable for small buildings. Summer gazebo is the perfect building under such a foundation. Therefore, it was precisely him preference in construction.
Lower strapping
On top of the foundation, the lower strapping is stacked, which is bonded by brucks from the tree. Fastening the bar to each other is carried out in the floor of the tree. The connection must be predetermined by an antiseptic or bitumen. Four screws are screwed over the compounds for reliability.


In addition to four vehicles around the perimeter, one additional center is installed - the so-called "lag". In the future, it will be needed for fastening the floorboard to the strapping (about this in more detail in the chapter about the floor).

Finished lower strapping
Pillars and upper blocks
Poles are installed on the lower strapping, which will serve as the basis for the walls and the upper strapping. Four pillars are installed in the corners of the arbor, and one additional column is installed next to the height of the rail.
The height of the front columns is 230 cm, the height of the rear - 200 cm. This is done for the further construction of the roof of the roof.

Fastening of columns on metal corners
The upper strapping is two bars installed in parallel to each other on top of the pillars. Fastening Identally lower strapping - In the floor of the tree.

Installed pillars and top strapping
Roof construction and laying
The whole process will be clearly told in the form of a phased approach:
- On top of the lower strapping, fasten 9 rafters in 30 cm increments;
- Parallel rafters set 9 boards also in 30 cm increments;
- If you did everything clearly according to the instructions, then you should have a roof in the form of a lattice;
- On top of the roof, they put the sheets of Ondulin or professional flooring, depending on your capabilities.

Rafyla

Okeekhet
The rafters are attached to the strapping on metal corners and self-tapping screws. It turns out pretty reliable designwhich can withstand not only the roof, but also winter snow.

Finished roof
Floor
After installing the columns, you can deal with flooring. You will need about 30 boards of 3 meters long, some of which will need to fit under the poles. The floor is attached to the tapping screw to the lower strapping and lag in the center.
The secret of the smooth floor is exactly putting the first board. If you have it happened, then the process will go more fun.

Finished floor
Railing and sheathing OSP stove
For railings, a timber with a cross-section of 50 by 50 mm is used, which is attached to a comfortable height. In addition to timber, it will be necessary to install additional supports, which will later be attached to the oriented chipboard. All this is clearly shown in the photos that will be presented below.

Mounting railing on corners

Ready railing
The OSP plate is attached to the self-tapping screw, plus additionally attached by bars in the center. This creates not only reliability, but also additional aesthetics.

Laying the first plates OSB
Some words about the antiseptic and paint
The proposed version of the inexpensive gazebo turned out to be extremely beautiful and spectacular. The main secret consists of a competently selected color, which plays between a dark and bright shade of wood in contrast.
You can use your vessel protection options, but the owner of this building recommends antiseptic Sezhes ultrawhich is applied in three layers. This will allow you to achieve reliable protection Tree and beautiful appearance.
Video
I express a lot of grateful for the presented video to the user of the channel with the title " vasya Vasin" It was he who prepared this video in construction, and also commented on some questions that he were asked in the comments.
If you have any questions, you can ask them both in the comments to his video and in our tape after publication. We can tell him your questions, after which you get and write you his answer.
Photos of summer arbors

Wooden gazebo with decor for summer holiday
In one of the publications on our site, we examined in detail the diversity of summer gazebo, made not only from the tree, but also other building materials.
View options S. different types and the design, as well as pick up some idea for your cottage you can by the link suggested below.
Other construction options
For various reasons, this will not all be suitable for the construction. In view of this, I offer you similar to the style of writing the instructions for construction, in which the process of building a gazebo is also clearly chewed.

Several links are presented below.
Among the presented options, all buildings are made of wood and in a fairly budget format. Any elite construction Materials Type decorative plaster Or wild stones are not used here.
Every homeowner dreams to build on panstone Beautiful cozy arbor. In her shadows, it is good for reading the book, work with a computer in the fresh air or to meet with friends for a cup of tea.
Garden summer terraces are appropriate both in the country and in a private house. If you choose a simple design and make a detailed project, then make such a place to stay with your own hands for everyone.
Photo: Wooden gazebo - frame made of board, roof from fiberboard
Permanent pergola in the form of a separate structure or adding to the house as an open veranda or terrace. Often, such a gazebo serves as a design for the courtyard or transition from one dacha zone to another, connecting, for example, a garden with a garden.
During the construction of pergola, the following procedure is observed:
- Create a sketch and prepare the material (any wooden board, log, lattice rails are suitable.
- Install bars supports. If you just deepen the wood racks into the ground or pour them with concrete, then in a few years the wood will start rotting, and pergola will collapse. Therefore, for the foundation, choose a round or square metal pipe of a suitable diameter. Having deepening it into the soil of centimeters by 40, the concrete is poured around and they are waiting for a complete frost (it is left over the ground with a cut of a layer of 20 cm long).
- At the top of the pipes, holes are made through which the vertical racks made to them are fixed with bolts.
- To the tops of the supports fix the strapping bar or board - horizontal connecting parts.
- The roof is missing for the pergola. The role of the roof is performed by long boards, laid on the edge with a gap of 10-20 cm. If a dense shadow is needed, they are covered with polycarbonate sheets or other lightweight material.
- Sidebilities between the racks are filled, stinging horizontal jumpers or installing low-level shields.
Pergola for giving decorate curving plantsthat give coolness and take off from the scorching sun. Different curtains also use various curtains for scenery, with their help on the basis of pergola create a sebitibility of a tent.
Metal canopy for cottage
It is enough to simply make an extension to the house based on metal racks. This will require the skills of working with the welding machine, if any, can be copped with bolted connections.
The basis of the garden terraces is made of metal profile Or pipes. For such structures use simple supports, the foundation is done, deepening the rack in the ground and the bay of their concrete.
By design, metal gazebo can be:
- attached to the building;
- separately standing;
- awarded to the fear of the cottage.
Polycarbonate, phaneur, profiled sheet, plastic lining are used for the sheath. Openwork forging will also perfectly complement the arbor from the metal.
Used as roofing material flexible tile, slate, metal sheets. If the roof is just needed as protection from the sun, it is enough to fix the fane or wooden boards.
Collect the design of the roof is better on Earth, and cope with this task for solid. But to raise and secure the roof, you will have to attract assistants.
Portable structures
For small dacha It is convenient to use mobile or collapsible arbors. You can construct them yourself, having a simple set of tools in arsenal.
Portable light designs in the form of a tent or arcs are made of metal corners and pipes, wooden boards. For such structures, it is not necessary for the foundation, and the roof can be made from the primary materials, for example, dense tissue.
If there is no time and the budget of construction arbor is limited, used pVC pipes. In addition, this material is easy to use, the details easily give the rounding or bend. Cover for walls and roofs sew from dense linen fabric. For the winter, such a terrace is entered into a room or disassemble to prevent damage from cold and moisture.
Another option worthy of attention is to build something similar to mushroom or umbrella. Collect a canopy on one support, and fix - in the center of the table. Such a mini-gazebo is suitable for a small cottage, it is also convenient to use it for children's games and entertainment. Colored B. bright colors The umbrella will be excellent protection on a sunny day for sandbox or inflatable pool.
Indispensable for country rest. After all, the city come not to sit in the four walls, in nature enjoy the air and the sun. Even a small and simple terrace will become a favorite place at the cottage or in a country house.
Many seek to purchase a country site. But after the realization of the conceived, many questions appear regarding the arrangement of this space. How, where and what to place is a personal matter of everyone. But almost everyone considers it necessary for the existence of a gazebo on the territory of the cottage or country house. In summer, it spends a lot of time. The whole family is going to have breakfast, dine and dinner in a cozy gazebo. Therefore, the construction of such an object should be taken seriously.


If there is a desire, you can build a gazebo with your own hands, which will arrange you and your relatives in all respects. Before starting work, create a draft structure on paper, it will be required to calculate the consumption of materials and other important things. It is also important to take into account the features and price of building materials. The gazebo is considered an economy class if the material for its manufacture has been used by the budget level. Tell in all these intricacies.


Location
The location of the arbor on the site depends on the purposes that the owners pursue, establishing it. Many belong to the gazebo as a place for a feast. This is not the case, in a gazebo it is nice to read exciting literature, women likes to study in it with needlework.
If you wish to spend family meals in a gazebo, a feast or just breakfast all together in the morning, it is better to choose a place nearby at home. The track between the house and the gazebo should be smooth, without obstacles, so that it was convenient to dispose of dishes, dishes.


If you consider the arbor as a place where you can relax, retake, distract from the fuss, then in this case it is better to arrange a homemade design closer to the garden. The hanging branches of trees, comfortably blackening space - what is needed in a hot summer day.


If there are small children in the family, it will be better to combine a small playground on a plot with a gazebo. It is so much easier to follow the children, you can watch their game, doing at this time your hobby in the gazebo.
In the case when the cottage acquired recently and the hosts are only determined with the recreation area, it is important that the gazebo was located in the recreation area.


Materials
When constructing, only coniferous woods are used.
Carefully approach the selection of material for the carrier parts, they are the most important. For their construction, pine and larch are usually used, since these rocks are less susceptible to rotting.


In Russia, the logs and other structures were built on Rusi. To this day, the log as a material does not lose its relevance. Technologies continue to develop, the material is made in larger quantitieswhile maintaining quality. Breed buildings are distinguished by durability, beauty and unusualness. The rounded log is actively used to build closed and open arbors, there are no restrictions. Accordingly, there are logs with different diameters for different buildings.


The timber is made from coniferous wood. The cross section of the bar used for the gazebo is usually 100 per 100 mm or 150 per 150 mm, the length of the bar is up to 7 meters. For the construction of dackets use a bar for the base, vertical racks. The roof base is also formed by a wooden bar. For the rest of the gazebo, the edged board is better suitable.

This material has its advantages:


The profiled timber is characterized by its geometry and is connected to each other through the spikes and grooves.
Pros of such a material:
- Simple collection of design. It is much easier to build a gazebo from the profile bar, the elements are collected like a constructor.
- Does not require grinding, the material is processed at the factory.


But there is also a cons:
- Over time, the tree dries and cracks appear on it. This is spoil appearance Arbor.
- Due to the gaps, there are channels for insects or fungus, which are very difficult to remove.
- The price of a profiled timber is much more than usual.

Flap, or a double bar, has a special Norwegian compound, due to which the design becomes very strong. It also has side sections that increase the space from the inside, in contrast to the ordinary timber.
A double bar has its drawbacks:
- Assembly. The boat is going not easy.
- Cracks. When the tree is searched with time, it will darken and cracks will appear on it.


Metal arbors Like many dachensons, and this is not surprising.The material is considered inexpensive, given that the metal is durable. From it you can create an elegant decor, metal pavilions complement the common exterior of the house.
A person who worked with the welding machine can cope with this work and has experience. SAMI simple design - This is a frame frame, the roof surface is tile.
Visually metal structures, despite its strength, look very fragile and easy. Metal gazebos can be built on any surfaces of the Earth. Such arbors are often transferred from one place to another. The possibility of transferring the structure is a undoubted advantage.


If still the owners of the site confuse the rude type of metal, then in this case they come to the rescue original ideasassociated with art forging. But the forging of various patterns and items costs expensive, but such beauty will serve for a long time. Another plus metal is that it is combined with other materials. As an example - a gazebo, which metal carcassand the roof is polycarbonate.
Note that under the influence of the roast summer sun, the metal is quickly heated to high temperaturesthat can bring some discomfort. But in this design, it is definitely more advantages than minuses.


Brick arbors or stone can be both open and closed. Often brick gazebos are multifunction and the brass, smoking or fireplace is usually installed in them. Periods of natural rock breeds look impressively, however, the cost of such a design is very high. It makes no sense to talk about the strength of the stone and brick - everyone knows that these materials are very durable and serve very long.


Polycarbonate gazebos are increasingly popular, they compete with structures from other materials. Such summer pavilions look very modern.
Consider its advantages:
- Strength. The material acquired such a desired characteristic due to the cellular structure.
- Svetopropusk ability. Transparent polycarbonate misses approximately 90 percent sunlightBut the summer houses prefer color polycarbonate. So shadowed interior Arbor, what is needed on a hot sunny day.
- Protection against ultraviolet rays.
- Flexibility of polycarbonate sheets. This is what allows you to give any form designs.


- Weight. Due to the ease of transportation costs cheaply. Also, light weight simplifies the installation.
- Wide colors. IN color palette You can easily find the hue of interest. It often happens that other materials of the arbor are not suitable for the house exactly in color characteristics, then it is worth paying attention to polycarbonate.
- Lack of additional processing.


Types of designs
There are many options for arbor designs. By the way, Altanki differ from the arbor by the fact that they have a fairly high foundation, the arbors are built on almost on Earth.
Open arbors are most popular in Russia.Classic Table of Arbor - the most ordinary single Roof on the support pillars. For the foundation it is better to choose a stone, brick or massive logs, it concerns heavy structures. It is usually enough deeply fix the pillars in the ground. The space between them can be decorate with beautiful lattices, boards depending on the total type of site. You can use a canopy as a roof.
Usually dackets are limited to a gazebo, which has three walls fenced, and the fourth wall is the entrance. Inside there are benches, between them - the table. But there are more original ideas - you can install a fireplace, a barn inside the arbor.


Open gazebos may differ, be made of miscellaneous material, with different roofs, etc. However, they have the same advantages and disadvantages.
Benefits:
- Small costs. Open gazebos do not require glazing, most of them do not need a foundation, it will not be worth it.
- Protection against sunlight and rain, while there is fresh air access.
- Portable structures allow you to change the situation at the request of the owner.
The main lack of open arbor is that their protective characteristics are practically absent. Such a gazebo will not save from the cool Late summer evening. Insects easily penetrate inside. Strong wind also gives discomfort, hide in an open-type gazebo from him.


Closed gazebo - in fact, a small house.
Pros of such a gazebo:
- Protection against weather phenomena. It can spend time in it and warm days and rainy.
- Options to equip the space is much more. This is the same as you can equip your own home, choose furniture, deal with decor, etc.
- Year-round use. If you have a heating, then under all weather conditions there is an opportunity there to be, even in the winter season.


Now consider the minuses:
- Considerable importance is finance, the closed gazebo performs almost the same functions as the house, respectively, financial expenses for it - as in a small house.
- The foundation laying is required.
- The plot must be rather big sizes. If the plot is small in the area, then the closed gazebo will look at it inappropriate. The owners will be uncomfortable in such a plot.


Glazed closed gazebos are considered the most beautiful. They are pleased to be in the evenings, watching the sun sits down. However, glass is fragile and quite expensive material, which can deliver a lot of problems to the owners.
Open and closed arbors are very different from each other, and they set them for different purposes. Before purchasing a material, deal with drawings and calculations for the future structure, consider the type of gazebo. What is important in it - only dinners with family outdoors in summer or year-round use of the arbor? Only deciding with this, proceed to the rest of the work.


Form and dimensions
Allocate some specific standards difficult.Each owner independently selects for itself shape, sizes, decor arbor. But basic forms still exist.
To the construction of a hexagon arbor, it is necessary to take much responsible. If there is a need to increase the free space, then the benches can be embedded in the design. So they will occupy much less space.
Interesting oval shape of the arbor, used by summer houses.


With a rectangular figure, there is much less difficulty, it can be installed by any length and width parameters. The essential plus of rectangular arows, unlike hexagon and oval, are more accomplished.
Choosing the dimensions of the garden house, create drawings and schemes. They will simplify the understanding of the structure of the structure.


Step-by-step manual instructions
From wood
In the work you will need the most common building materials, which will have any gardener or dacket:
- sand;
- crushed stone;
- cement;
- impregnation, paint, protective coatings;
- roof coating material.


Be sure to graphically present the future gazebo, it is impossible to build a gazebo without a picture. So the general picture will be visible, which material you need and in what quantity. The image will also simplify calculations, because visually easier to navigate in the design.
Picture the general plan of the site along with the house and other objects located on the territory.So you will calculate the design site.
With the help of the cooler, mark 4 straight angle, taking into account the desired length and width of the structure. Check how direct angles can be obtained by measuring the length of diagonals. In the rectangle they are equal.
You can use the well-known Pythagore's theorem. The diagonal, erected into the square, will be equal to the sum of both sides, the length that is elevated to the square. If equality is performed, the direct angles are noted correctly.


During the construction of a hexagon arbor, the order of work will be somewhat different.
In the ground, install the peg, tie it to the end of the rope. Take the second peg and tie the second end, stretched rope Between the pegs and there is a radius. By changing the length of the rope, change the radius. The second peg is out of circle.
Now it is important to note the points of the hexagon vertices.Through the center of the circle, spend a straight line when the circle is crossed with two points, in the figure it is M and P. The line can be arranged as you like, but focus on your preferences. If the gazebo is located along the fence, then this line should be parallel to the fence.
In one of the points, drive the same amount that was in the center. Do not remove the rope, otherwise you change the radius, and no correct hexagon will be released. For example, set the number of the point P, then another cola mark points on the circumference O and T. Similarly, we do with a point M.
When all six points are found, you need to knock the peg on the site. So points are not lost.


As mentioned earlier, the foundation for non-heavy gazebos wooden material not required. In his role can be brick, stone or tiled laying.
There is still a very unusual option of the foundation from wheels, more precisely, from the tires. Tires are flooded with cement, fix them with a large metal pin.
Wooden hemps are also used as a foundation. But if the soil is clay, often wet, then this method is not suitable.


Important moments When filling the foundation:
- Mandatory sand and crusched pillow. This applies to all types of foundation, except for the pile.
- Sherry concrete should gradually, best in a wet environment. Periodically moisturize the coating, otherwise only the upper part will dry and then give a crack throughout the foundation.
- The finished foundation needs to be protected from external influences. With this task, rubberoid or other more expensive materials can cope well.


If there is a desire to make a gazebo with a brazier, the foundation of the design should withstand the weight of the mangala. Then it is better to use a tiled foundation that will wear this weight well and the appropriate load.
For the strapping on the bottom of the vertical racks use the bar, which is attached to the lags.Next are attached racks that will keep the roof. Fastening to lags is carried out by nails. Racks must have an extremely perpendicular position relative to the Earth.
After the device racks begin the flooring flooring. To do this, use boards, resistant to rotting and other external influences. For fastening the boards, you will need self-tapping screws or nails. From each end of the board, a pair of screws or a pair of nails is mounted. If they are attached nails, it is recommended to do the holes in advance for them in the board. So less likely the appearance of cracks on wood.


Roof Start stands with a frame. For square arbors, four-tie roofs are best suited, but it is easiest to build a single one. From the bar are cut out stropile legsThey are pairwise at an angle. Each of the legs are symmetrically joined the auxiliary pumps.
A sheet of plywood is usually used to cover the roof. Self-tapping screws are used to connect, after the Fanera itself is covered to protect the rubberoid, then a bitumen tile.
Tile is very easy, it is also quite easy to work with her. The coating is fastened to flooring with large nails. For cornese tiles used construction Fen. After the installation of ordinary tiles is going. Nails must be long to fasten the phaneer, cornice and ordinary tile.


Before laying down the tiles, it is removed by the film, it puts the brackets, each time overlapping the seams. Nails must pass through all the tile layers, otherwise it will break down over time.
At the edges of the roof of the tile is cut off, these places are labeled with bitumen glue. Across the skate is laying the skate tile with a sticky layer, fastening it with nails.
Buying flexible tile, follow the number of the party, it should be the same. It happens that different shades of the material come across different batches.

Metal
Pay attention to the soil, scatter and confuse it. Masters advise to make the layout of the surface paving slab. Thus, the metal structure will be more rack, there will be no skew of the design, and if you want to remove the gazebo, then a flat site of the tile will remain in its place (for the collapsible type).

The country house is erected, and the plot is not yet equipped? It's time to think about a place to relax. Where is it nice to relax in the summer heat, and under the torrential rain? Of course, in the gazebo, which was built by personnel. In a wooden building, cozy and comfortably read a book with a cup of tea, celebrate holidays in a family circle or with friends. You, probably, is already interesting, yes? In the article you will find actual information By the construction of the arbor from the tree with their own hands.
Arbor from the tree, its advantages and disadvantages
Before you start the construction, search for drawings and pick a place for the gazebo, you need to carefully study the properties of the material. The advantages of the tree are as follows:
- Weight. Allows you to facilitate the installation of the design, and save funds on the construction of the foundation.
- Ecology. A tree is a safe material, in such a gazebo take me a meal, rest with children and spend a lot of time.
- Ease of processing. Sophisticated design solutions Implemented by people having minimal construction skills.
- Price. The cost of the arbor from the wood of coniferous rocks, oak or birches is low relatively with metal structuresand accessible to everyone.
- Harmonicity. Building harmonizes from 90% landscape designs In view of its naturalness.
Harmonious and beautiful, fit into any design site
Alas, without deficiencies can not do any material.
- Low fire resistance. To avoid fires it is not recommended to install near the gazebo stationary mangalyYou need to process the material with a special impregnation.
- Moisture intolerance. A permanent source of water near (river, lake, an artificial fountain) leads to the decoration of the structure. This is prevented by applying waterproofing products into details.
Preparing for the construction of the arbor: project drawings, optimal dimensions
The choice fell on a simple in the construction of a rectangular arbor. For such a type of construction there are two options for the roof: a duplex or four-tight. We decided to make the roof of the first design, as it is easier for beginners.
- The base of the gazebo is a square with a side of 2 meters 10 cm.
- Length of support racks - 2 meters.
- The distance from the roof base to its upper part is 66.5 cm.
- The average strapping is performed at a height of 70 cm from the floor.
Project arbor with opaque skin to the level of medium strapping. For such a building, it is recommended to put stationary drives for hardening the design, the length of which does not exceed 15 cm.
In one of the sides of the gazebos, it is provided for a way out. It is performed in the middle, indents from angular racks are 60 cm. The width of the day - 80.9 cm (taking into account additional beams).
Sizes 2x2 meters with access to the entrance
The length of the rafted is 1.99 meters. In the manufacture of a protruding roof, the area that the gazebo will be occupied will be 2.5 x 2.5 m 2. It is worth considering with the subsequent decoration of the terrain around the construction.
Such sizes are optimal for the design in which the family rests on the territory of the country house. Of course, under yourself regulate the height of the gazebo or the base area, if it is planned for large-scale holidays and events.
We choose the material (wood, logs, bars, etc.), tips. Calculation of the required number
When choosing a material for the manufacture of a gazebo, attention is paid to the tree breed and the method of construction.
Most often, the construction is erected from such breeds:
- Pine: resistance to rotting and mechanical strength. The disadvantage is easily amazed by the woodcutting mushrooms.
- Spruce: hygroscopic and less susceptible to the influence of bacteria.
- Larch: 30% stronger pine, and more resistant to moisture. Disadvantage - complex in processing; Durable, but easily splits.
As for the method of erection, it is distinguished by 3 types.

There are 2 types of boards, from which it is convenient to make wooden structures:
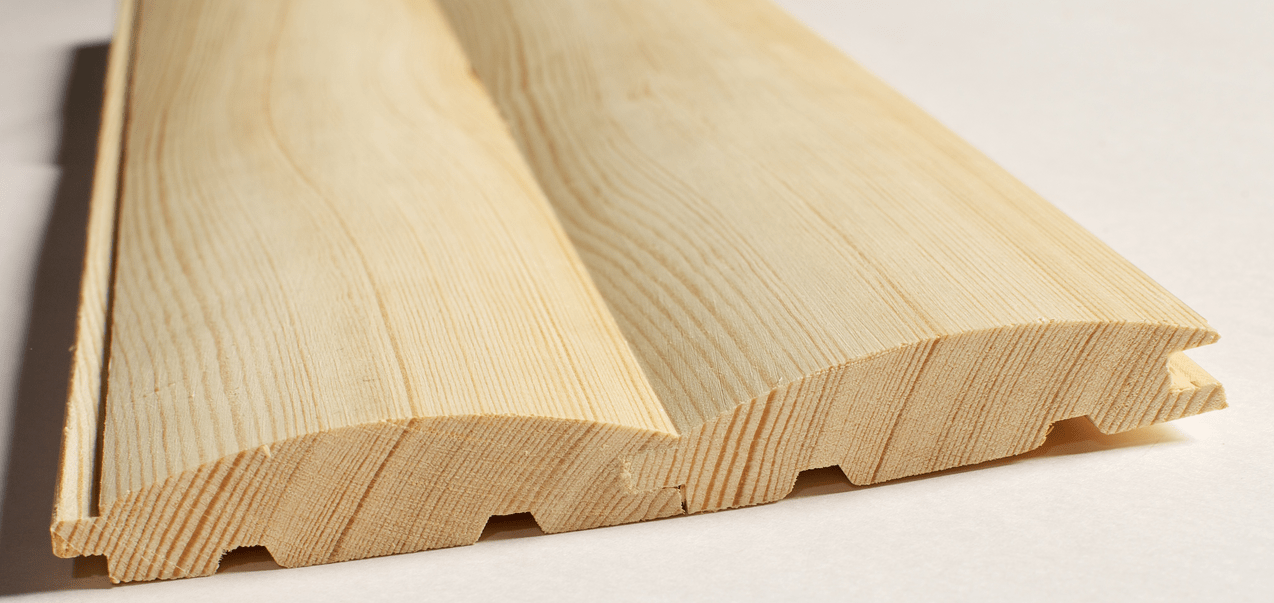
Tipped board, it will be easy to mount
The board is advised to use the masters, which in some arms are built by the construction, since it will not need additional assistance in view of the weight of the material.
- racks - 27 meters of timber or 54 p. Boards,
- rafyled - 10 p. Boards,
- top strapping - 8 p. m. Boards,
- paul coating - 40 p. Boards,
- railing (average blockage) - 8 p. Boards,
- roof - 8. square meters (Ruberoid or tile).
List of Tools for Construction
Before starting work, prepare the following tools:
- saws - circular and for cutting at an angle,
- electrolake,
- chisel,
- a hammer,
- electrolovik,
- joiner's workbench
- roulette and construction level,
- stairs,
- drill and rolled.
Construction of a wooden design step by step
Layout the foundation: Does he need and how to do it?
Before starting work, you need to prepare a drawing independently or find it on the Internet.
A common mistake in the construction of buildings near the reservoirs is incorrectly selected foundation. You should also take into account the possibility of close running groundwater And the specifics of wooden buildings, we advise you to erect it not monolithic, but a column. This species will allow the gazebo to acquire additional stability and save time.
Following the instructions, the process of laying the foundation will be rapid and uncomplicated.
Markup scheme under the foundation
To begin with, mark the plot for the construction of the drawing. Install the stakes around the perimeter of the arbor and cover them with thick thread.
Preparatory work
After that, check the correctness of the installed supports, measuring the diagonal (distances between opposite angles). They must be equal.
Perhaps, the best way For a small gazebo
The next stage - dig a holes under the bearing poles. The depth is 40 cm, the width is the diameter of the post + 15-20 cm. For our arbor, four supports are quite enough, if a gazebo is planned with an area of \u200b\u200b6 square meters and more, it is advisable to make an additional pit in the center. This will help prevent the flexion of the floor boards.
Before installing the columns, treat them with antiseptic material (tar or bitumen).
Then insert the supports into the pits and fall asleep. It is better to perform it with a large crushed stone or anterior old brick. Failure the material and check the verticality of the columns by the construction level.
Final stage. Prepare concrete solution And pour the pit. Further work should pass two or three days, depending on air humidity. Poles can be separately decorated with bricks. It will improve the appearance of the foundation and will further protect it.
Construction work on making a gazebo to give your own hands
The construction of the gazebo begins with the establishment of the base.
Place the pre-prepared bar horizontally, at a distance of 10 cm from the ground and fasten with the help of screws to the reference column (column foundation). It is necessary to carefully carry out these works, since the stability of the design and service life depends on the quality of the base.
Reliable fastening with metal corners
A small indentation from the ground will provide good ventilation. In a wooden gazebo, the floor has been perfectly done from the same material. In the manufactured basis, we install lags for a durable floor frame. The distance between two adjacent supports is at least 40 cm.
There are two assignment options:
- screwing screws at the junction;
- bunch with metal corners.
The next step is laid on top of the gearboard of the floor board. They need to be kniting with a small gap of 1-2 mm for better ventilation. Each element is screwed with two screws on each side. If you decide to use nails, then you need to drill holes in advance for them, it is necessary that the board is not cracked.
Put the floor in the design
All Wooden Details Treat Waterproofing Materials if you use conventional board, not terraced (it does not require processing).
Next - install bearing supports. Prepared by a barrier, put strictly vertically on bearing supports. Check with the help of a building level and strengthen the bows. To harden the design, perform the middle strapping. To do this, take the board prepared in advance, according to the drawing, mark and cut the desired details. Then, with the help of screws, secure the base on the bars.
The upper block binds the support poles and is the base for the roof. Screw the prepared boards with self-drawers and secure metal corners for greater strength.
Top and middle
We set the railing, we make feeders in the risers, as shown in the photo, and fix with the help of the corners. Under them fix the doom for outdoor decoration, retreating from the edge to the width of the material for the coating, plus 1-2 cm.
It is impossible to submit a gazebo without a railing
To give a future gazebo of stability, you can perform this part of the work from the bar. Dutches are made from the end and connect it by fastening two nails, as shown in the photo below.
The length of the propyl is equal to the width of the bar
For the roof it will be necessary to assemble slinge system. It is triangles under roofing material.
With such propuls in rafters, the roof will be much more reliable
In the planks for rafters on a predetermined pattern, drink a gap for a bar (boards) of strapping at a distance of 30-40 cm.
Detailed drawing roof arbor
Pattern Collect very carefully, checking and trying on several times. The roof with a sink will give you the opportunity to relax in a gazebo with rainy weather and not to mock. Three boards secure a metal angle. Ready-made triangles rise to the height of the roof and are nailed with long nails form or mounted with metal corners. For the stability of the roof during installation, it must be tested in the center. This can be done by the bar, at the end of the work it is cleaned. After installing each part, check the horizontal vertical using the construction level.
The inner ends rafters are fixed on the central grandmother in such a way as in the photo.
Inner grandmother for fixing rafters
Inner grandmother, bottom view
If you decide to use four boards on the roof instead of eight, then you can consolidate them in another way. Two main connects with each other with self-tapping screws, and the remaining remains to them.
Fastening a four-stroke system
All triangles need to cover OSB plates with a thickness of 6-8 mm, strictly cutting them according to the drawings.
Before you begin to lay a roofing material, bring one horizontal chalkboard from each roof end, in the figure below the letter A, on the sides. This moment should not be forgotten, as it will protect you from oblique rain, and the ends of the boards from moisture.
This board will protect you, and the structure itself from the rain droplets
Additionally, drippers can be installed, then no rain can dodge you and your arbor.
Droplets will reliably protect the edges of the arbor from any shower
The selected material (bitumen tile or runner) will launch with a nasha for better insulation from moisture. Stacking needed from drippers, gradually moving towards the base. Connections of the roof triangles protect from precipitation with pieces of the remaining roofing material.
Bitumen tiles fix with special nails, in a certain place of roofing sheet
To decorate the arbor between the railings and the top strapping, perform a cavale from the 30x40 mm bars. Ends with spire at an angle of 45 degrees, and stick the elements to a smooth (without sowing) surface. Then long nails come down the ends to the medium strapping and to the root base. Position the details of the cross will.
IN sunny days Inside the arbor will always be half
The denser you want the "windows", the more often the bars need to be installed.
Finish: how to cover whether you need and how to paint
If you want to preserve the naturalness of the material, then the maximum that is worth to do at the final stage of the finish is to cover the surfaces with varnish. If there is a desire to show your creative abilities, then the gazebo can be painted in its unique design. For this wooden surfaces It is necessary to handle the primer, wait until it dry and proceed to painting. In order for the color to be more saturated, you can cover in 2 layers.
- The first finish option is to install balusters. It all depends on the fantasy, there are many options on sale, choose your favorite, for the tools. You can also order under the size and consolidate them in the frame of the arbor. This is done with the help of screws and uncomplicated disintegration movements.
For every taste, for all sorts of designer ideas
- Another option of interior decoration is lining. This material is a blackboard with a double-sided compound for placing the premises. Such a connection allows you to carefully fit the elements one to one. This material is most often choosing due to low cost, ease of installation and thermal insulation properties. Also lining will give your gazebo of naturalness.
You can also combine the finish - Lining + Balasins
- Interior decoration is made from pine boards. This option is distinguished by a low price compared to oak, cedar or larch. A variety of colors will help choose the boards, as suitable as possible to landscape design.
Mounting occurs with a horizontal or vertical way. The first visually stretches the gazebo in the width, the second - height.
For finishing, you will need nails, screwdriver, hammer, drill, perforator and hacksaw.
- At the first stage, all the material is treated with an antiseptic, to prevent rotting and the appearance of fungi and other microorganisms. After drying, apply the flame retardant and wait the day.
- The next stage is the installation of the lining on the shap, which was performed at the previous stage. The first boards must be attached, ranging from one of the angles of the arbor, as carefully as possible, since the entire further process depends on them. Lock them on the cheek with special clamps (in the photo), scoring small nails. The following panels mount the most closely as possible, but leaving the gap of about 1-2 mm so that with increasing moisture, the material does not start to write down when swelling the boards. Check the laying of every detail on the construction level.
Bashed the lining with these devices is easy
- The last stage is a lacquer coating. This is done for waterproofing and improving the appearance.
Photo: species, options for finished designs
 Simple, ventilated design with four-tight roof
  Option Options with a brazier inside her: functionally and convenient
  Russian folk style may not come up with each site
  Simple composition of logs with a doom
At the cottage come to relax from the city fuss and enjoy nature. However, during bad weather or sultry weather, you have to hide in cottage house. There is another option to build a summer gazebo. A light design will decorate the site and will protect the owners from bad weather. You can find many variants of country arbors. However, before the independent structure of such a design, you will have to learn many subtleties of work. The choice of a specific option depends on the capabilities of the budget and the preferences of the owners. To figure out how the simplest gazebo is constructed with your own hands, you should familiarize yourself with the main end-in-laws of work.
Choosing Materials and Design
Traditional material for arbors is a tree. When using it, the construction acquires natural beauty. Wood service life is also quite large. If you choose a high-quality antiseptic impregnation for wooden elements, they will be able to serve not one year. The cost of the material is also taken into account - the tree is very cheap. Time to build such a gazebo will be needed. If you slowly work, you can manage for three days.
Another popular option for which you often pay attention to the creation of arbors - metal. When assembling the framework of construction from metal pipes, the gazebo can stand on a plot for many decades. The designs of light shelters for the cottage is also a finest. However, the main question that stands in front of the owners of the plots - how to build a simple gazebo quickly and cheap?

The setting of such a task can be done by wooden floors and framework frames from a bar. Quite inexpension will cost the base of concrete. Before work, an accurate plan of construction is drawn up. In the drawing, all sizes and materials used are indicated. It is important and correct to choose a place to install the arbor. After that, the fertile layer of the Earth is removed. The soil must be removed on the depth of 10-15 cm. After removing the soil, it is necessary to level the platform.
Important! Very simple arbors are performed from wood, so the instruction will be calculated on the absence of metal elements in the design.
Practical to protect wooden supports by bitumen or rubberoid. If wood is contacted directly with concrete, it may be damaged. 5 years of operation, wooden parts will still start refusing, which can cause the arbor collapse.

To cut off a tree from concrete baseIn the ground, it is necessary to place the pipe segments. It is necessary that they stick out of concrete by 30 cm. They are performed by holes for fastening elements. With such a support device, the eternal pillars are obtained, capable of maintaining the roof of the construction for many decades.

The simplest gazebo for the cottage does not require a device of brick fences that would protect it from a gusty wind. Suitable a simple fence made of eurvagon. It can have a height of 80 cm. This fence is strengthened by two longitudinal bars. This will protect the back of resting from blowing the wind.
Polycarbonate designs
Cellular polycarbonate sheets may become an alternative to Eurovantia. Such material perfectly misses light. It is convenient to fix it to wooden Bruckam. It is not afraid of polycarbonate heat and high humidity.

Design roof frame is performed from wooden bar cross section 50x50 mm. On the arbor, you need to install a tent design. It will be attached to the strapping. The roof of a simple summer gazebos is usually sewn with leaf roofing materials. Polycarbonate, slate, metal tile are chosen for this purpose.
When creating a drawing of a gazebo for giving, it is necessary to calculate its exact dimensions and width of the roof. It is necessary to simplify work with roofing material. So the sheets do not have in vain to cut pieces. It is better to keep inquiring for lateral and end ropes of the roof.

For example, for a wave slate, the size of the arbor in length should be a multiple of one meter. At the same time, the scope of the structure is performed with a length of 1.75 m. When laying on one slope of several series of slate, it is necessary to take into account the leaflets of 10-15 cm.

When considering other materials for the construction of arbors, it is necessary to pay special attention to cellular polycarbonate. It will come in handy both to create a qualitative fence and when building a roof gazebo. Polycarbonate shockproof and has a small mass. In addition, it can be installed on both wooden and metal frame. A photo of simple arbors for the cottage made by their own hands will help to understand how such structures are arranged.

It is appropriate to mount a gazebo of polycarbonate in the shade of spreading trees. In this case, the transparent material will provide an optimal level of illumination. Due to the translucent roof and thick foliage over the construction inside the design, a pleasant half-day is created.
Features of simple arbors
It must be remembered that a light gazebo of polycarbonate is a simple design. All that is necessary for its creation is steel corner and a strip of the same material. It will take to prepare a polycarbonate sheet and planed boards.

After concreting the corner supports in the foundation of the design, it is necessary to cut them into their steel corner. For the roof support, one belt is welded to the racks. Two belts must be fixed on racks in their middle part.
Polycarbonate is well bent, so it will take a little effort and time to create an attractive arched roof. It is only necessary to fix on the racks two bent steel strips curved in the form of the arch.

Roofing, which is installed on a summer gazebo, can be performed from elements of bituminous tiles. To do this, purchase several OSP panels. They will become the basis for such roofing.
OSP panels Even in the case of a small thickness (10 mm) are capable of maintaining sufficient rigidity. For this reason, for such sheets, it is not necessary to build a frequent frame from wooden bars. They are simply fixed on the strapping timber structure.

As noted, the easiest construction is not equipped with a frame frame. The basis of I. outdoor coating It often serves concrete screed. It must be reinforced by a grid of steel. Such a surface can serve as a foundation for the manga. If you wish to use the gazebo and during the winter frost, the floor should be made of wood. The base of the design is raised above.
The foundation of a column type is quite simple to construct, and the cost of materials is low. In order not to exceed the established financial limit, it is better to use standard red brick for the base. The base is confused quite simply - first for the pillars, butt rolls, and then brick supports on a concrete solution are put on them.

The framework of the future design is installed on the poles. For this, the timber 50x100 mm is selected. Wood floor flooring, which will be laid on the bars, will be reliably protected from snow and moisture. If the winter gazebo, three of its walls can be made of polycarbonate.
Tip! Setting inside the design open focus, You can get a pretty comfortable room in which picnics can be carried out.

Garden gazebo
By simple drawings You can build an attractive and reliable gazebo for the cottage from the wood. In this case, the design can be quite complicated. Buildings from wood look quite solid and attractive.
The construction of such a gazebo requires the preparation of the following materials:
- bar 100x100 mm;
- sheets of roofing material;
- self-tapping screw;
- reiki;
- edged board.

In addition, such tools must be prepared - a screwdriver, circular saw, electrovelock. Such a gazebo is equipped with a smoking room by a small size where the brass will be installed. This solution allows you to make a gazebo comfortable and safe.
Build similar designs better on distance from a residential building. Thanks to this, the house will be protected from smoke, and people in it will not hear noise.

Wood construction structure
To figure out how to make the simplest gazebo With your own hands, it is necessary to deal with detail in the peculiarities of such buildings. This will ensure the durability of summer shelter. Stages of construction Arbor:


The walls are squeezed by blockhaus or clapboard elements. The roof is covered with soft tiles. A gazebo for the cottage that is constructed with your own hands can be done with any interior decoration. Subsequently, the arbor is painted outside and from the inside. It is better to choose colors that are combined with the overall style of the color gamut buildings on the site.